Background
All Amazon Machine Images (AMIs)built and submitted to AWS Marketplace must adhere to all AWS Marketplace product policies. Self-service AMI scanning enables sellers to initiate scans of their AMIs to verify that it meets all AWS Marketplace requirements and receive scanning results quickly—typically in less than an hour—with clear feedback in a single location. To initiate scan of AMI(s), seller must click on ‘AddAMI’ button, select the AMI(s), specifyAMI details, and submit on AWS Marketplace management portal.
Problem statement
It was observe in many customer call that managing AMI(s) is not easy and straightforward user experience. In the old version while Adding AMI from EC2 to Marketplace sellers experienced limitations in form single page control to add, manage AMI(s) and resolve ingestion as well as front end issues from the single page itself. The following shows a earlier version of adding AMI(s) from EC2 to AWS Marketplace.
Designs
Product launched -Jan 2021
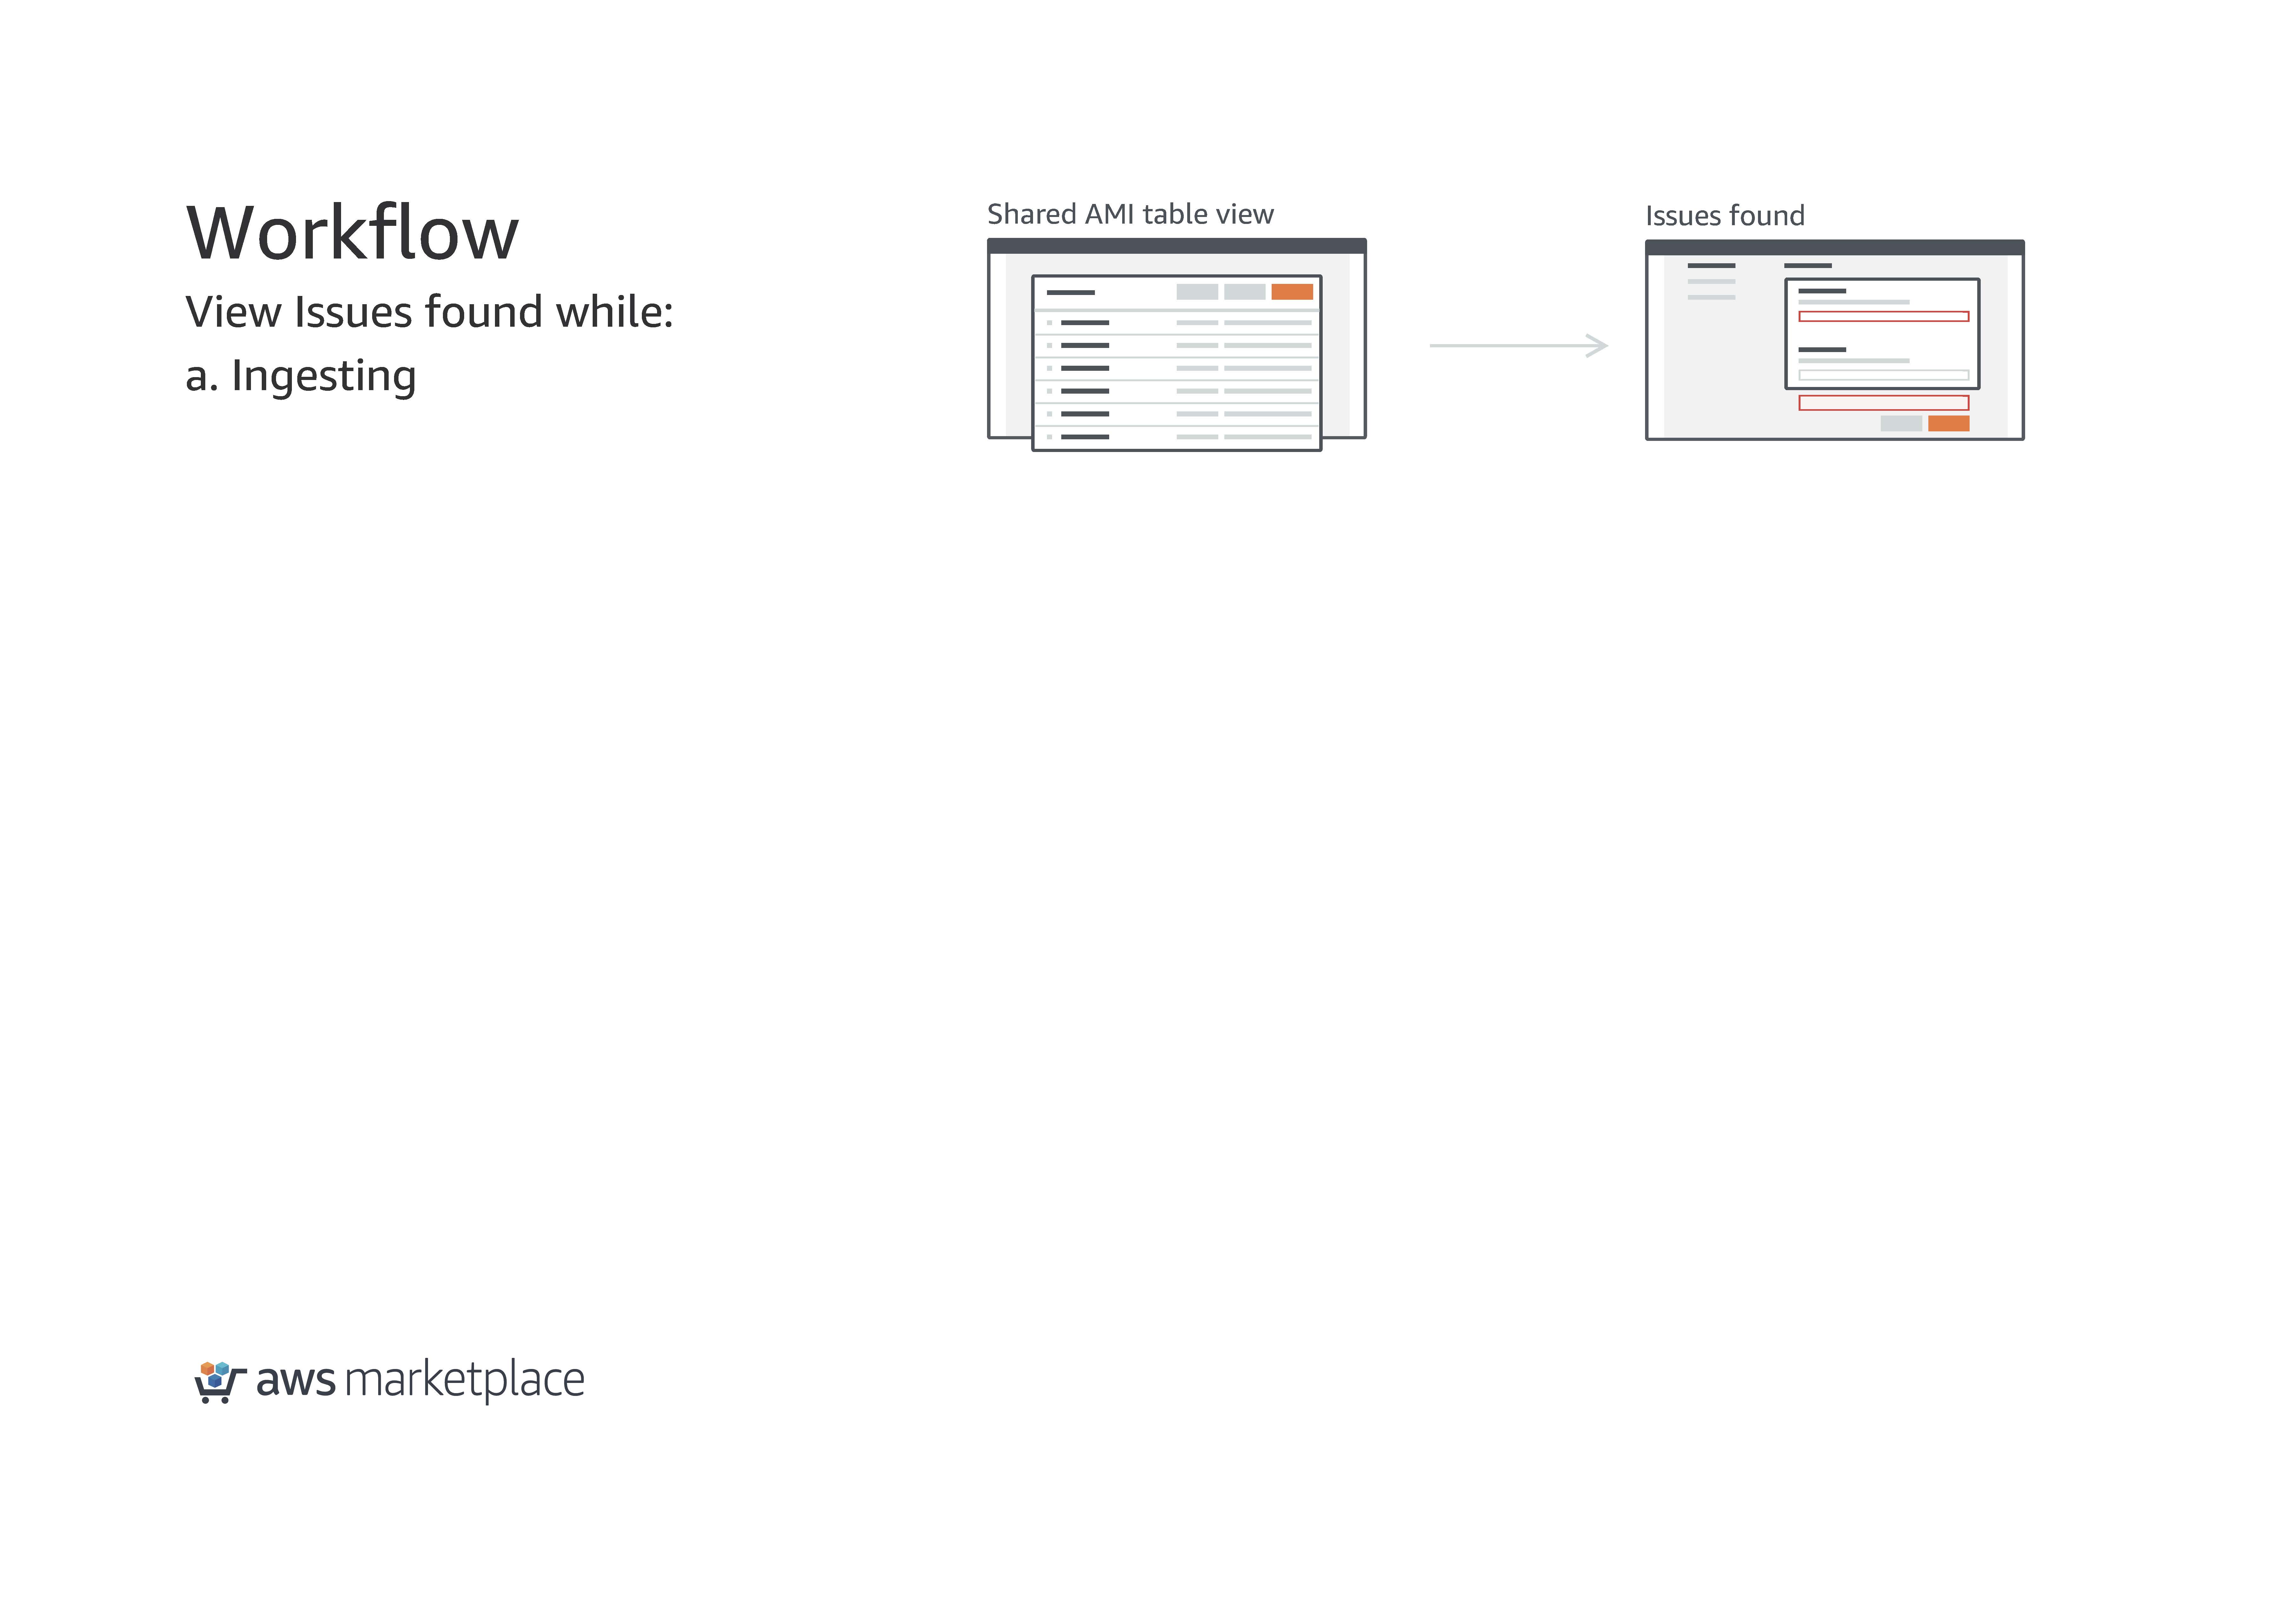
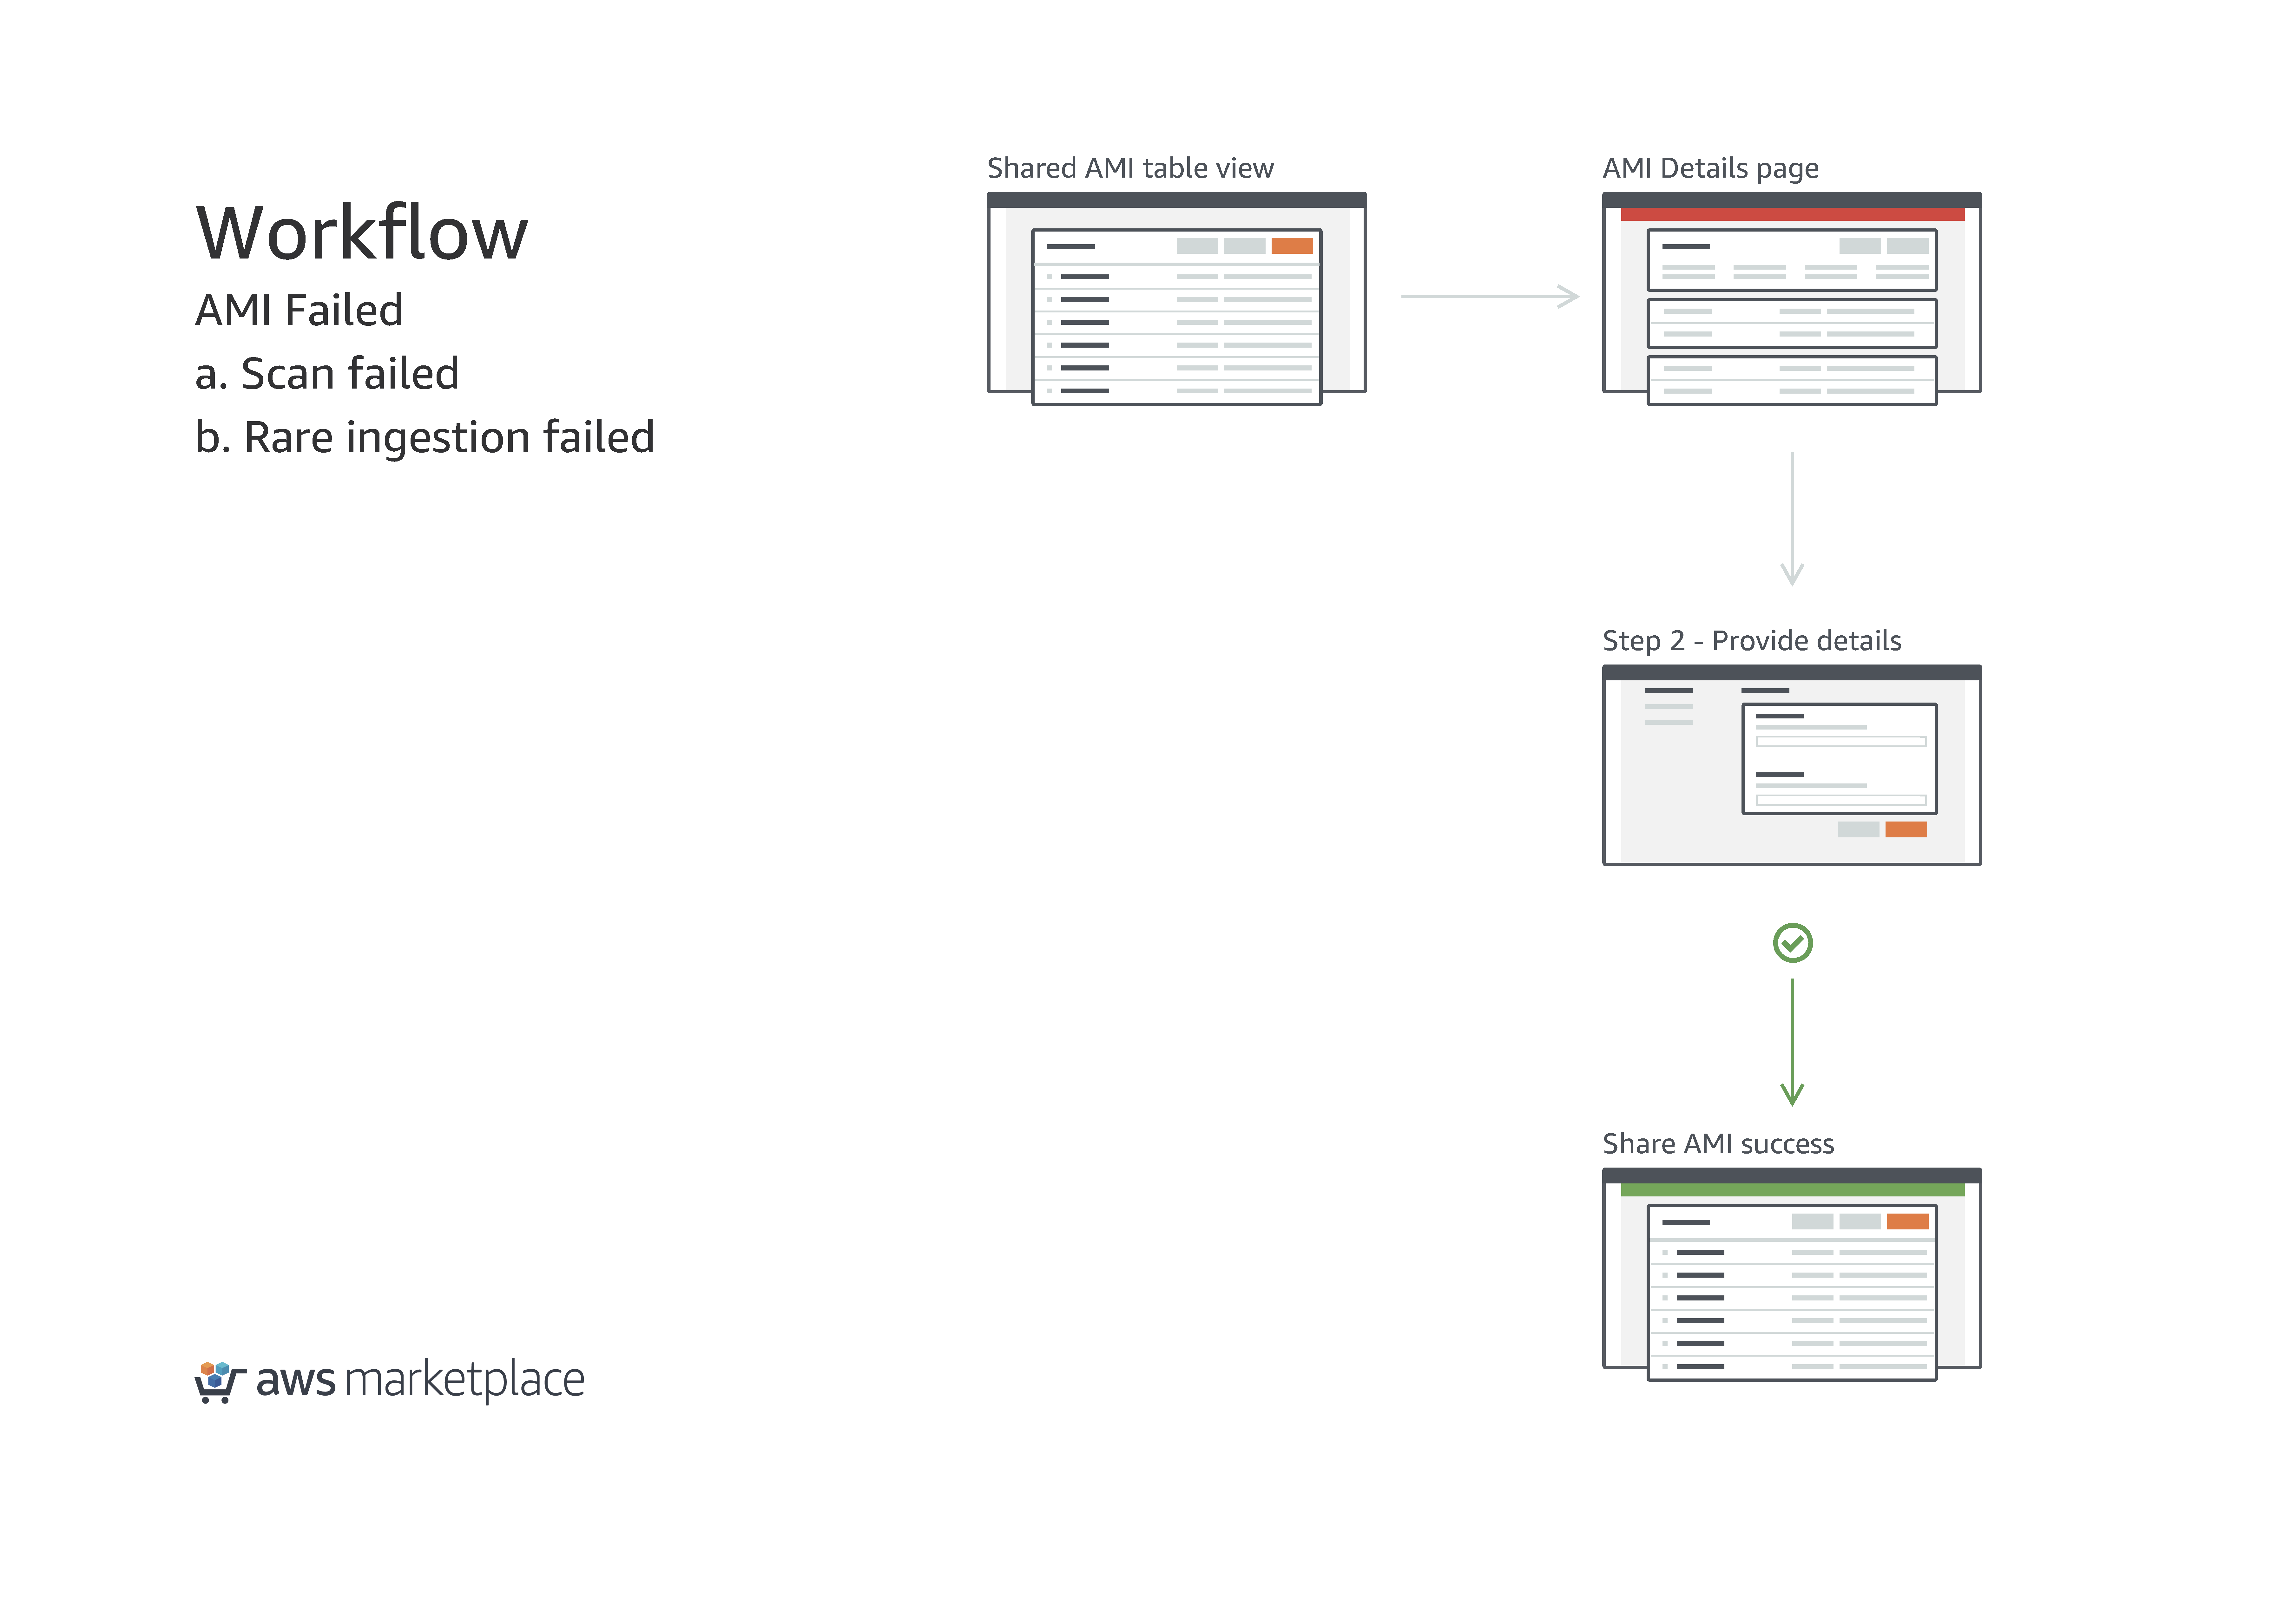
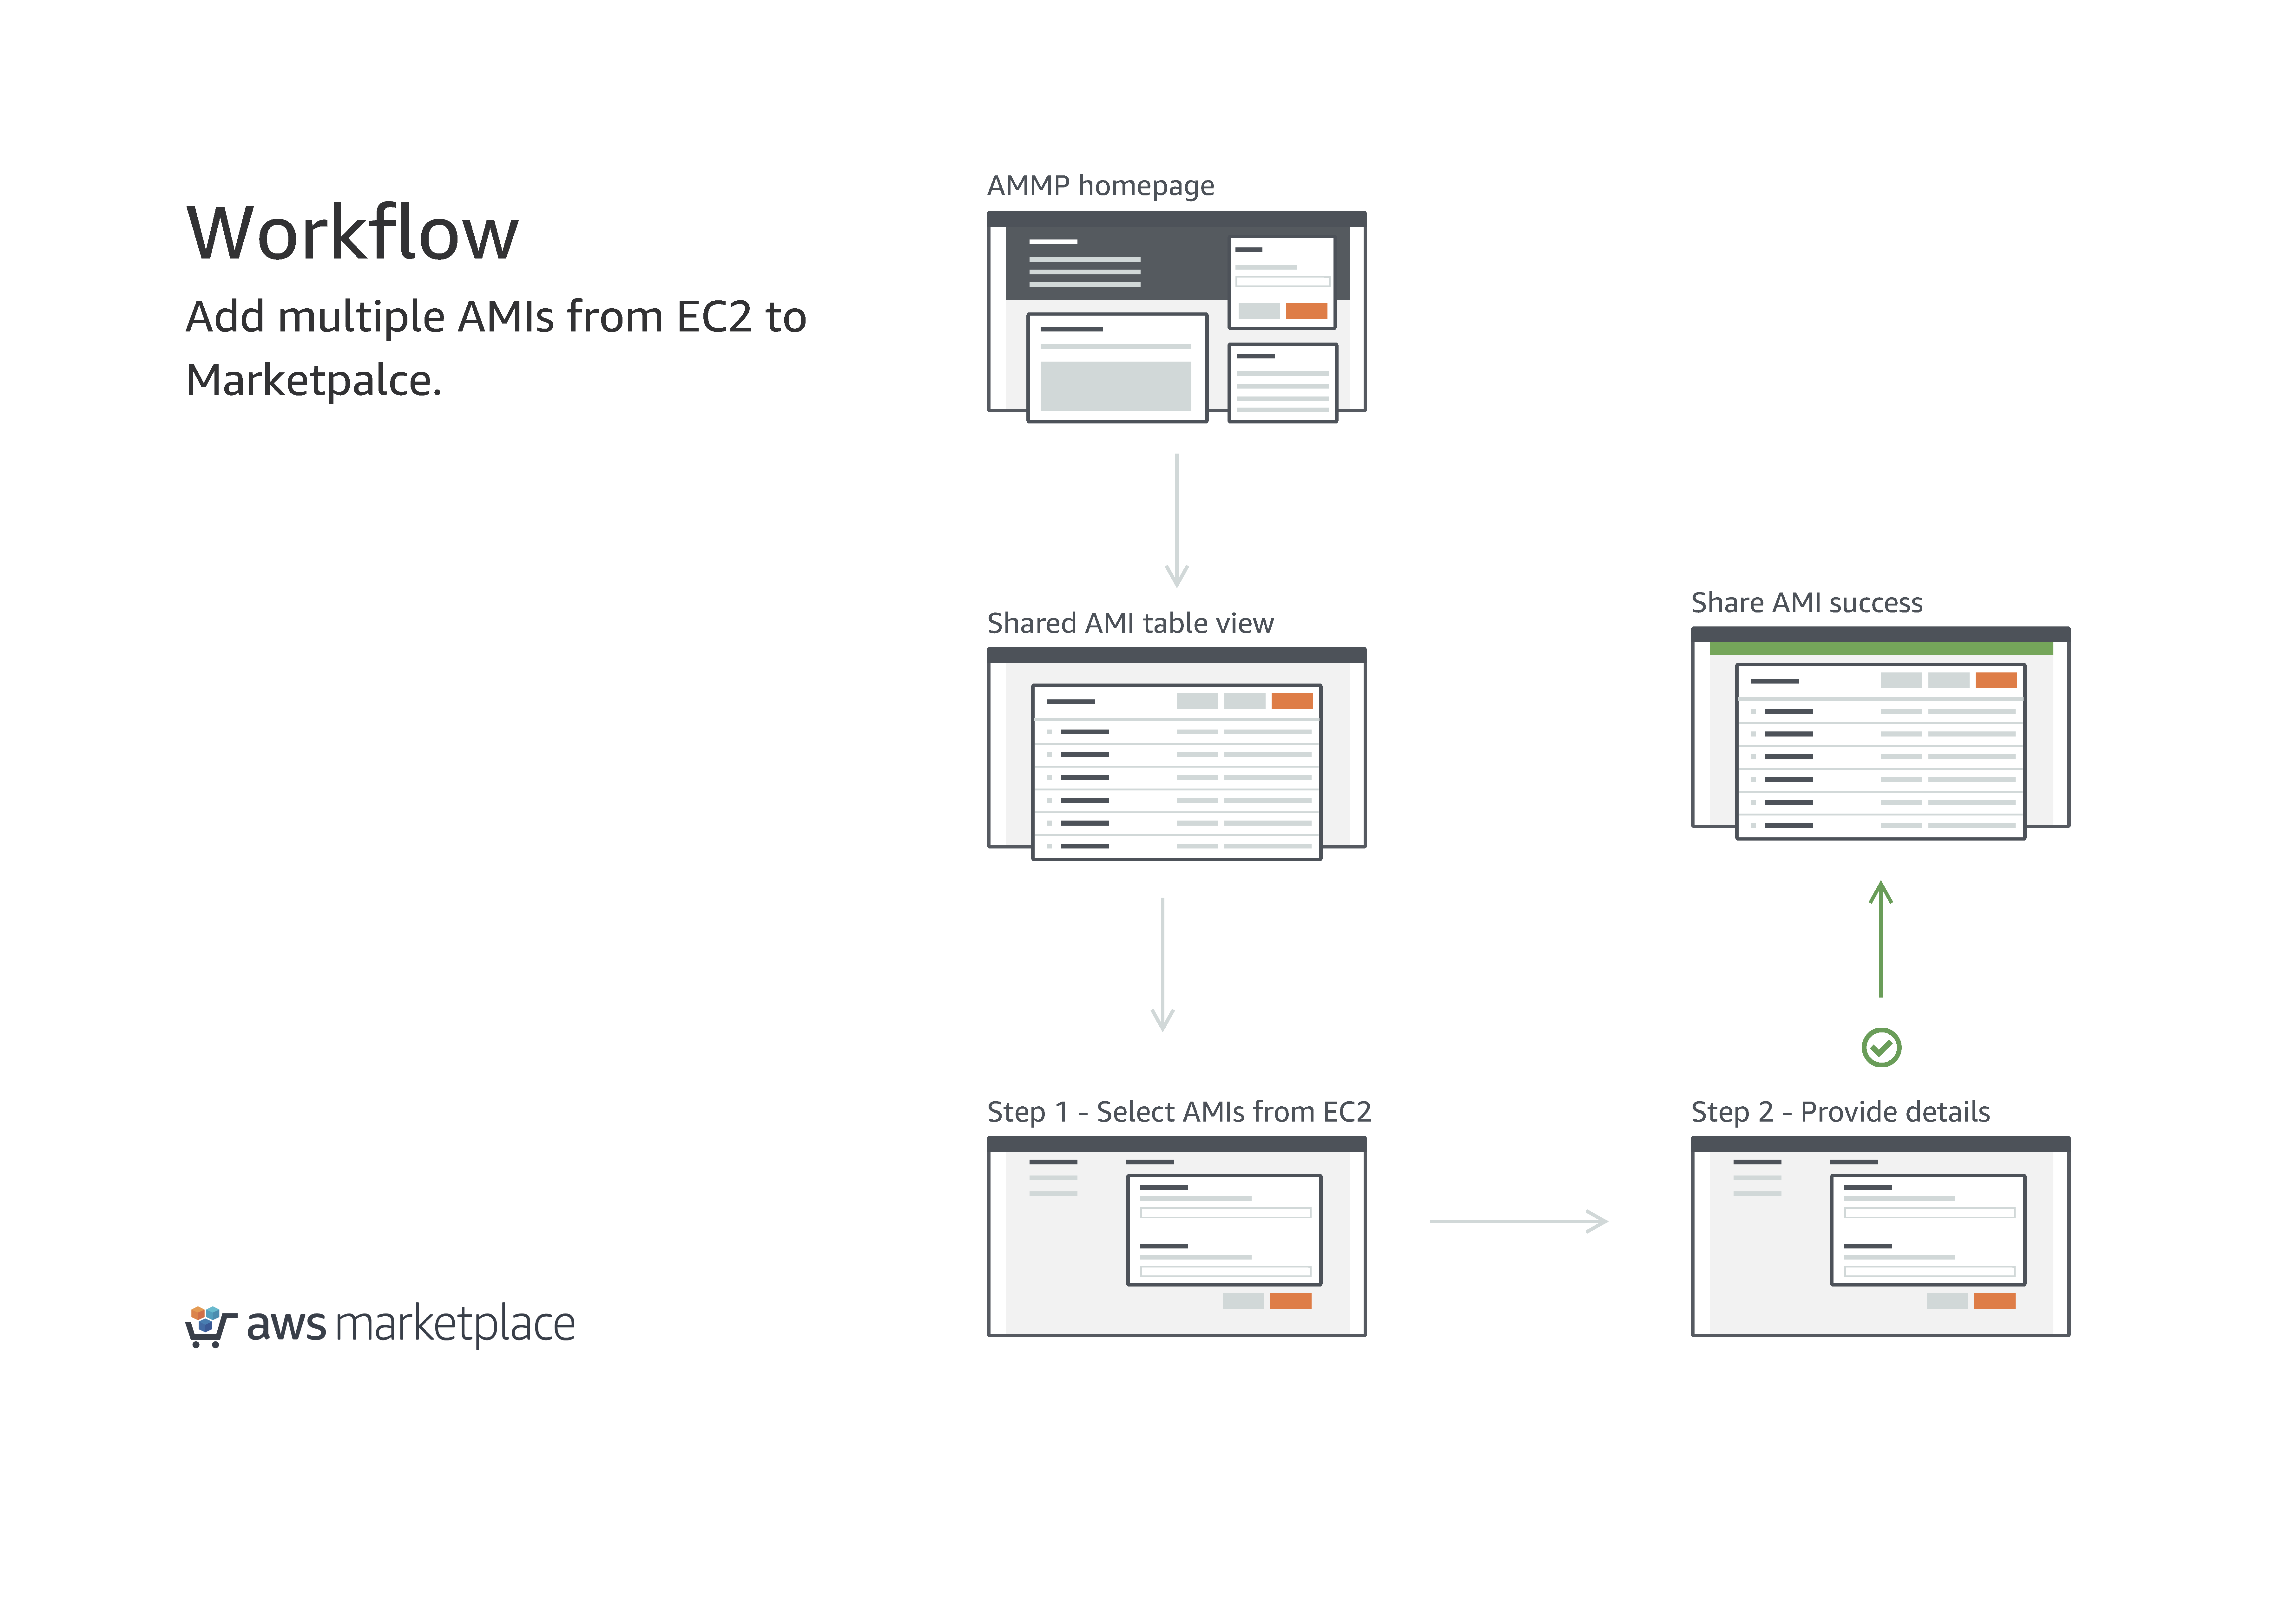
Workflow
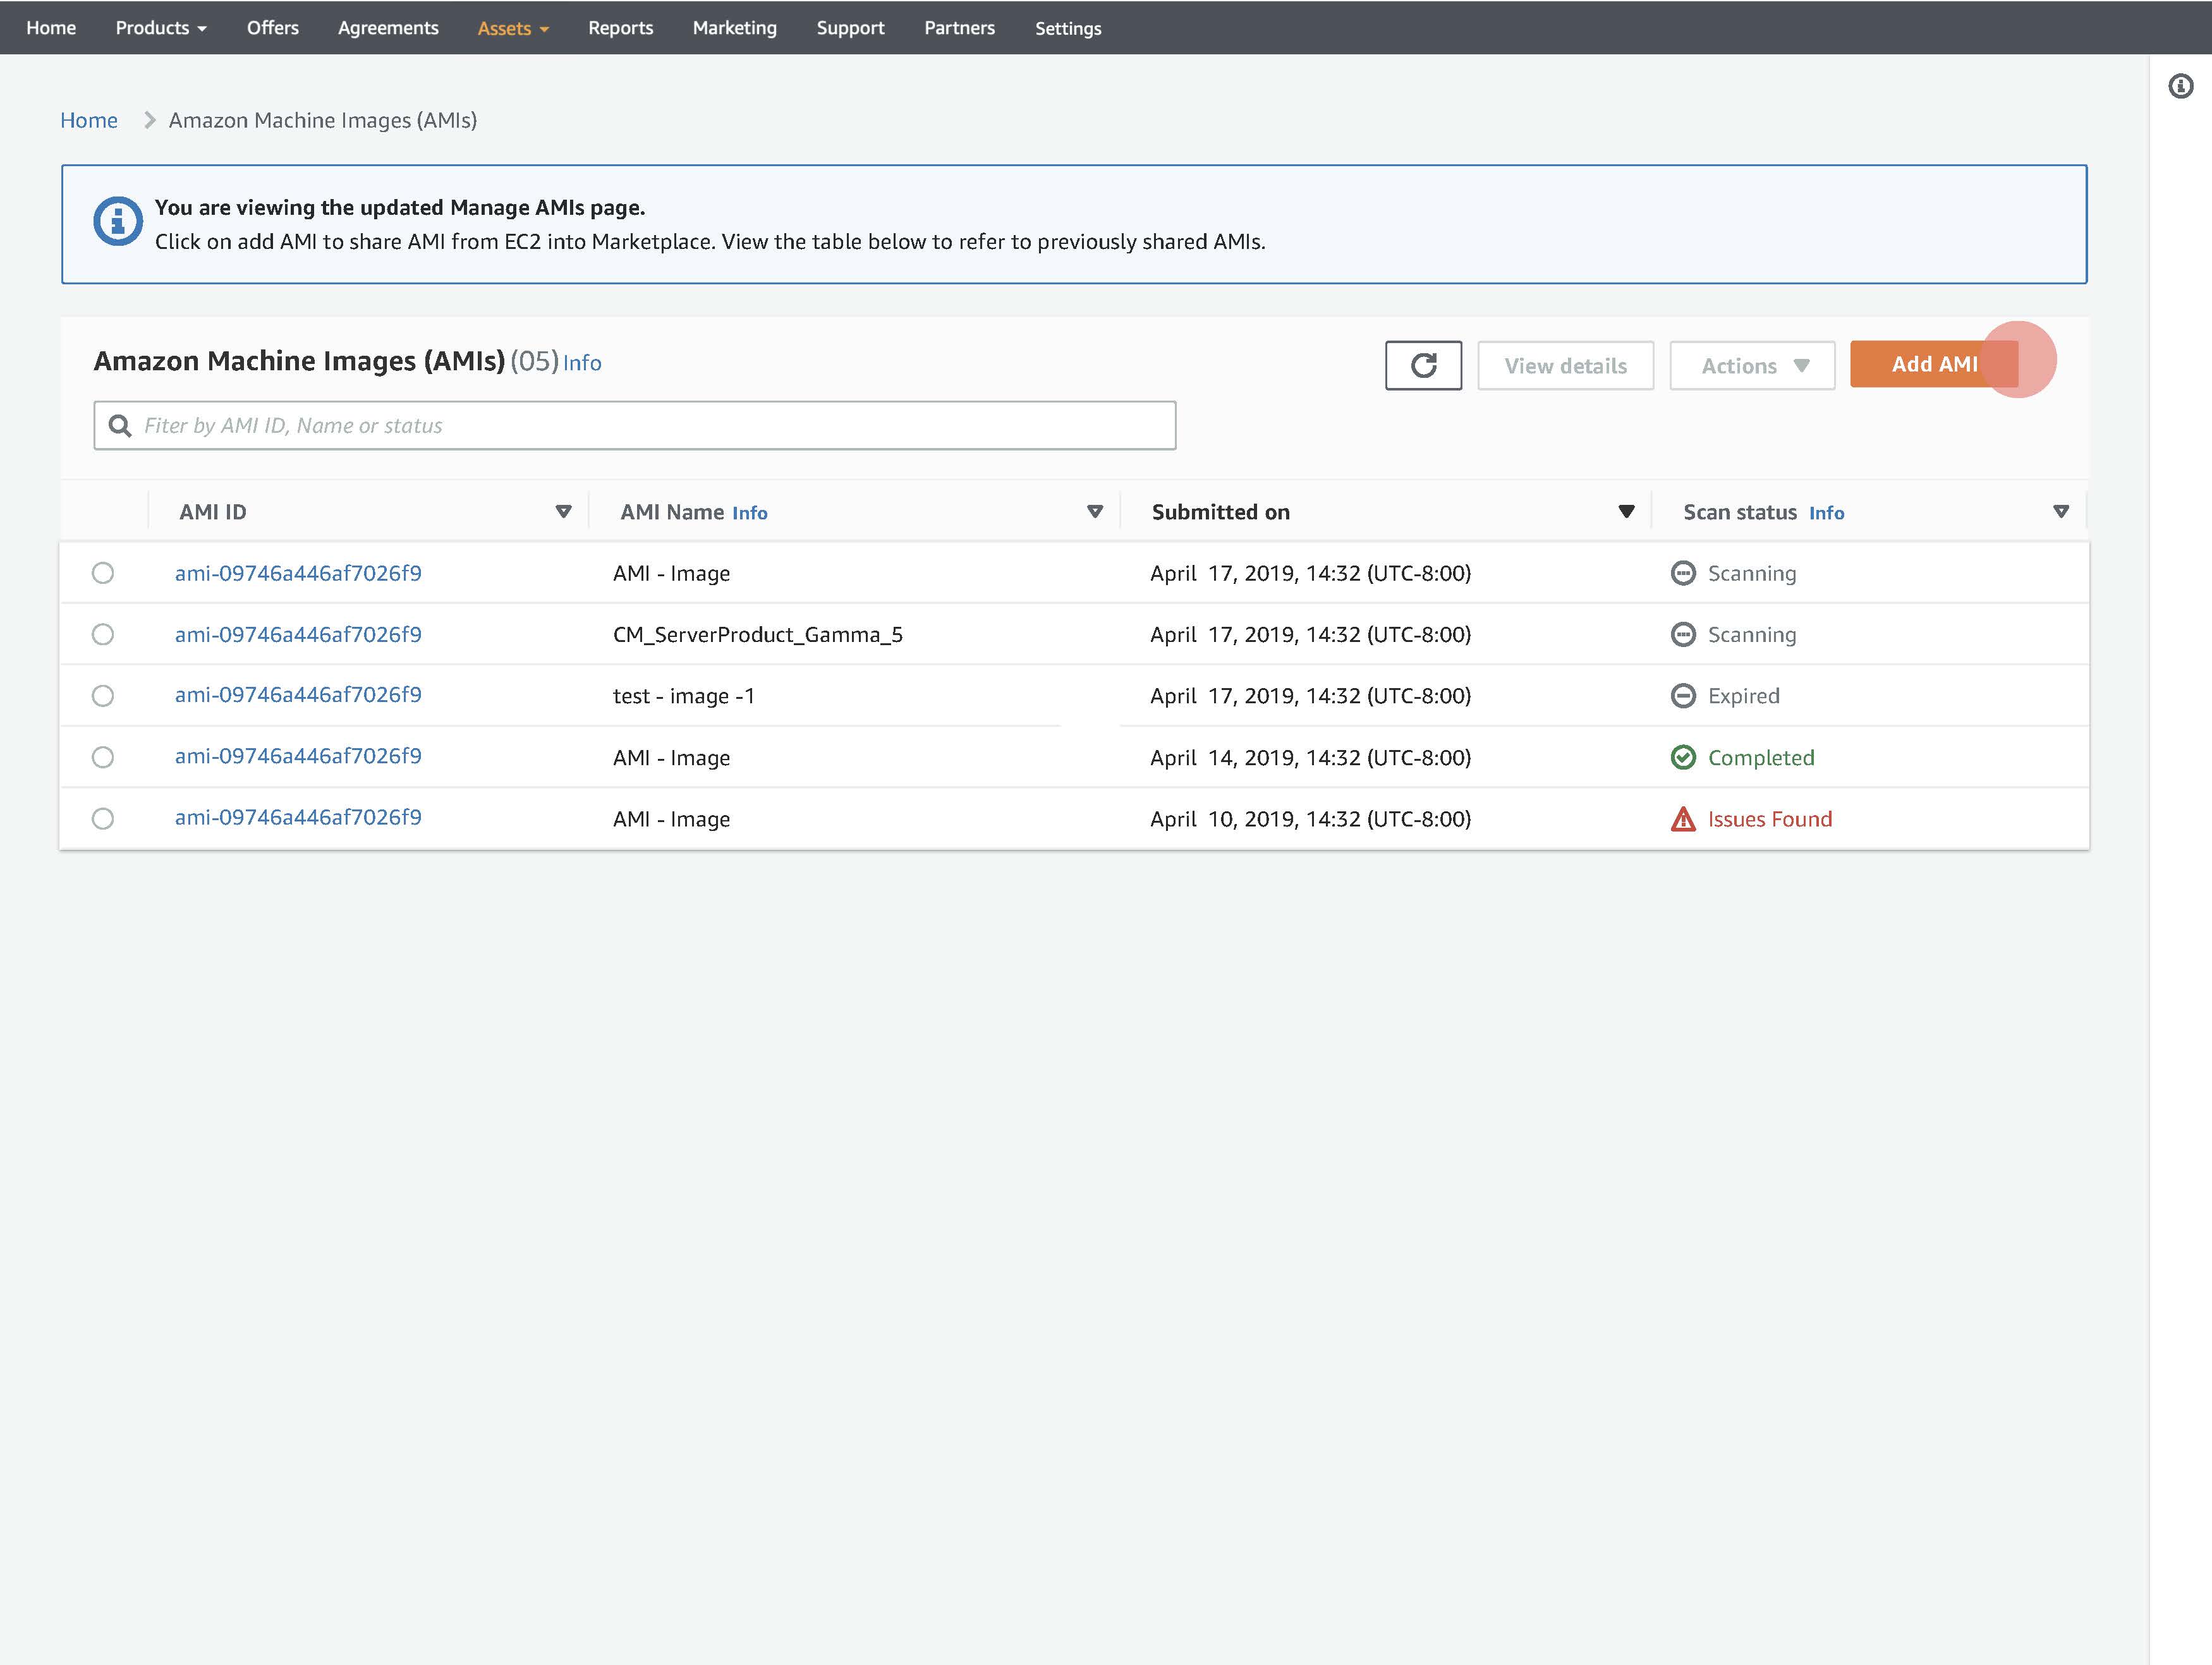
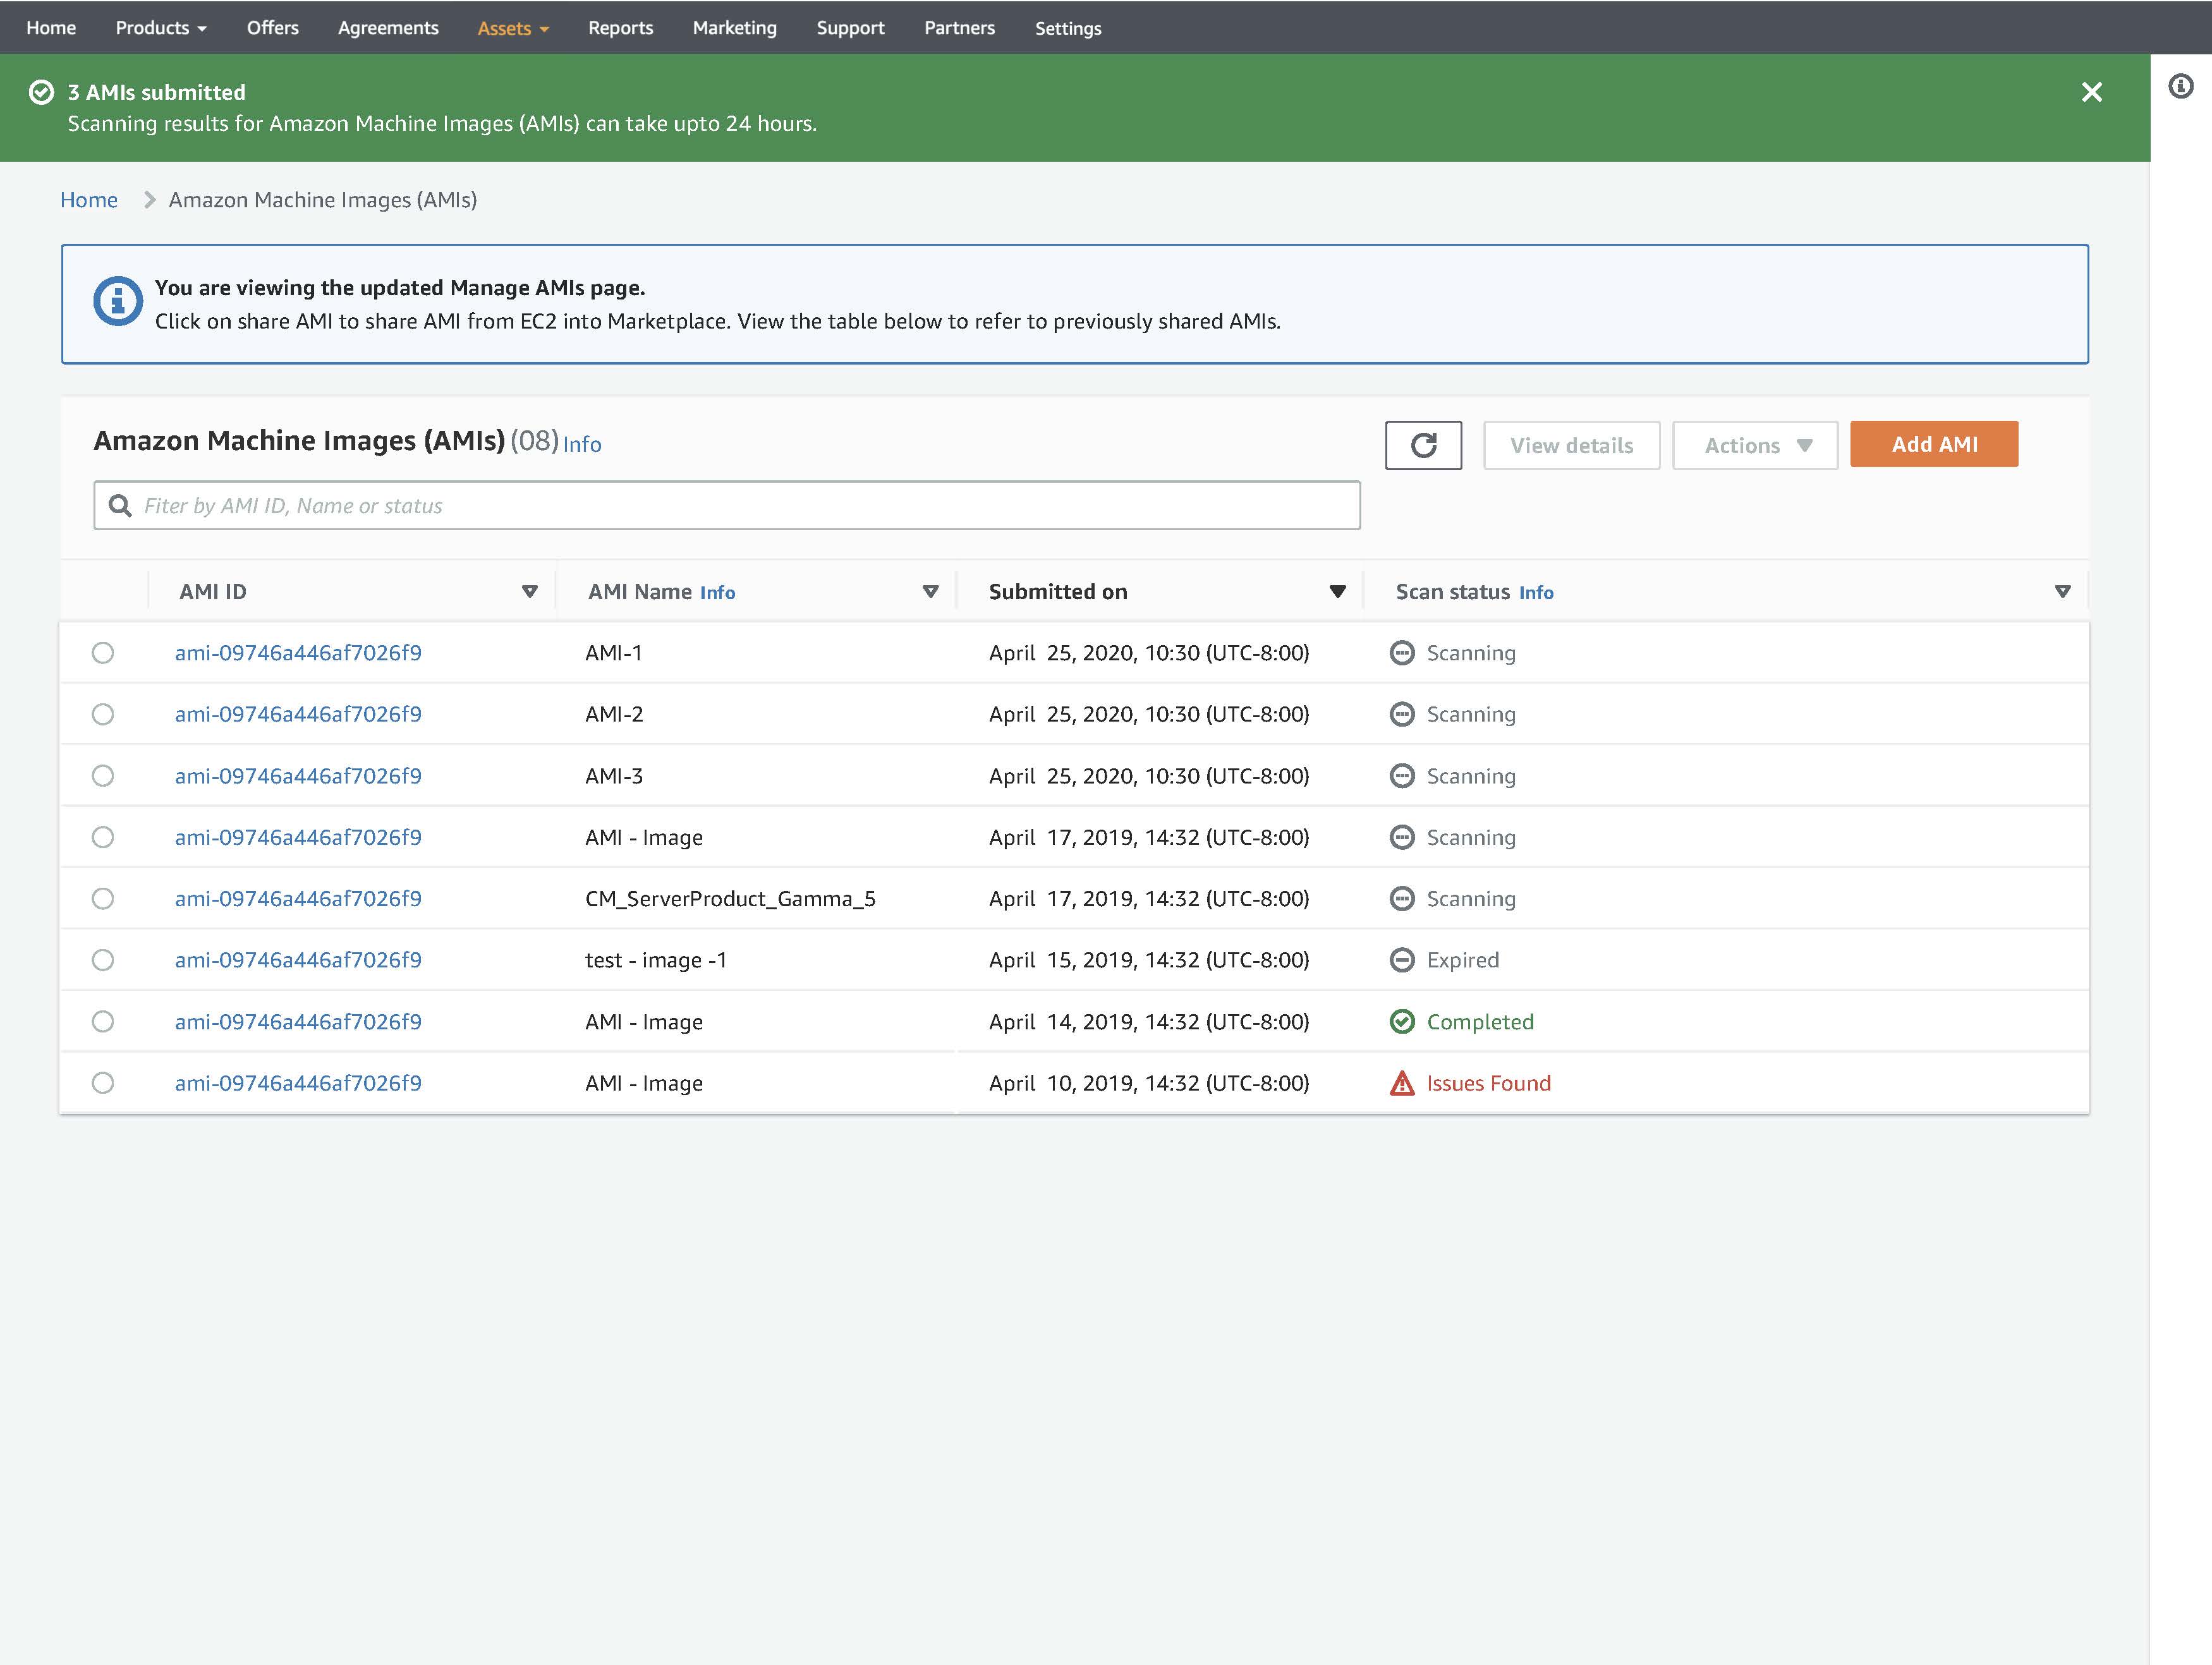
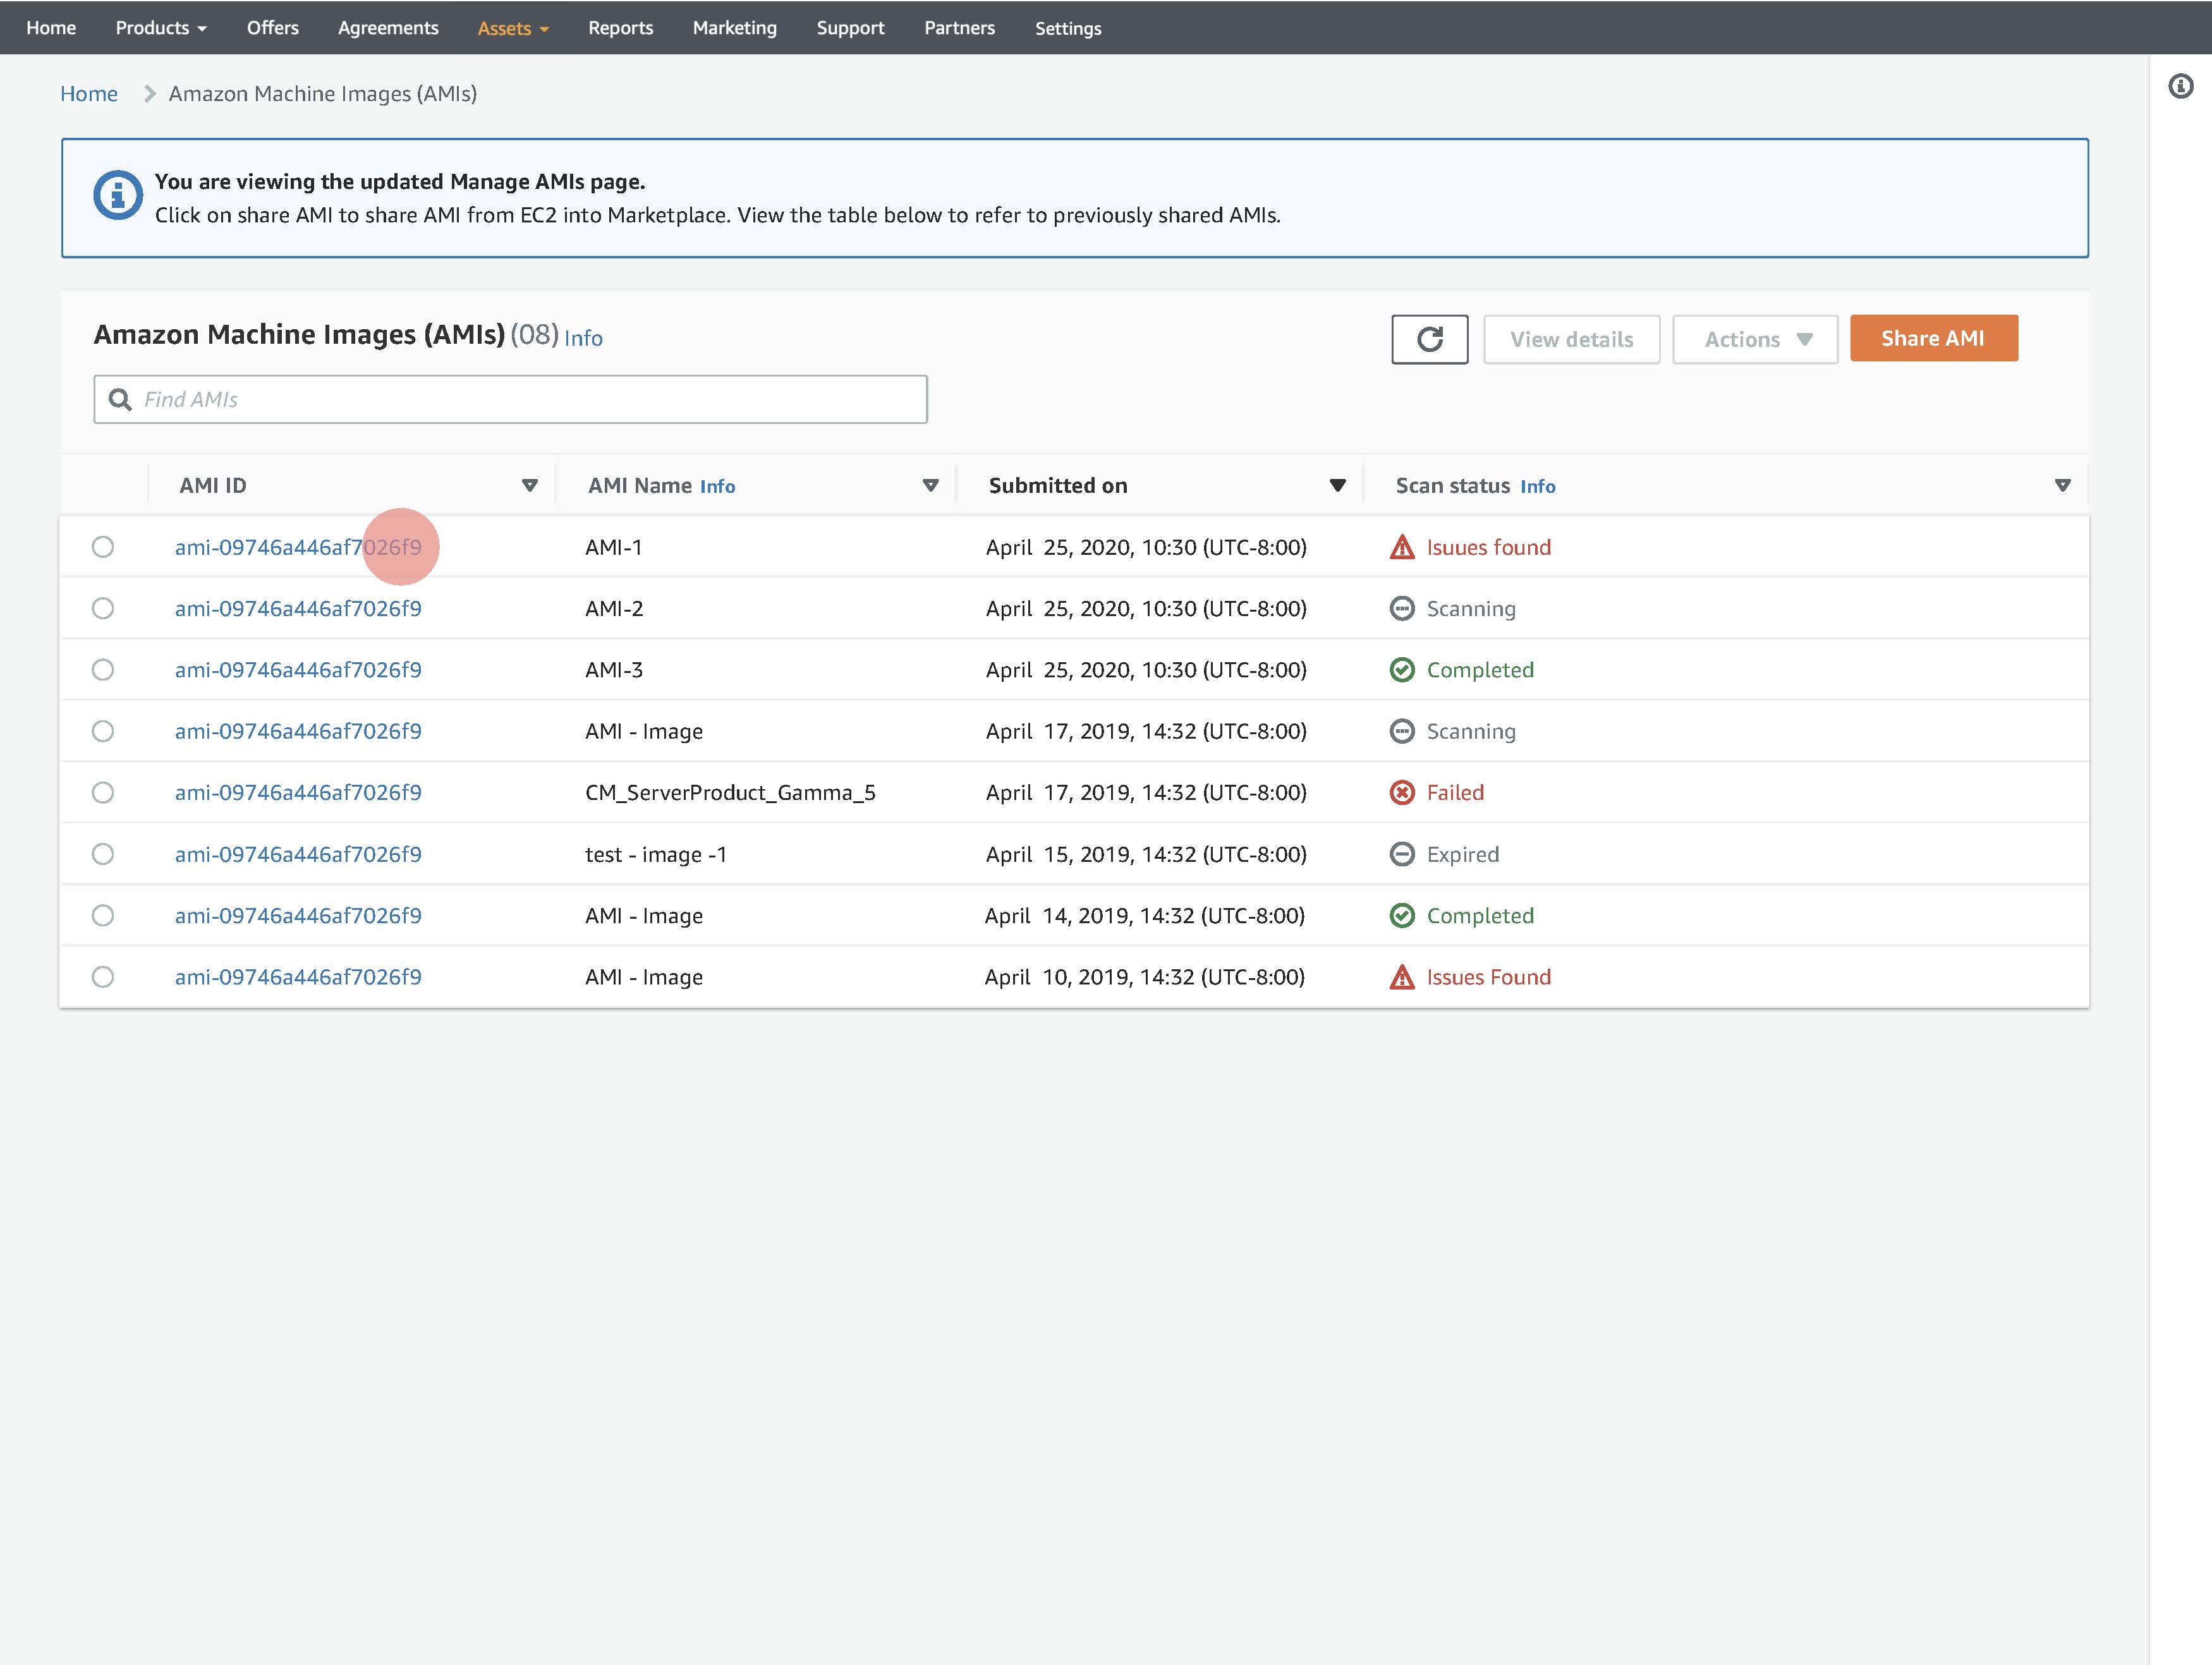
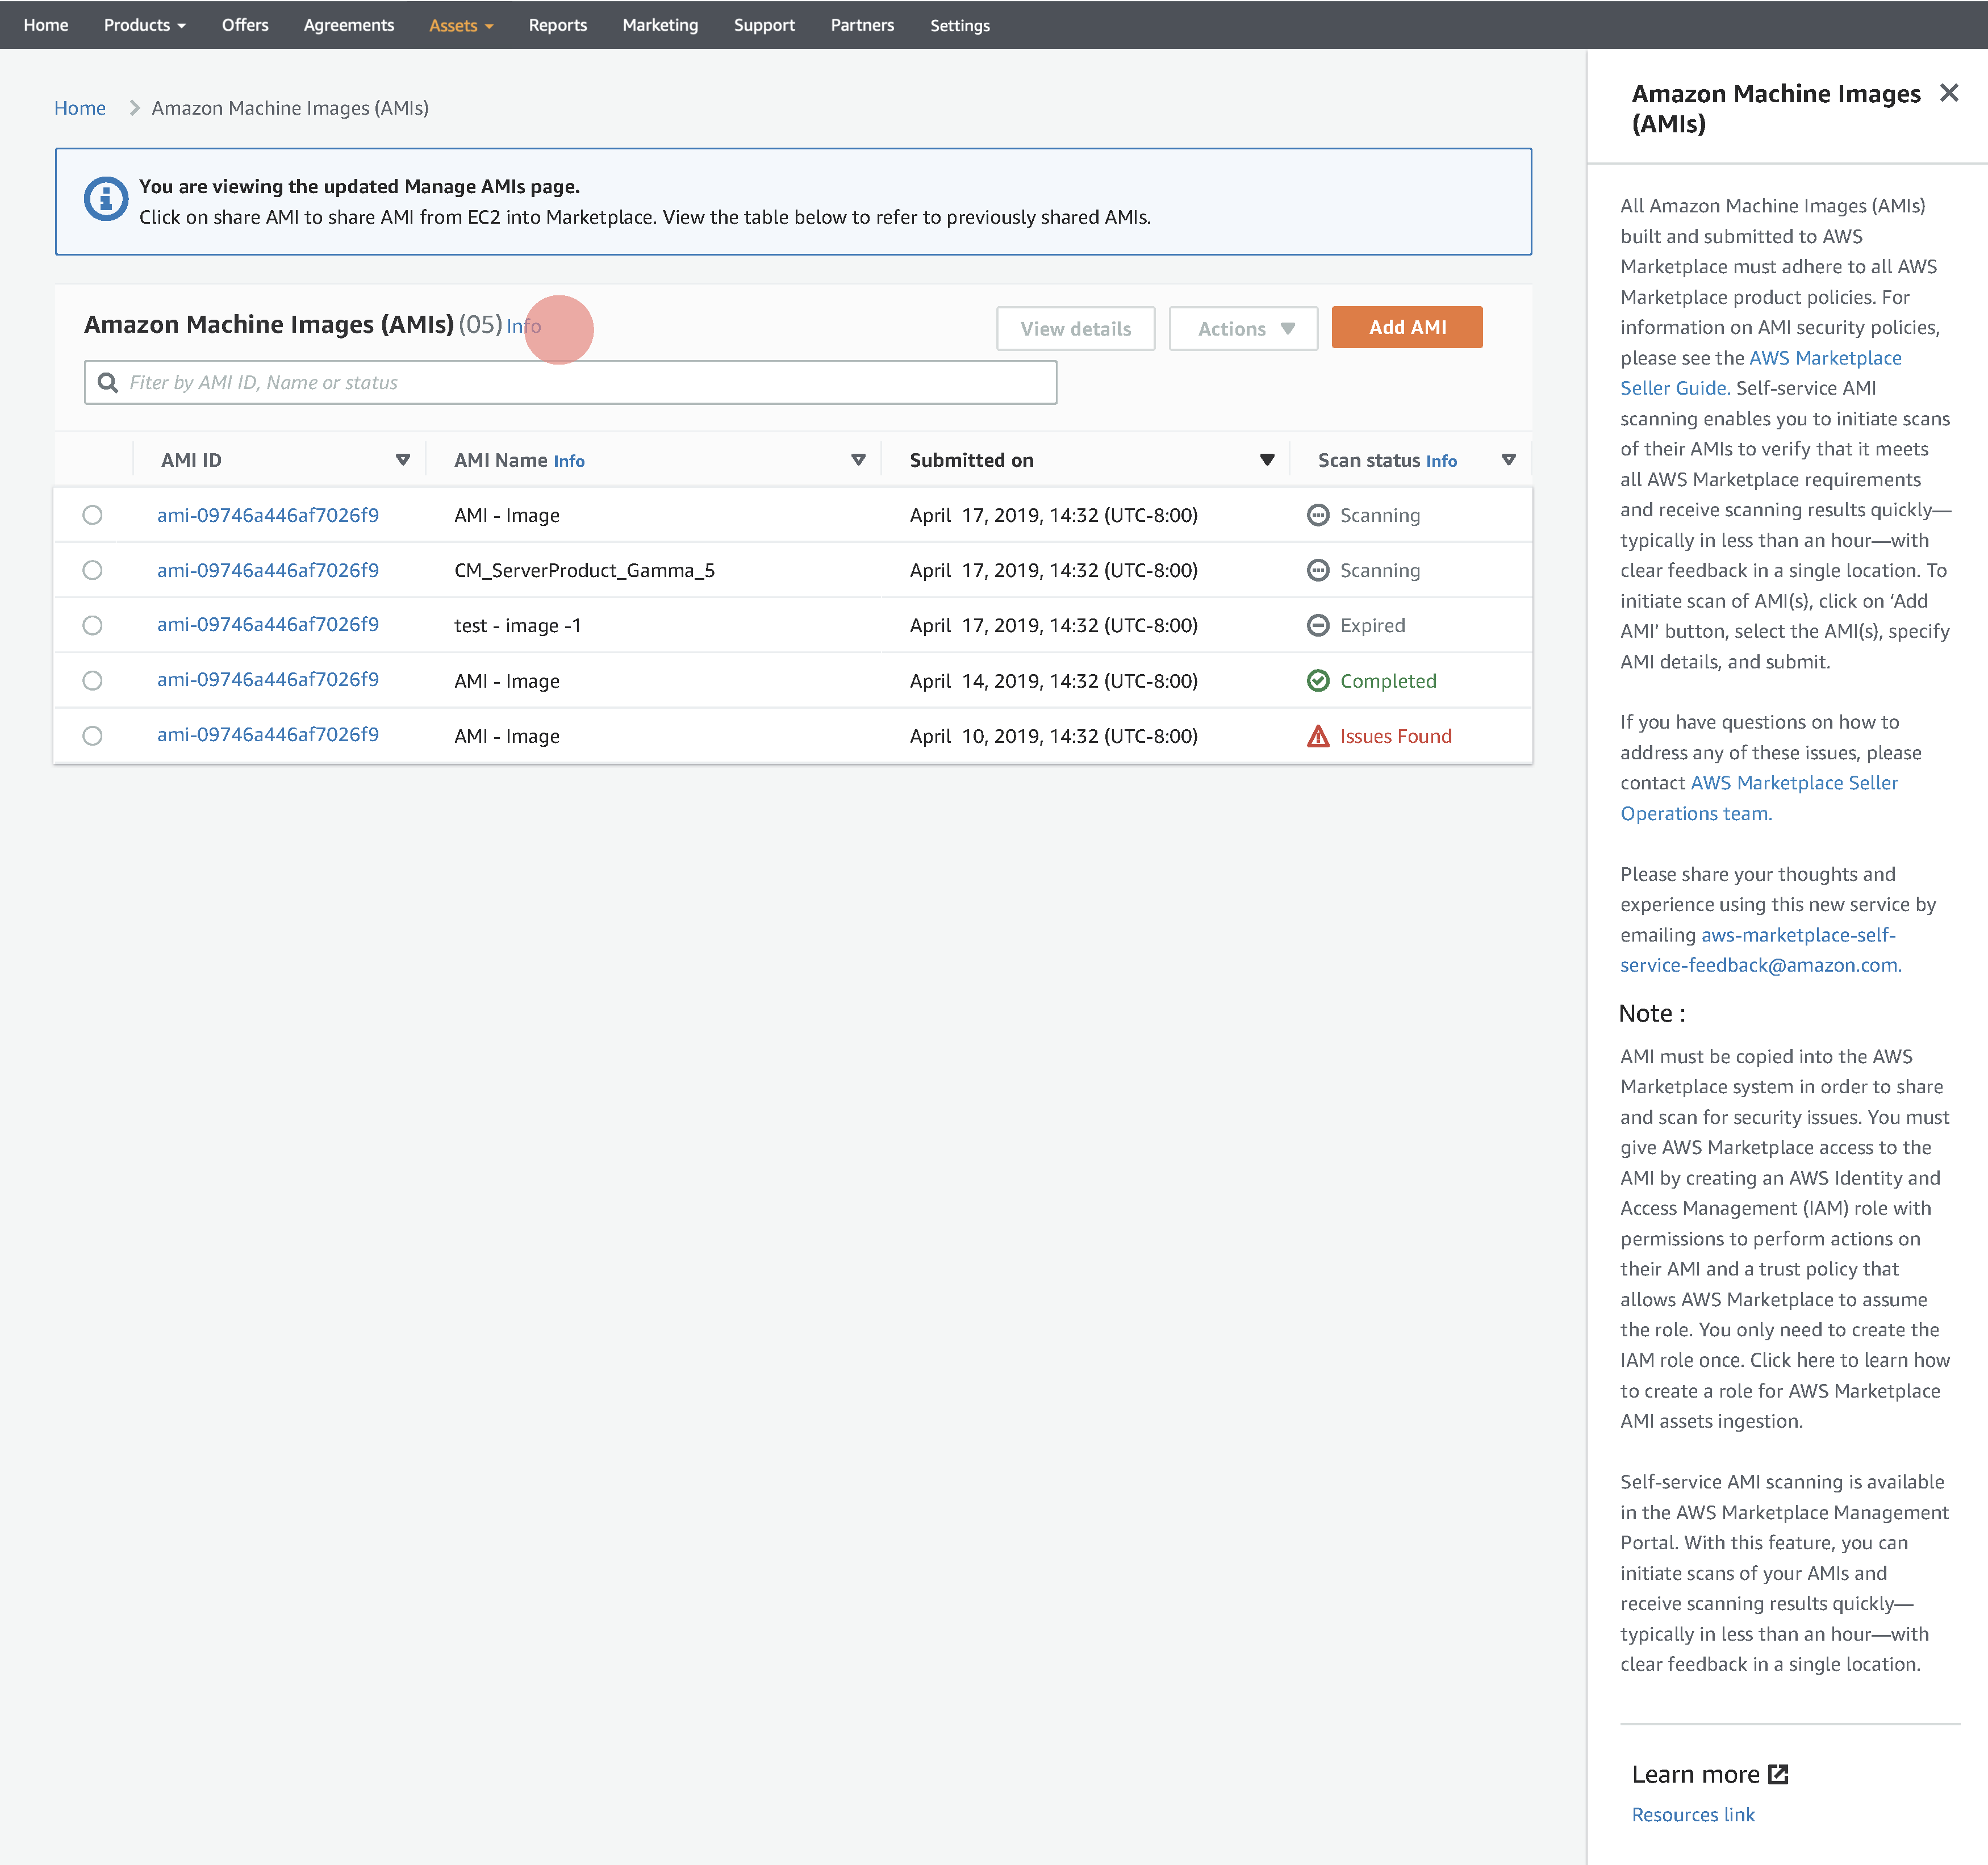
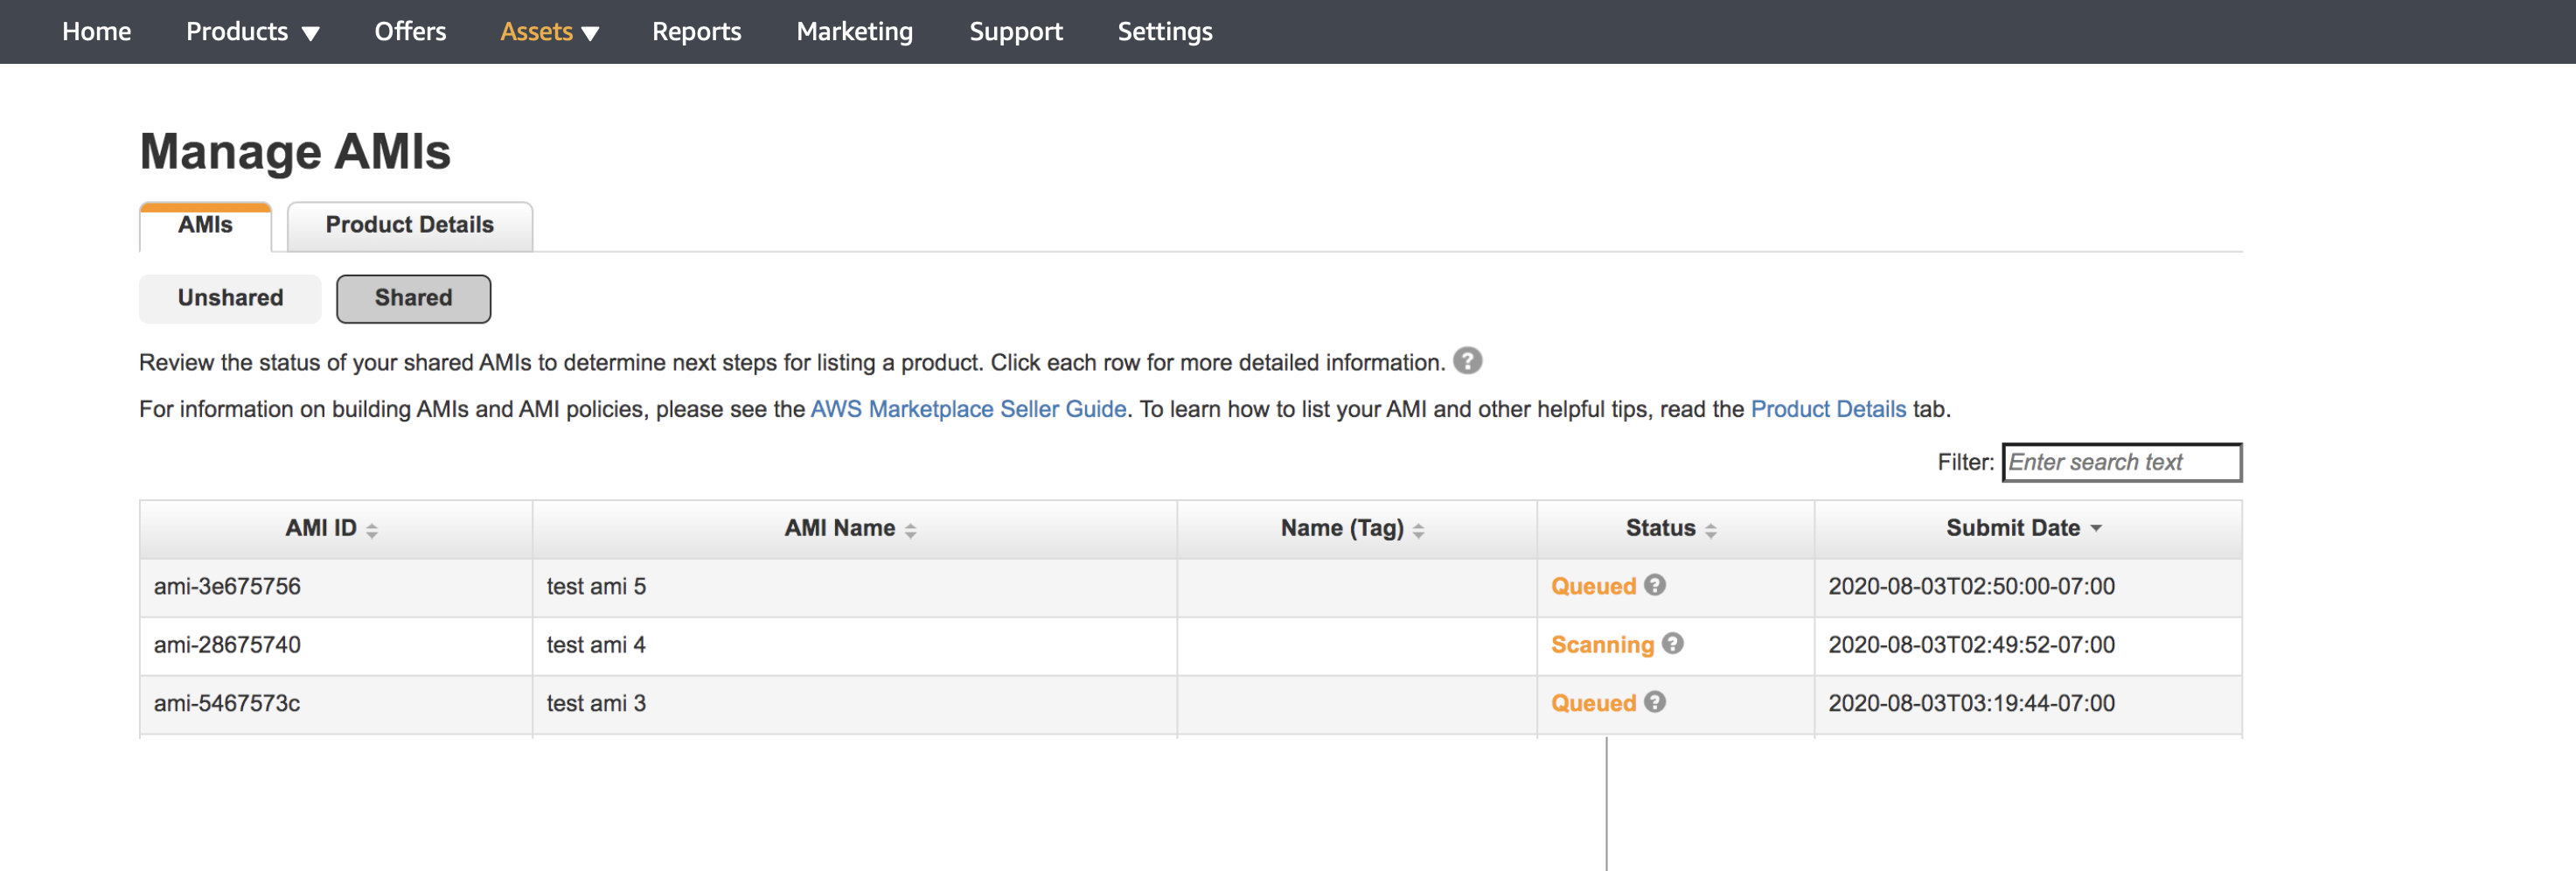
Manage AMI
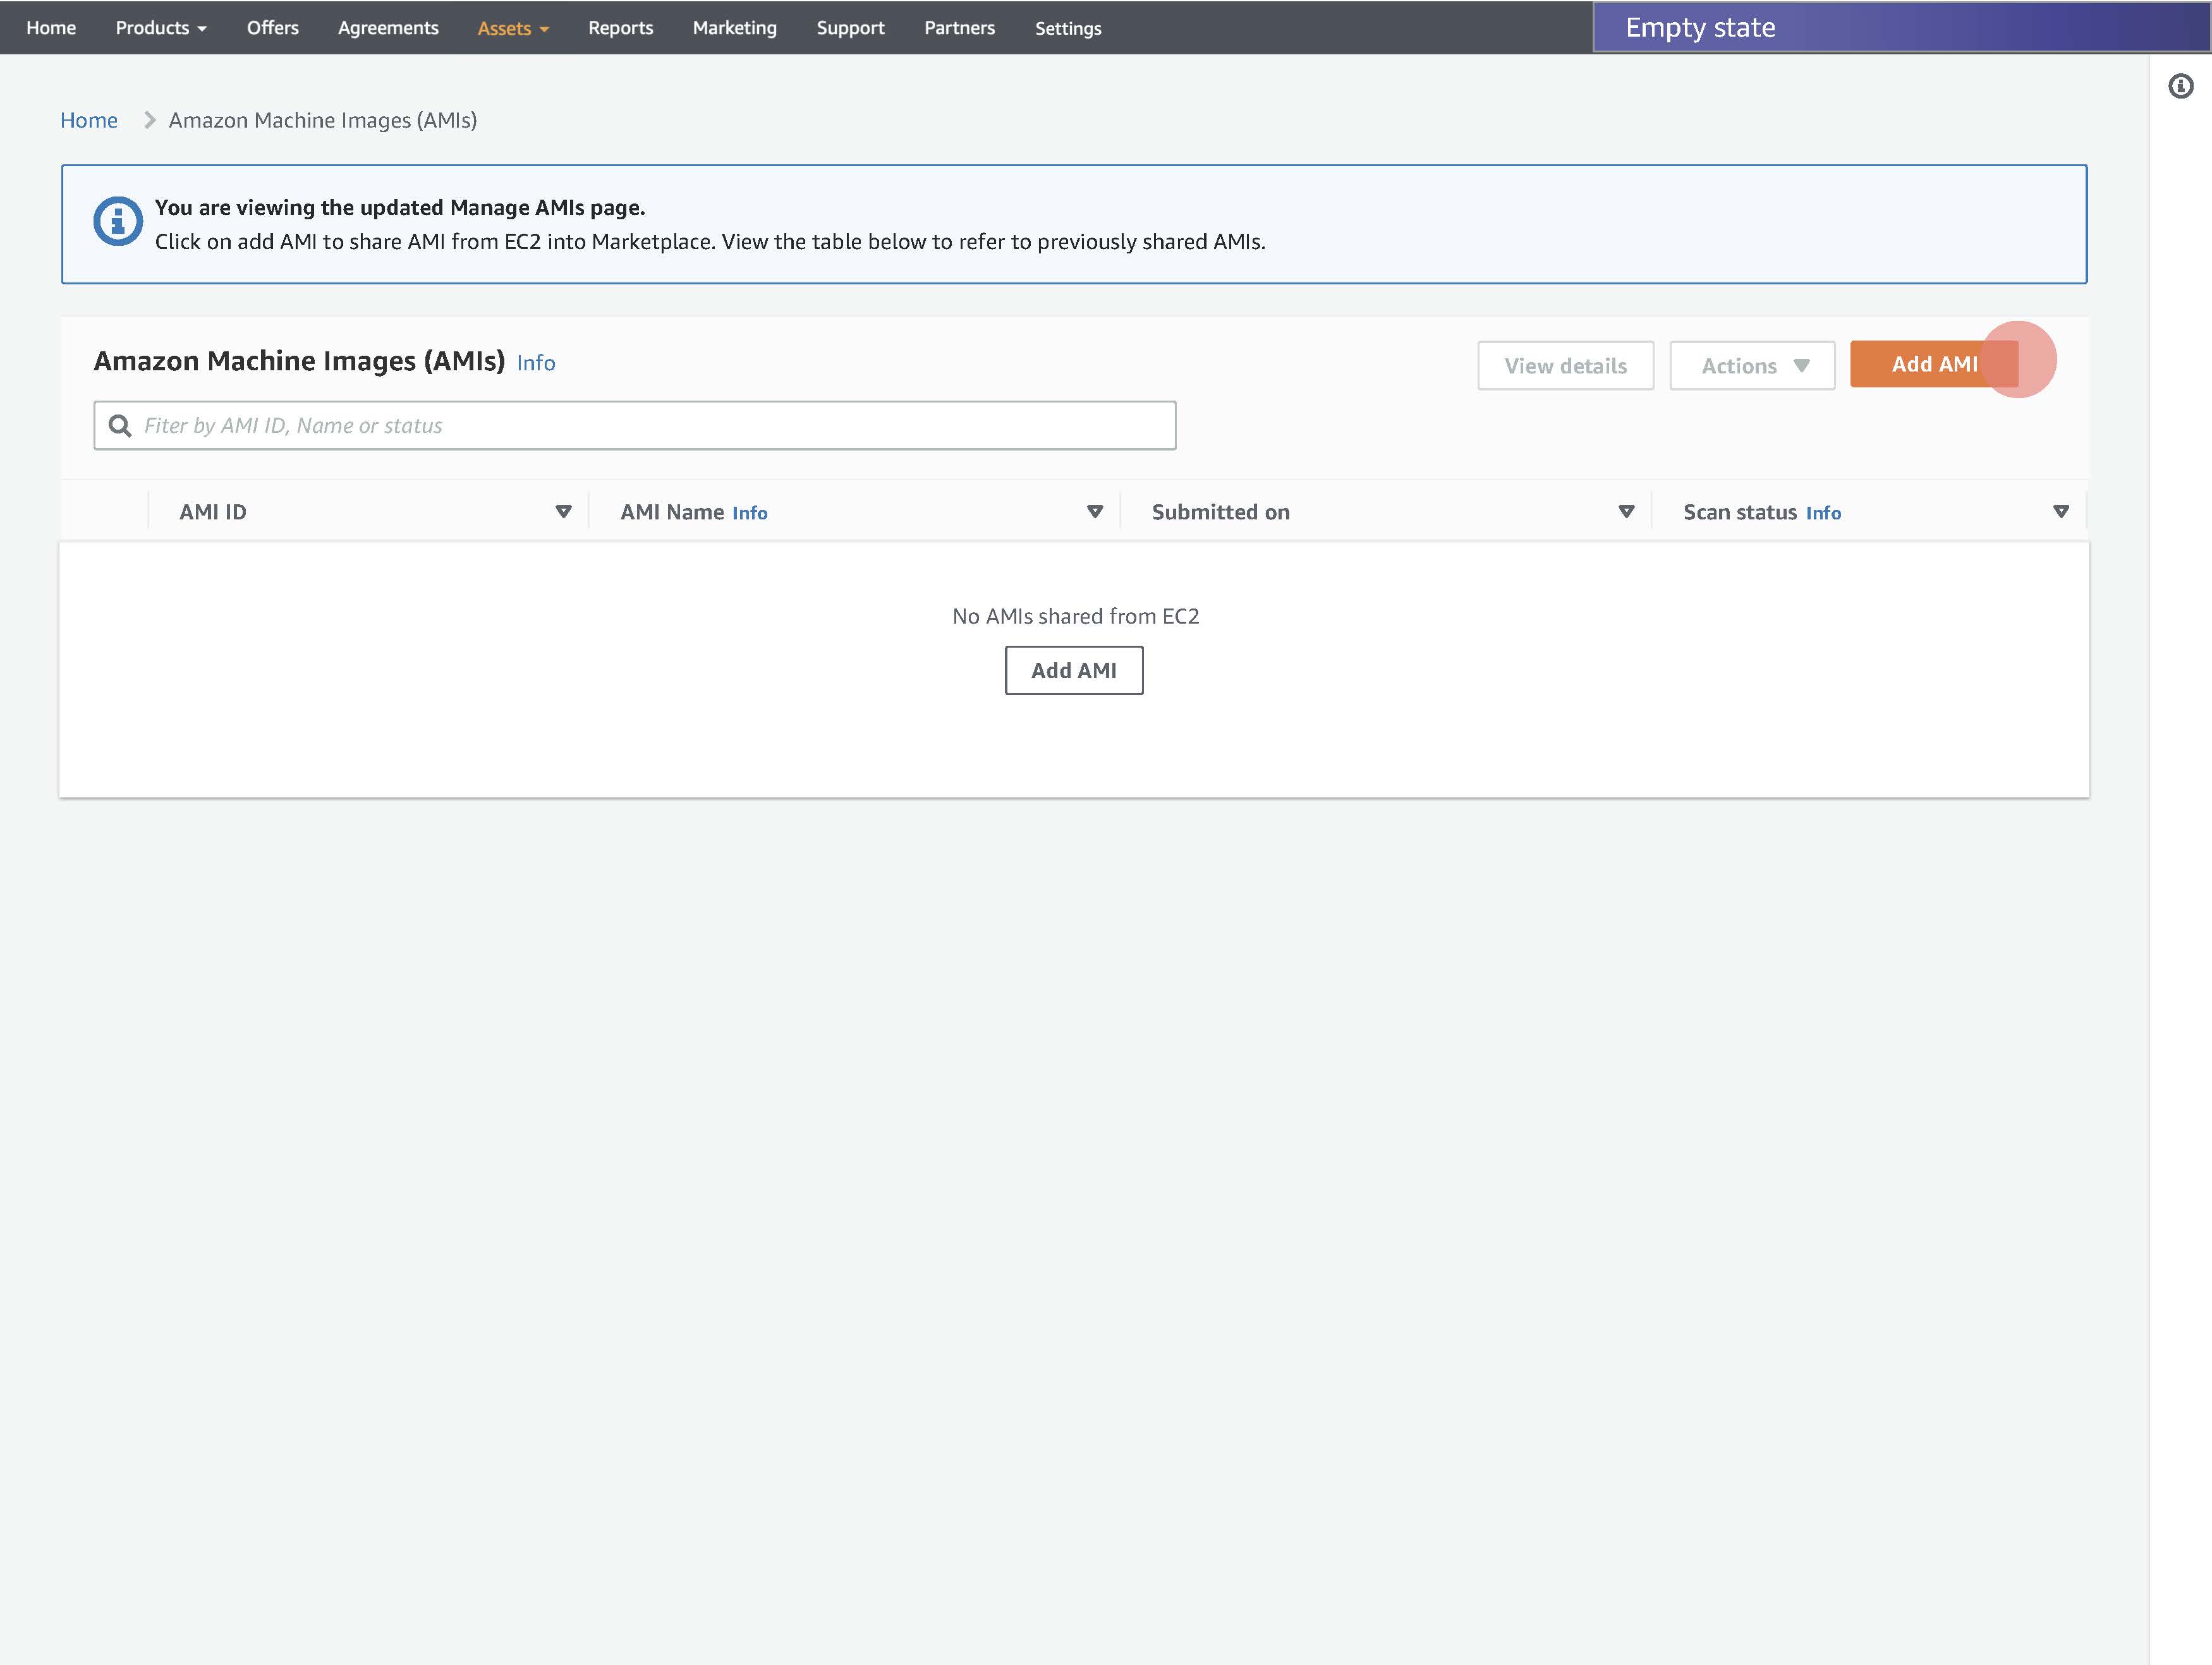
Empty state
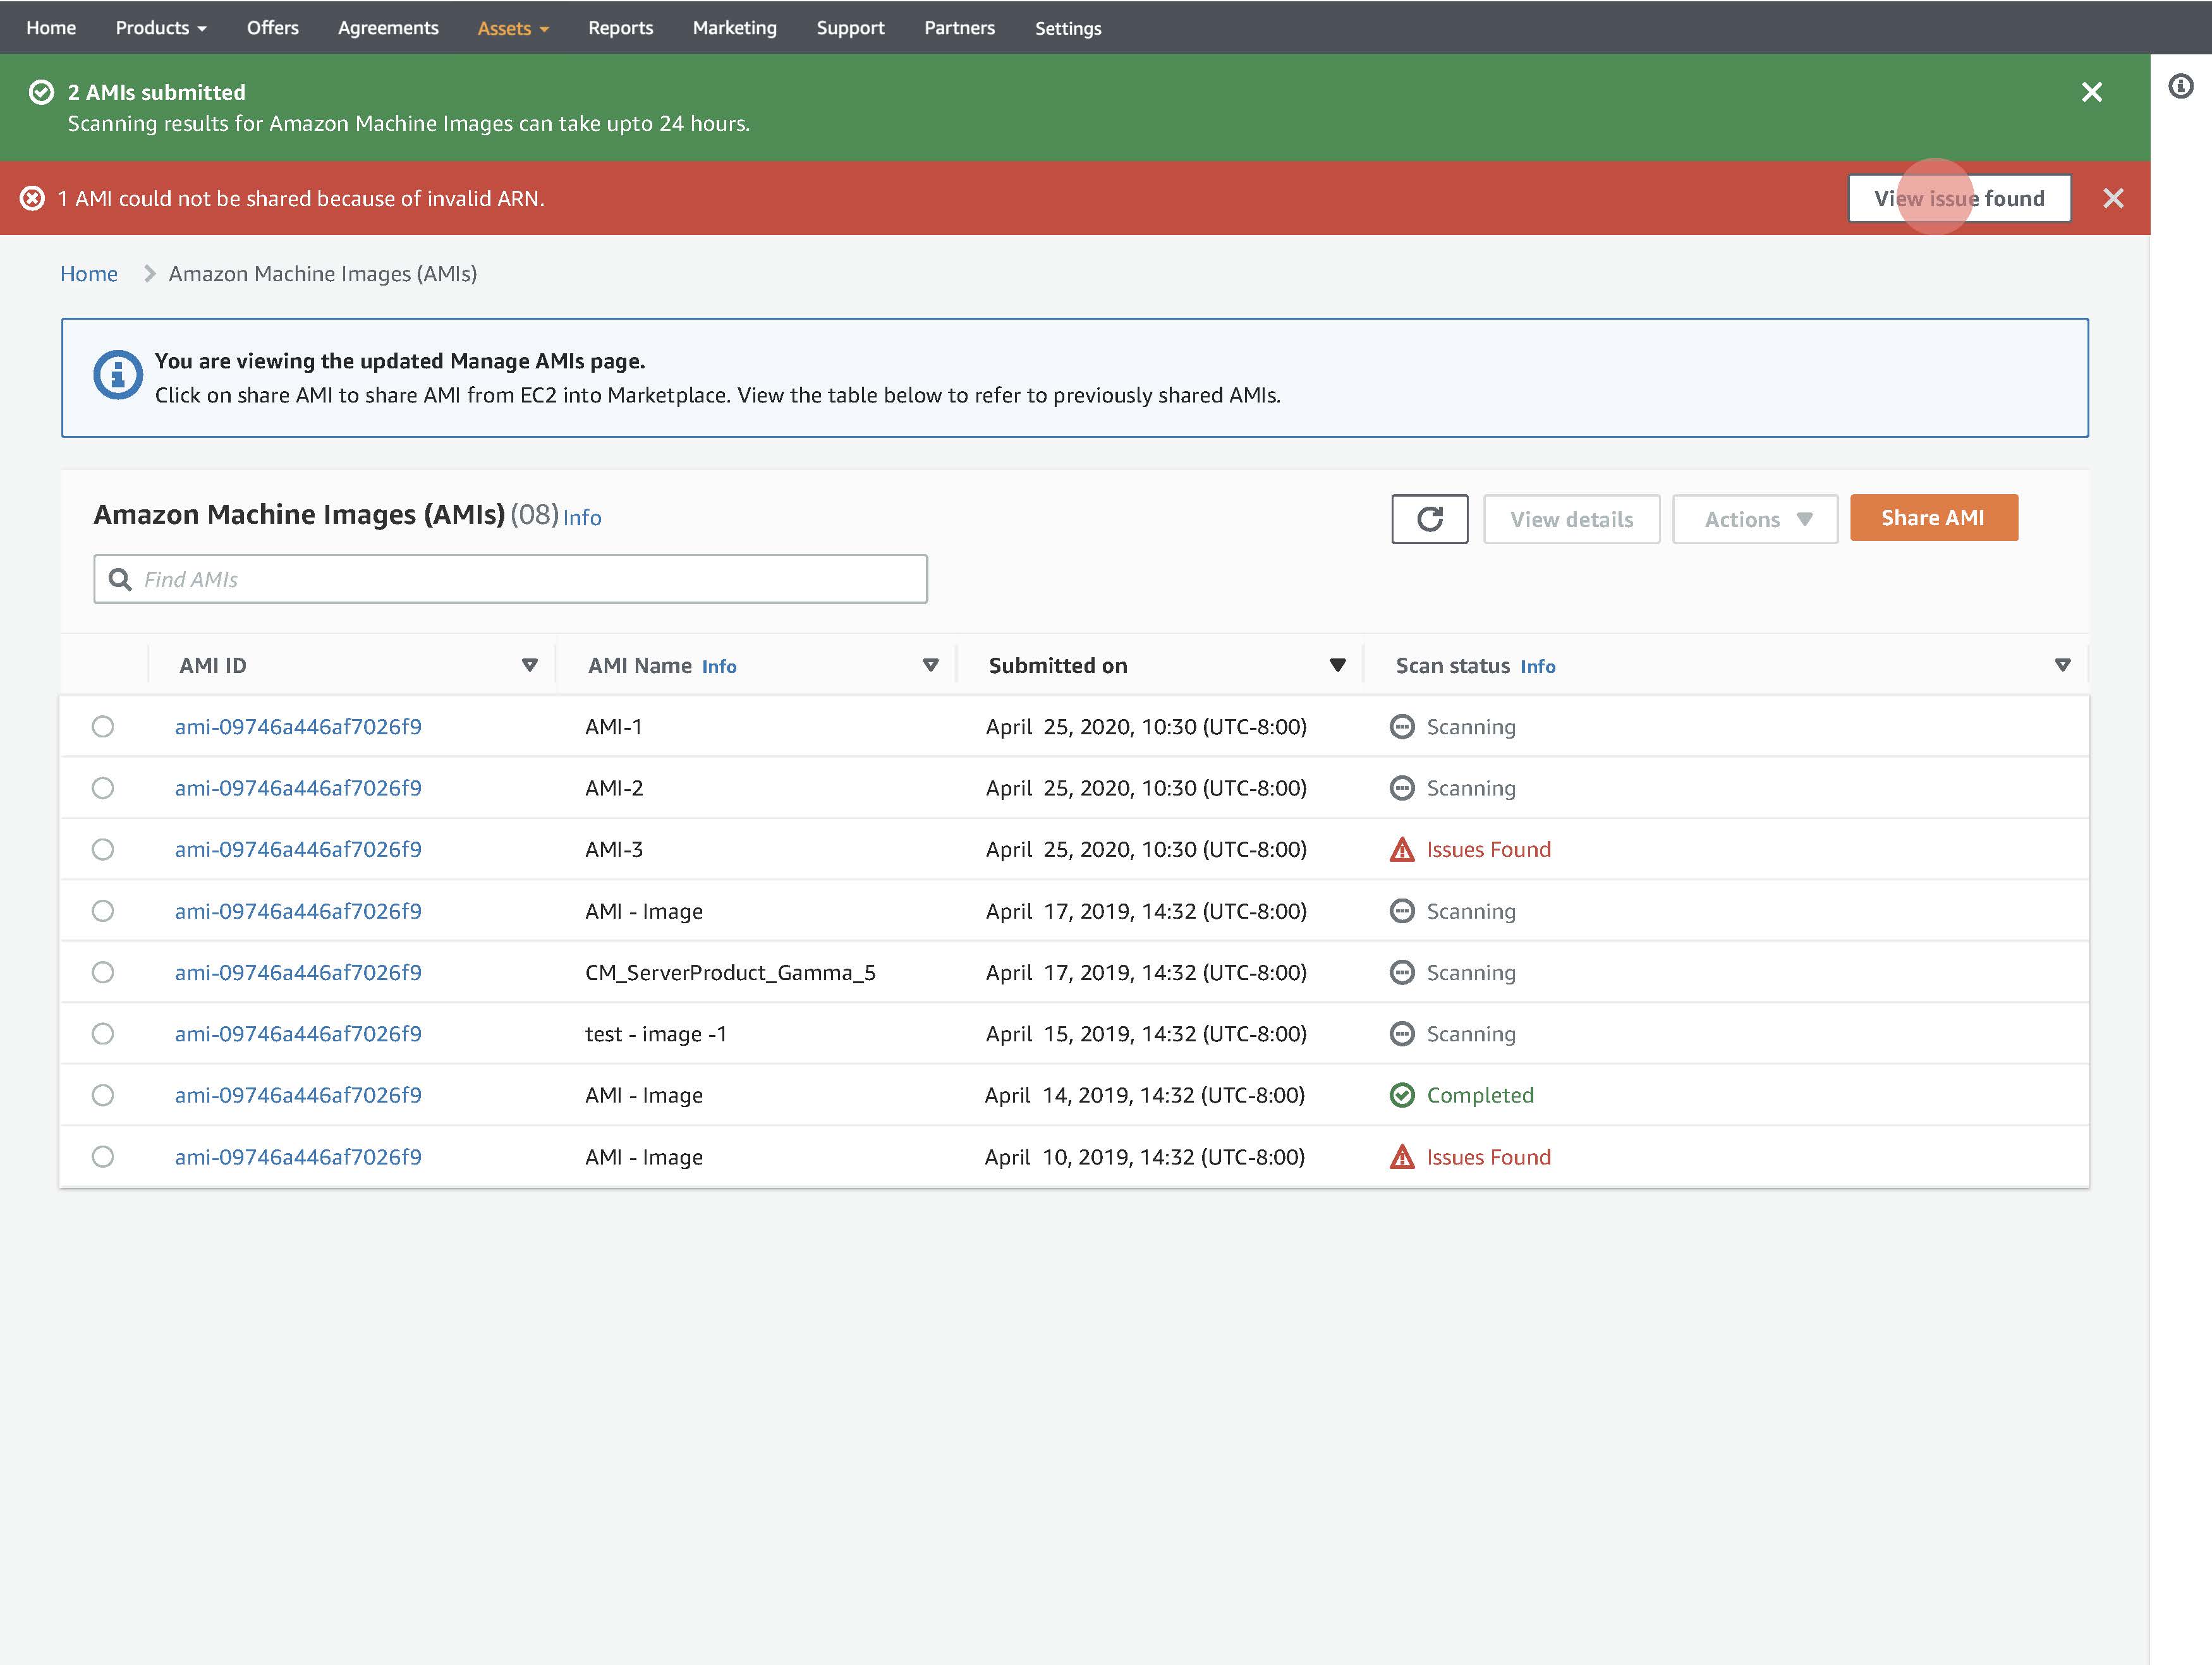
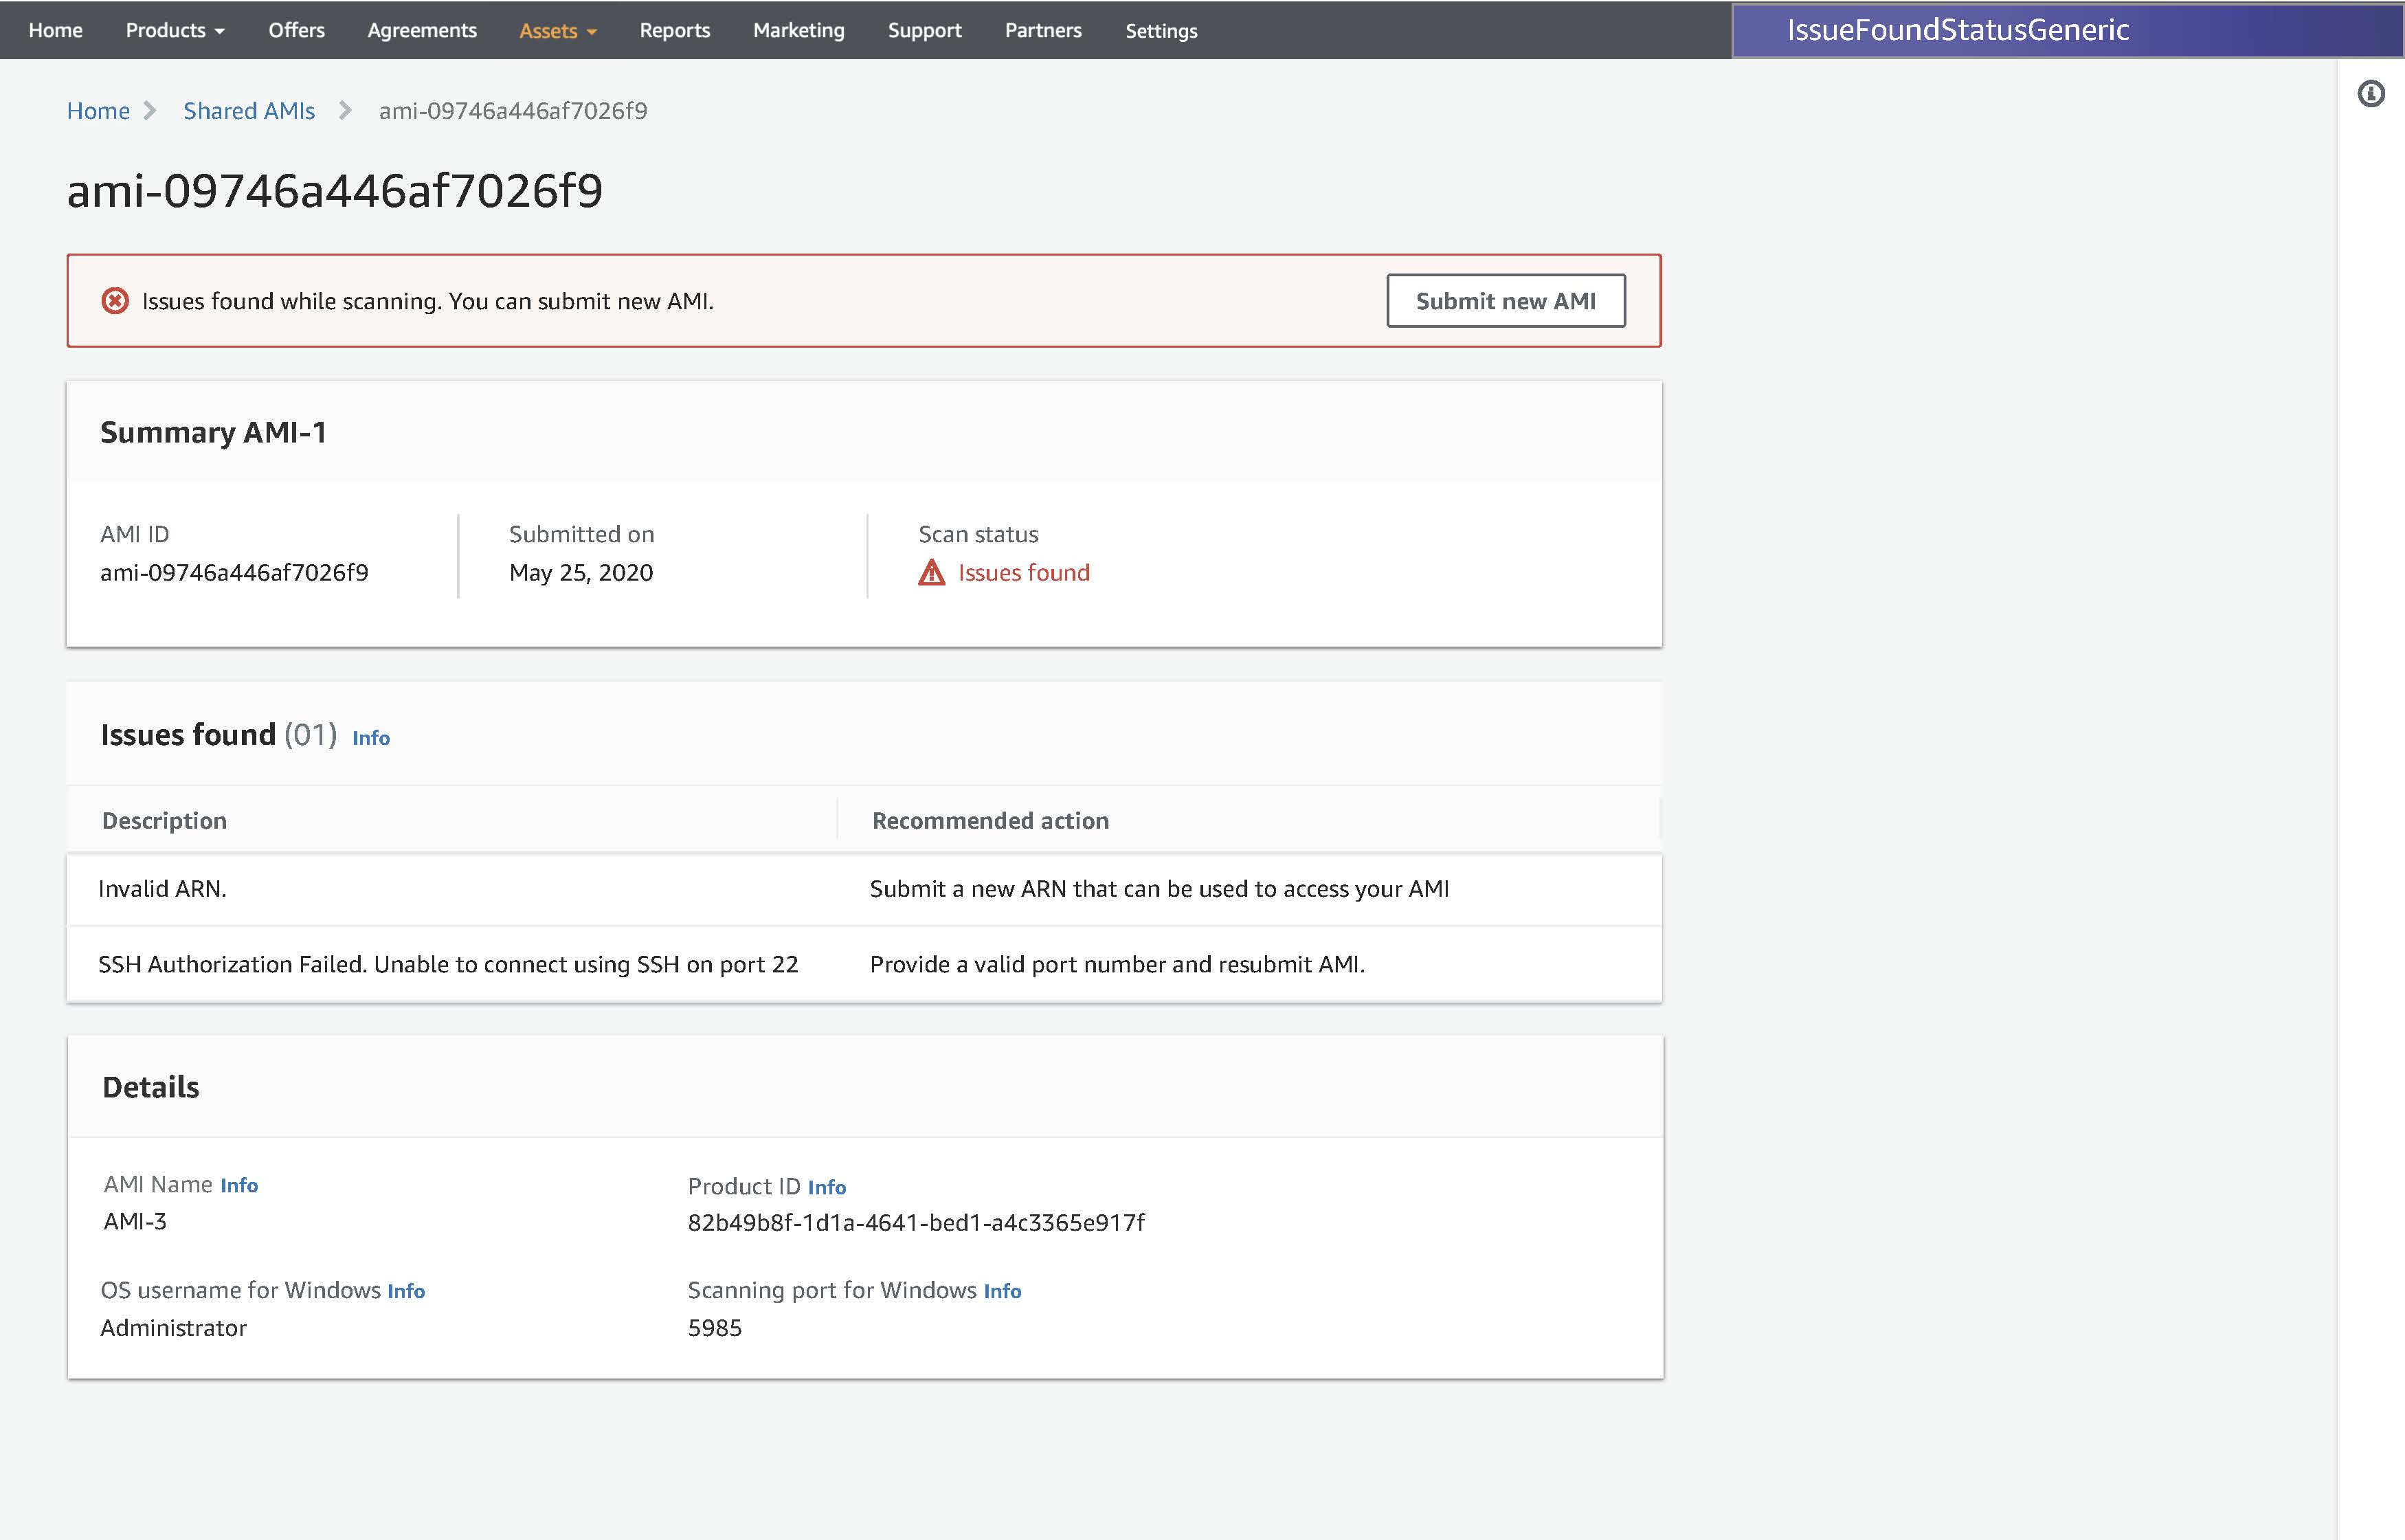
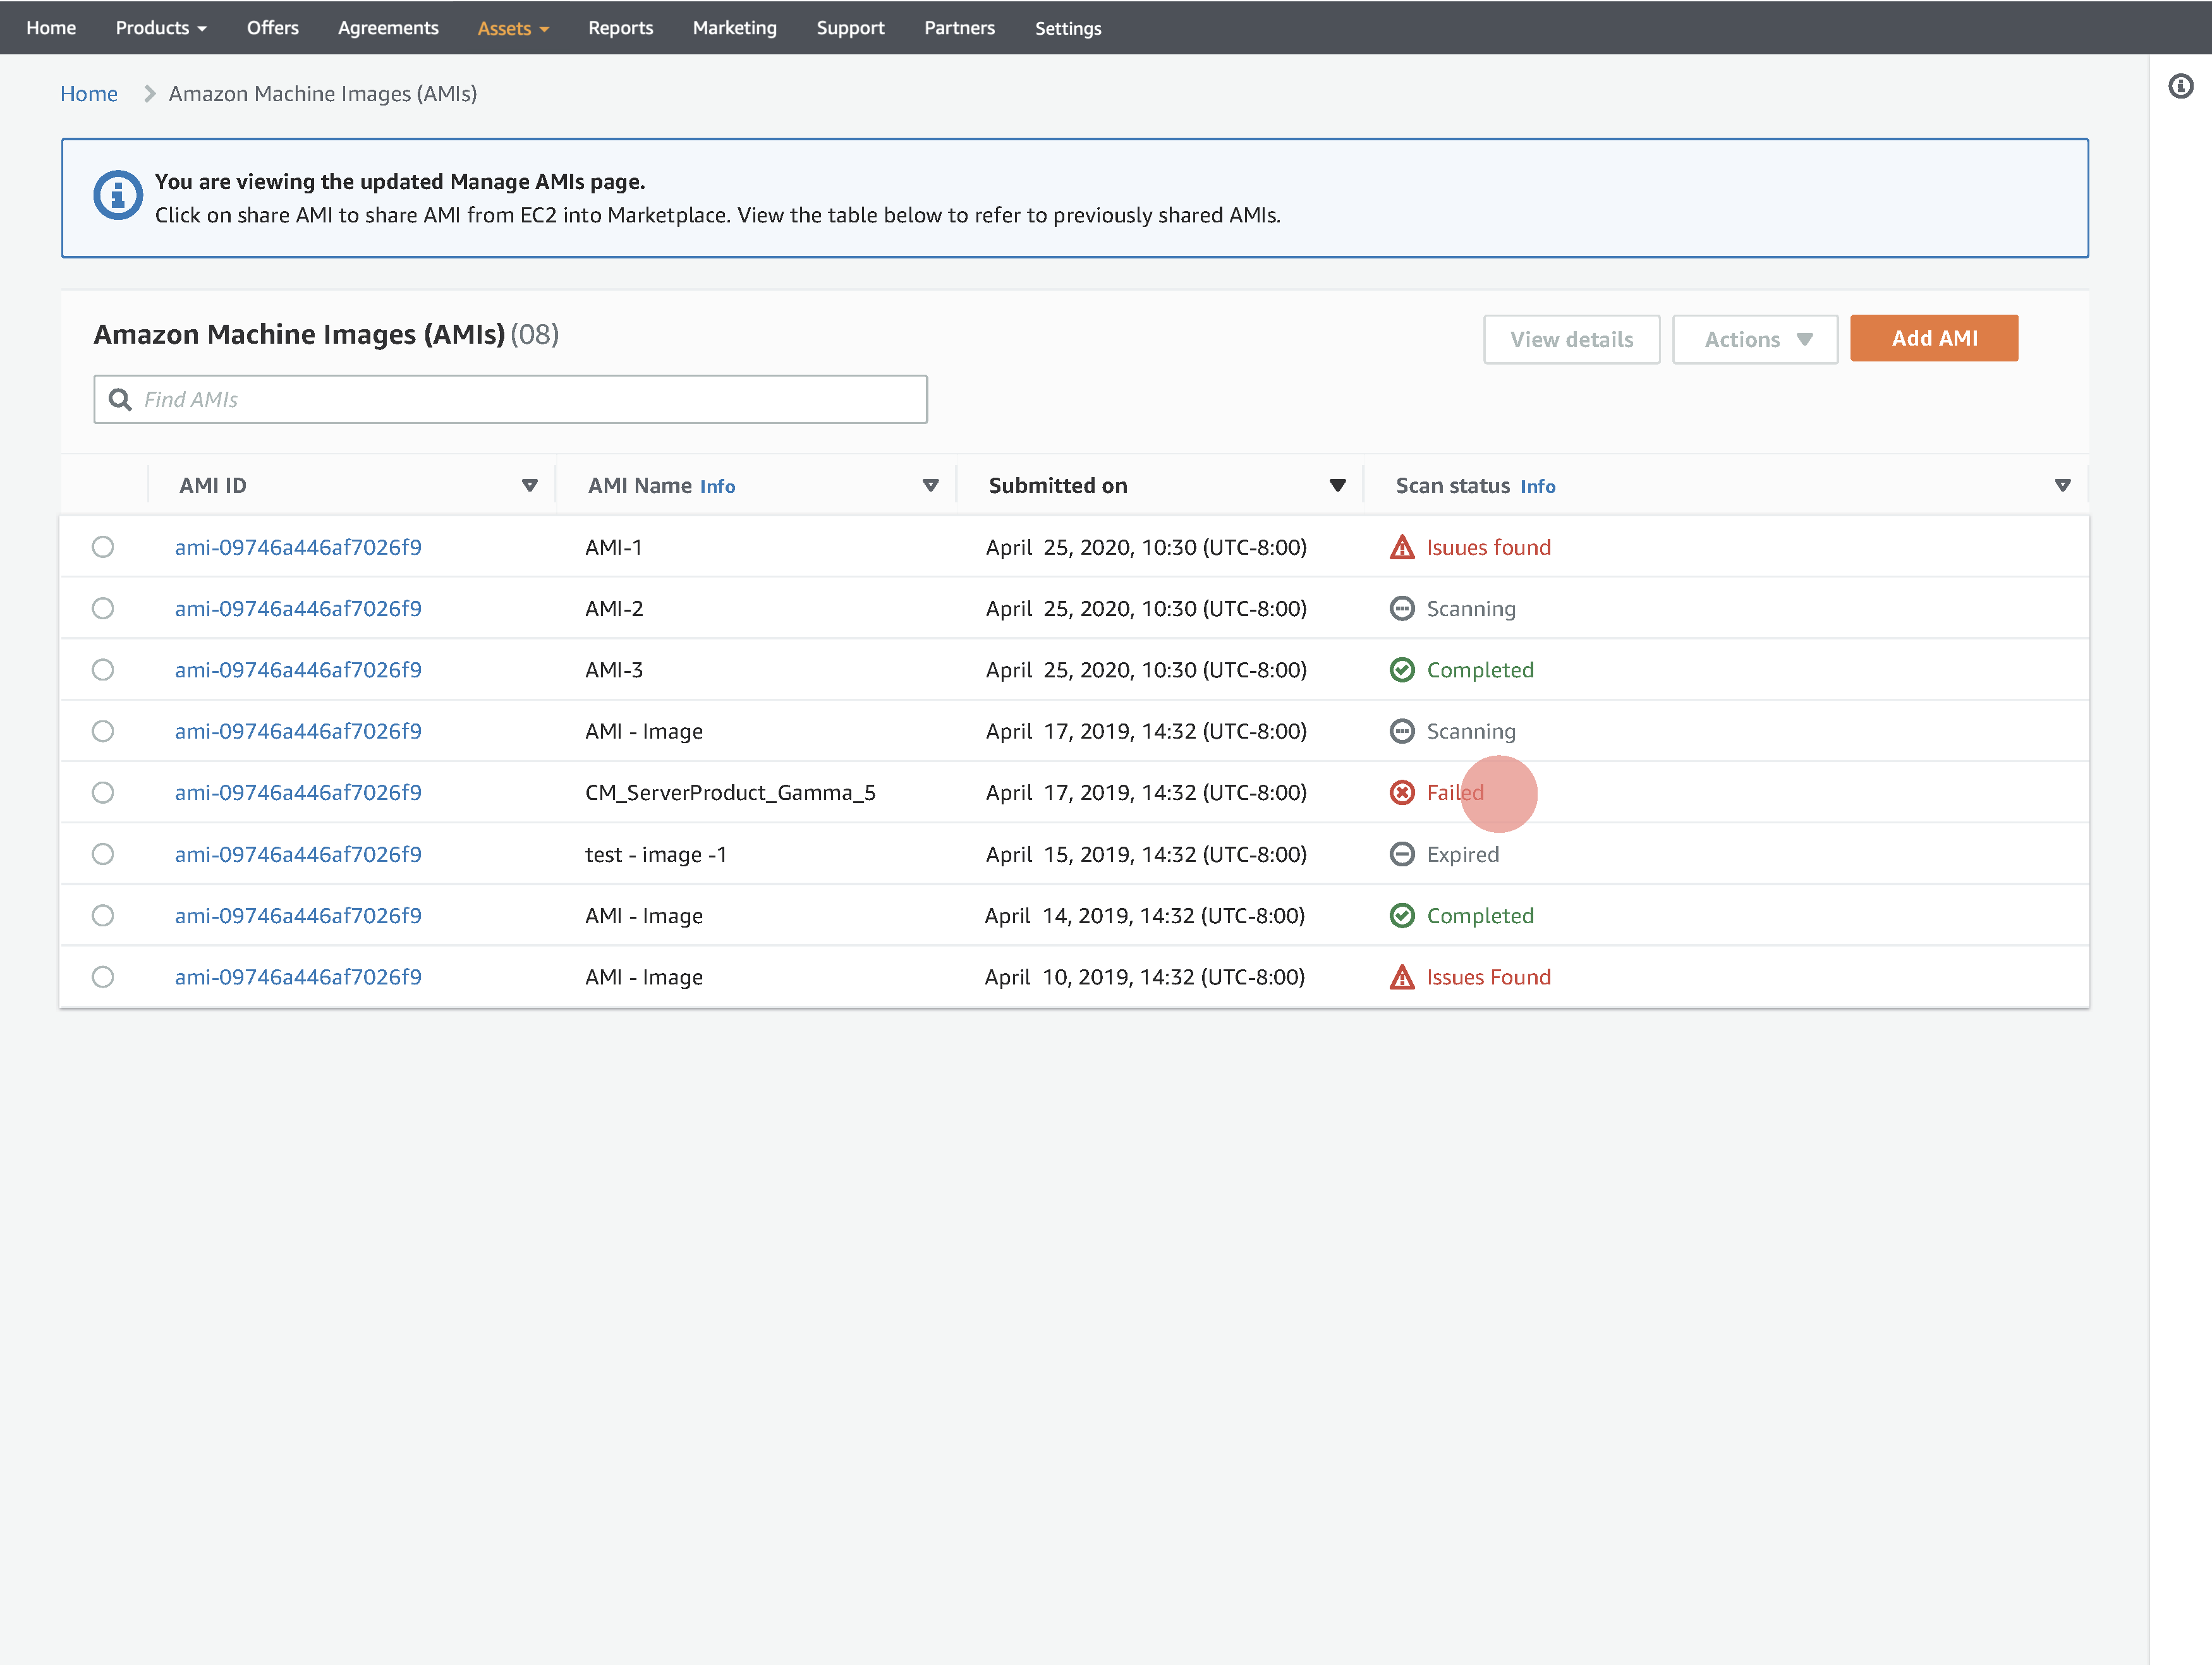
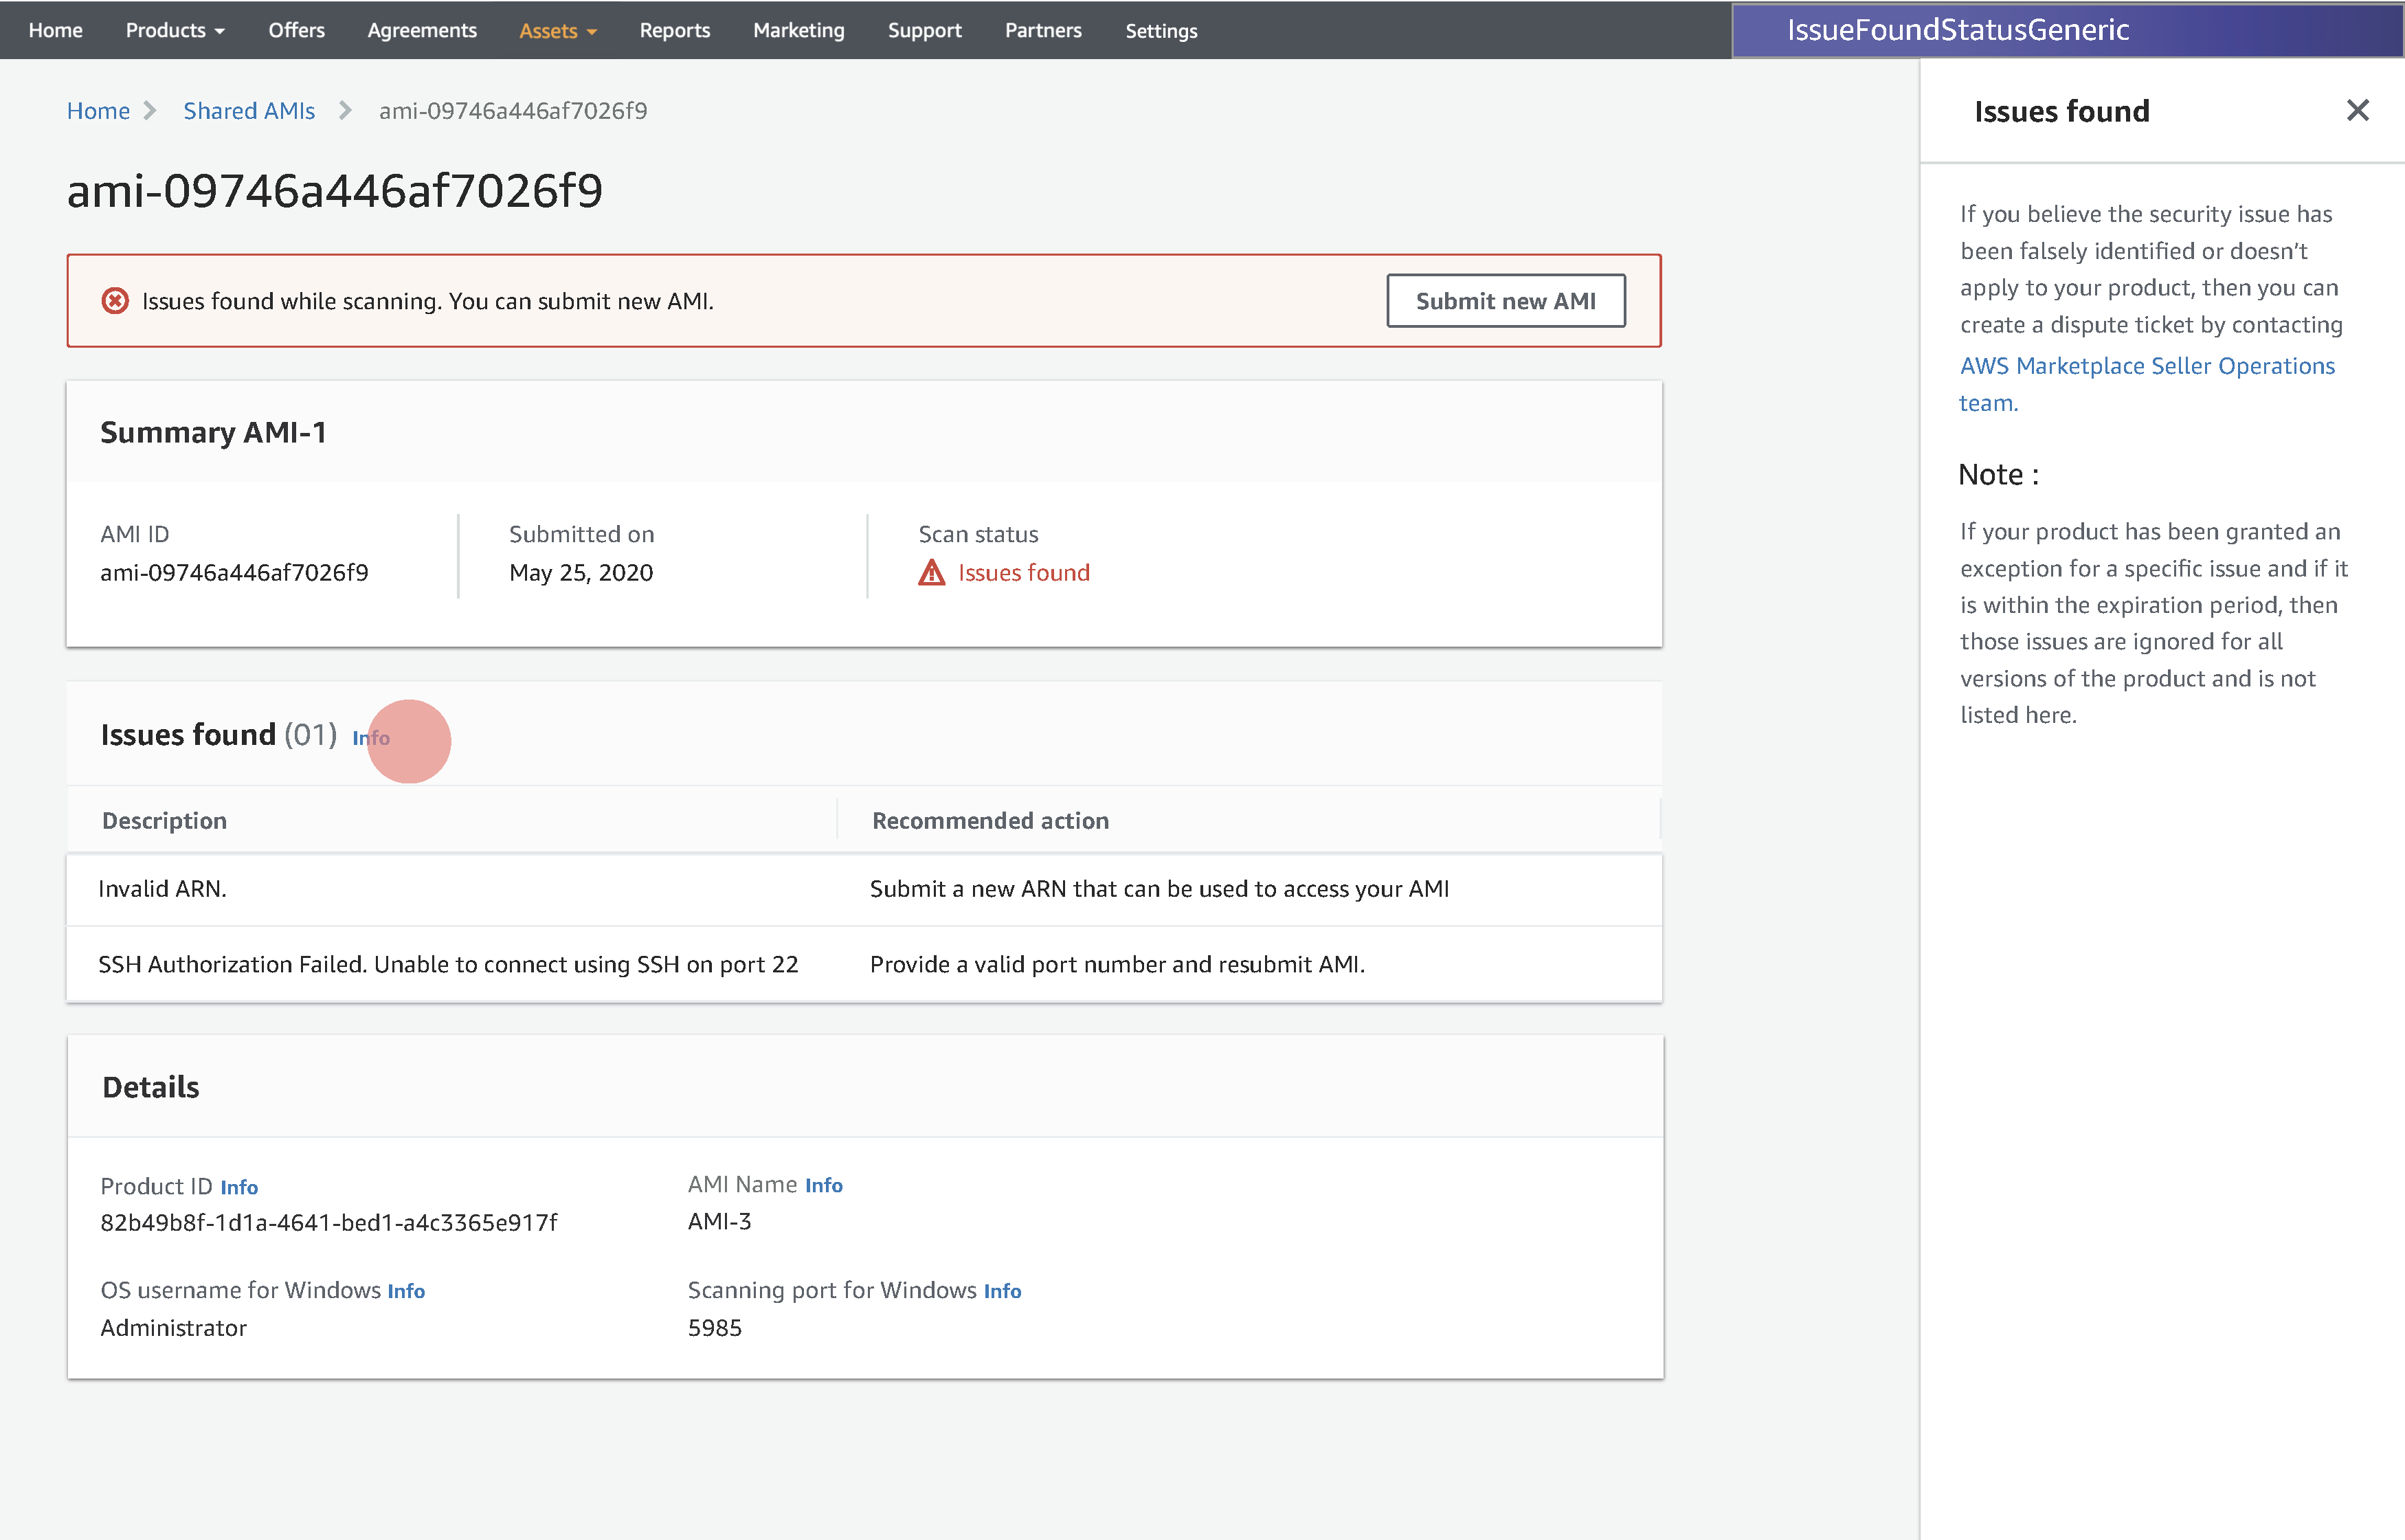
Manage AMI page shows sellers a list of AMI(s) shared from EC2 to Marketplace along with the statuses of each AMI.
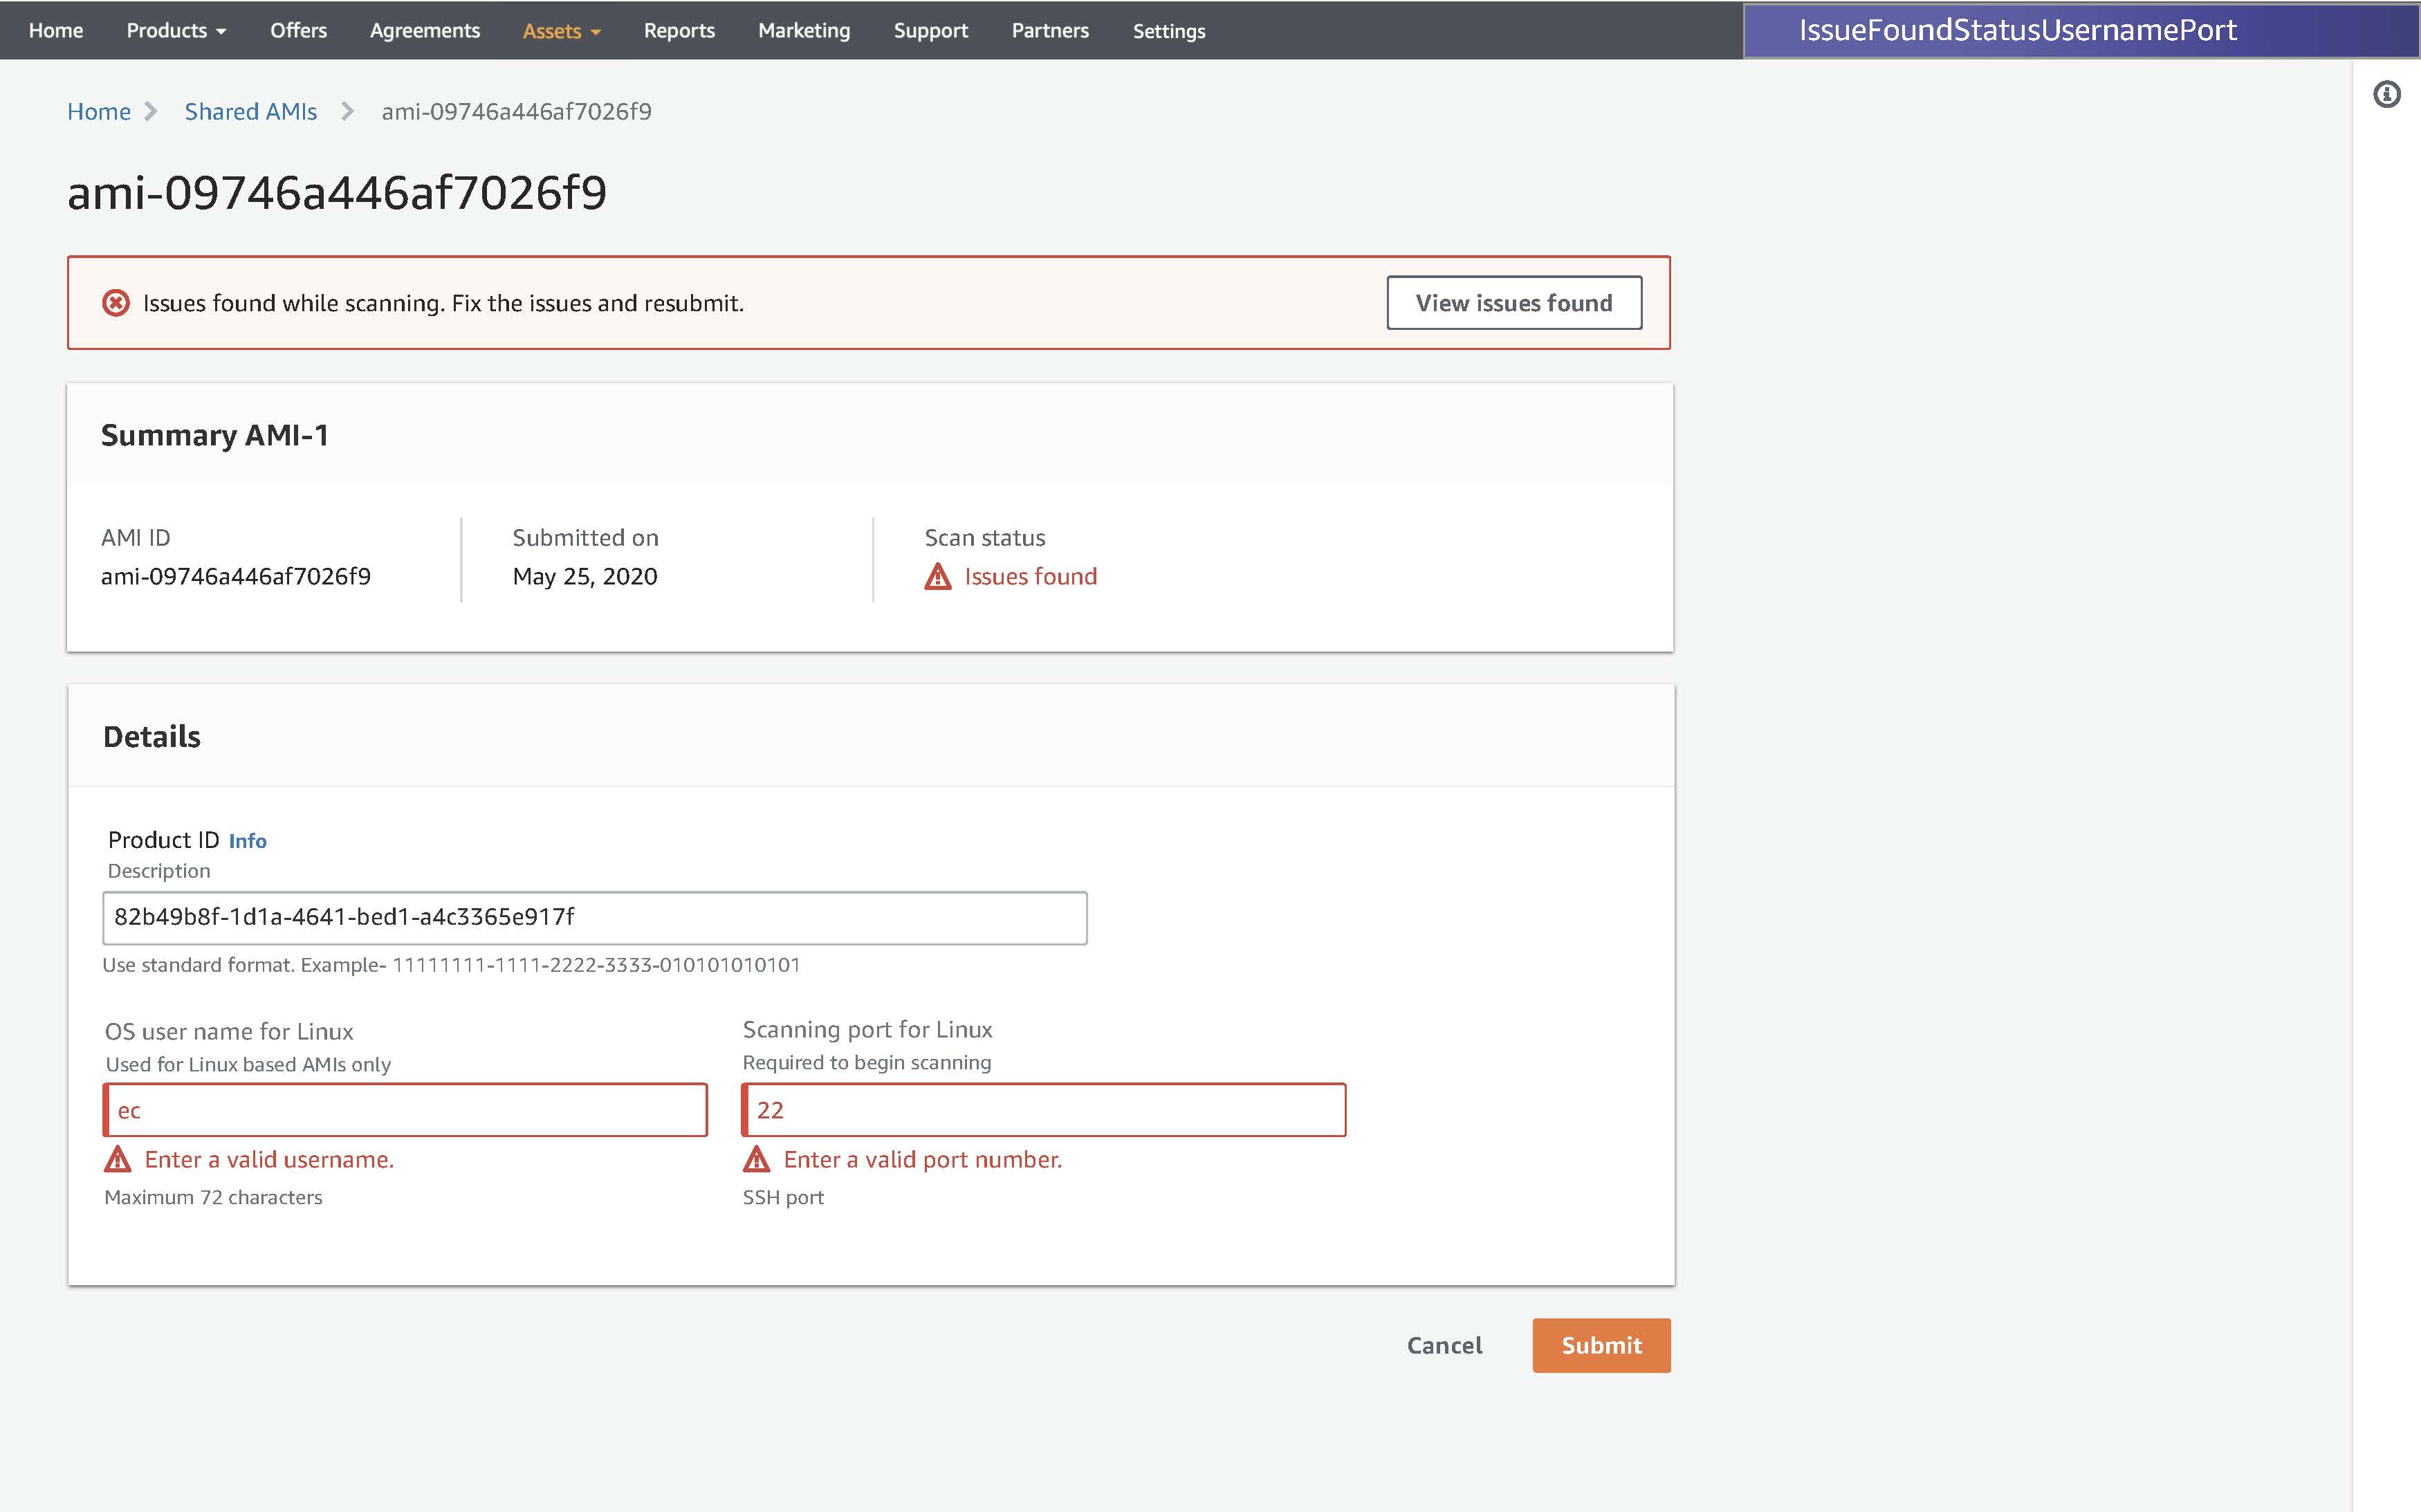
Once AMI(s) shared from EC2 to Marketplace sellers can view statuses of each AMI which makes it simple for seller to view the statuses and take action on the AMI(s) with issues found.
Users (Sellers) can see Add AMI CTA to start thge flow where they can share AMIs from EC2 to Marketplace for scanning.
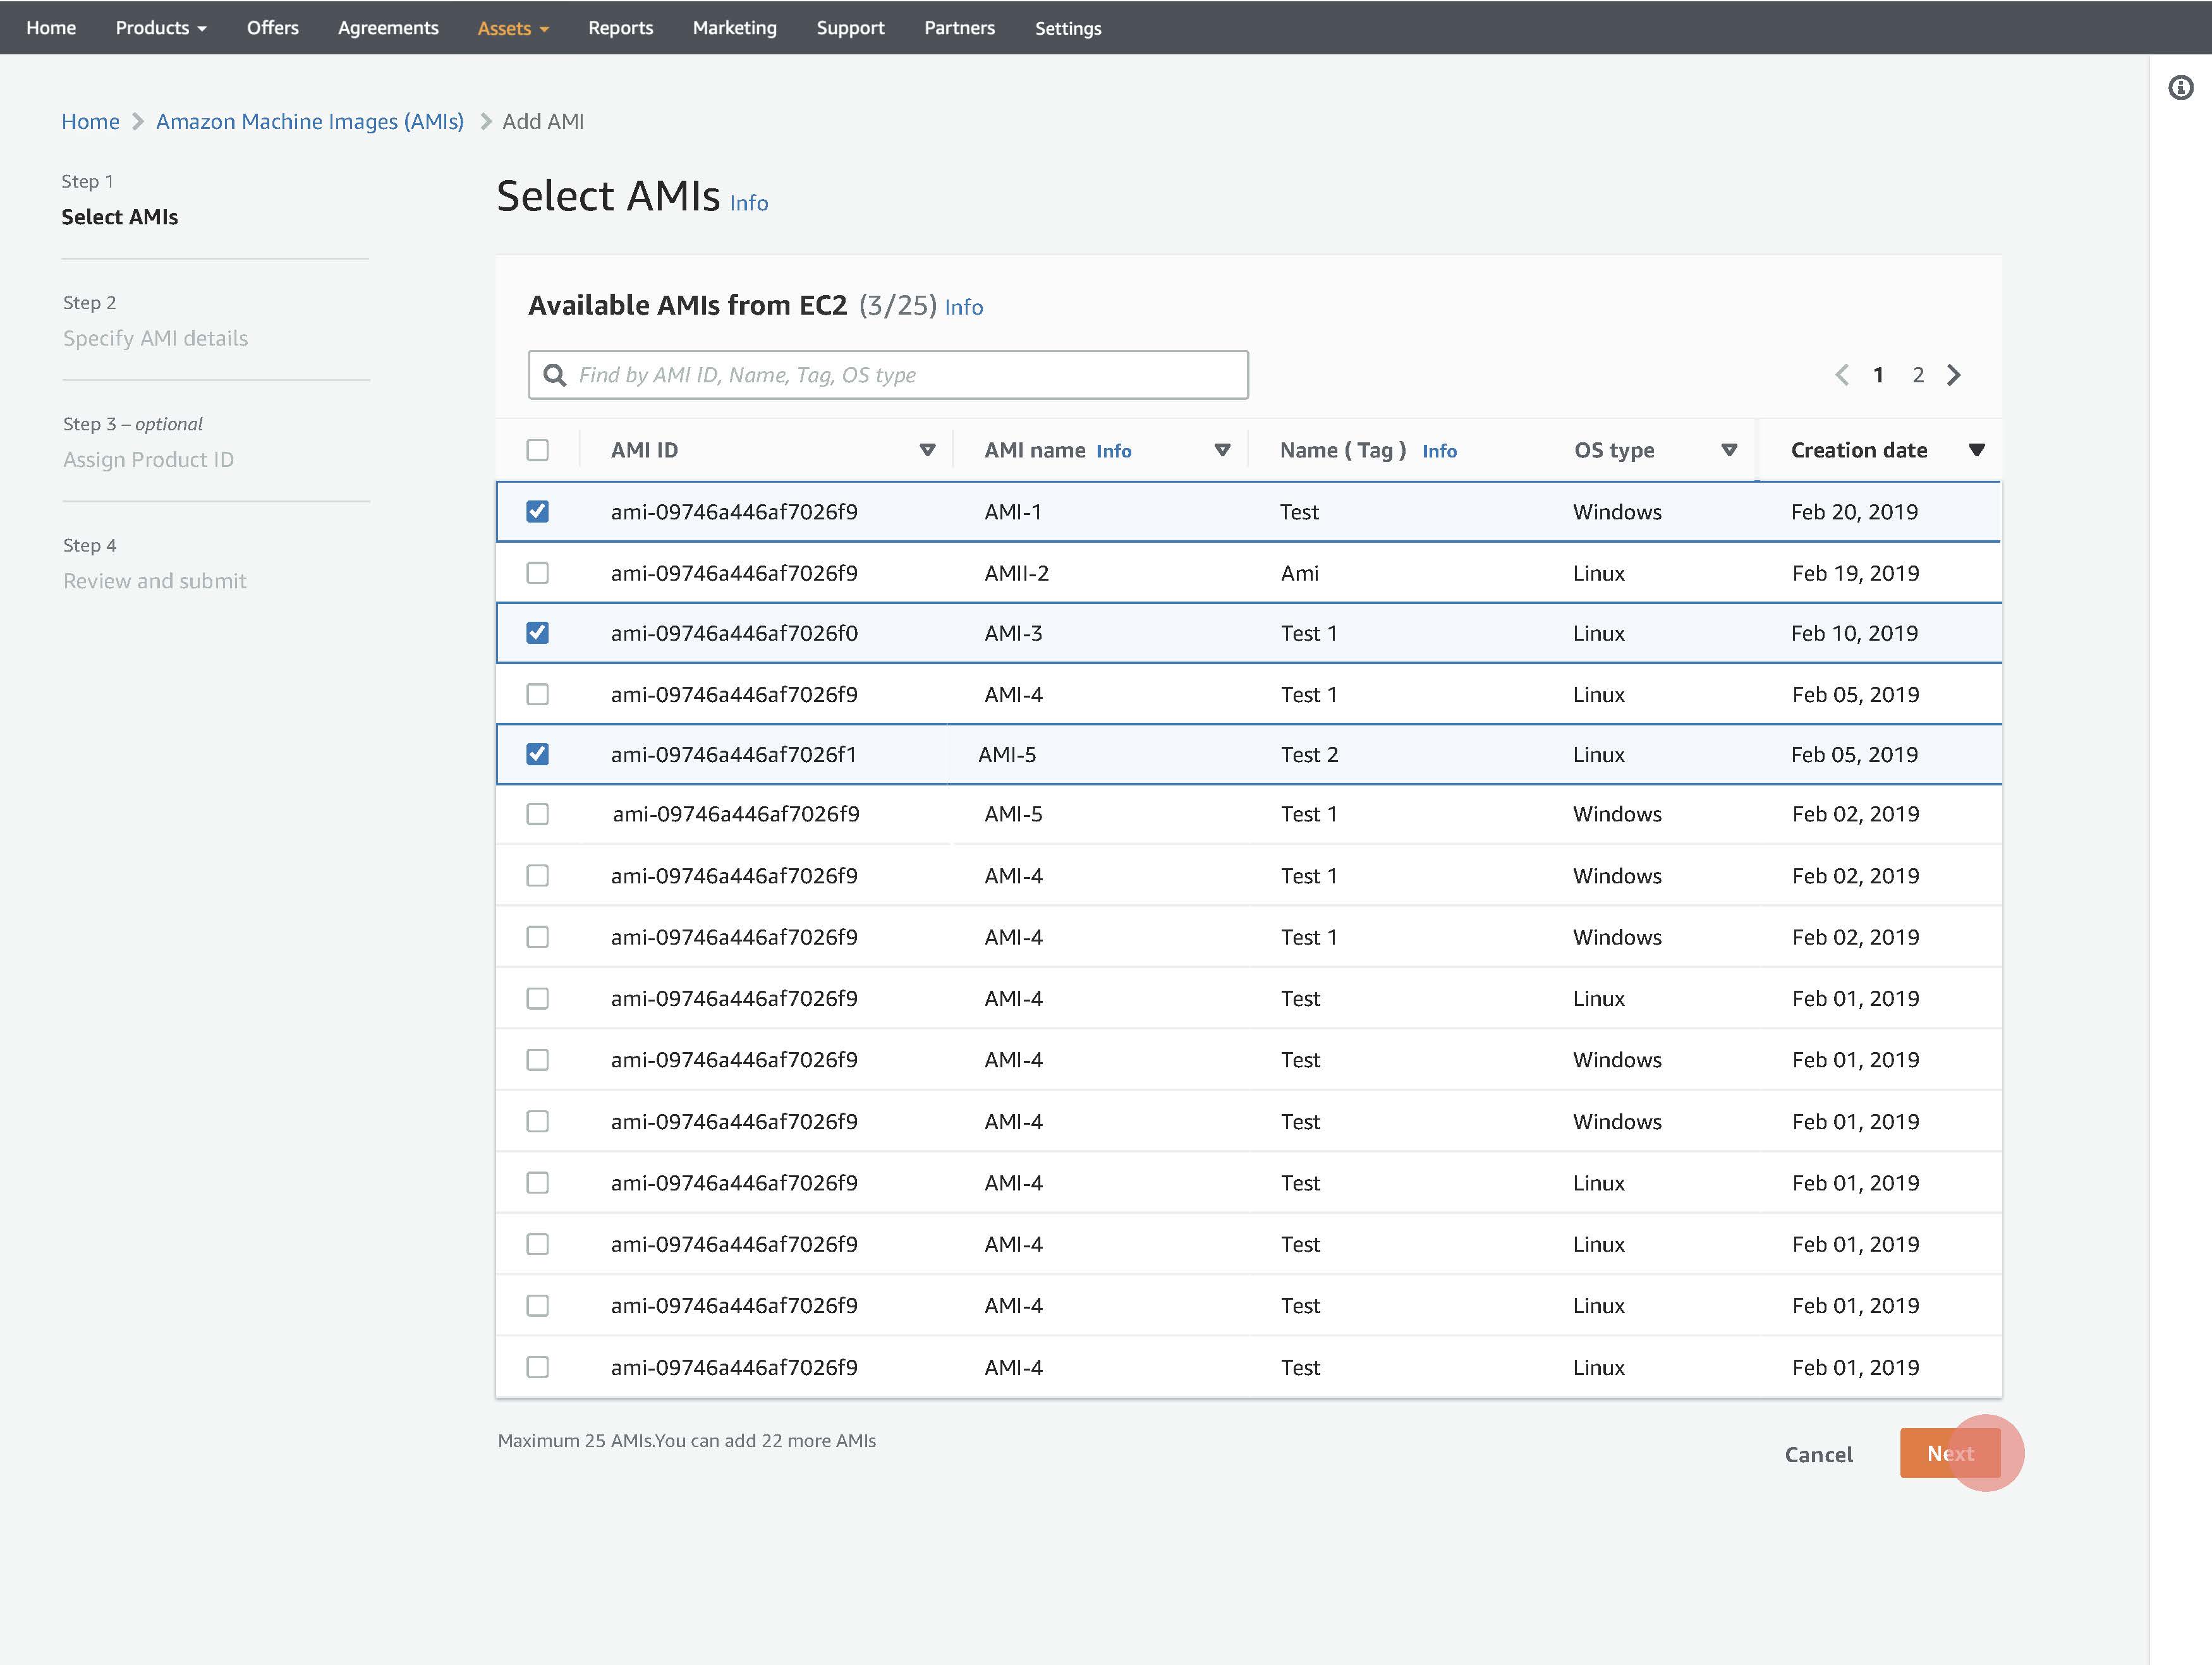
Step 1
Select AMIs
Select AMI(s) from EC2
Users can select up to maximum 25 AMIs to be shared.
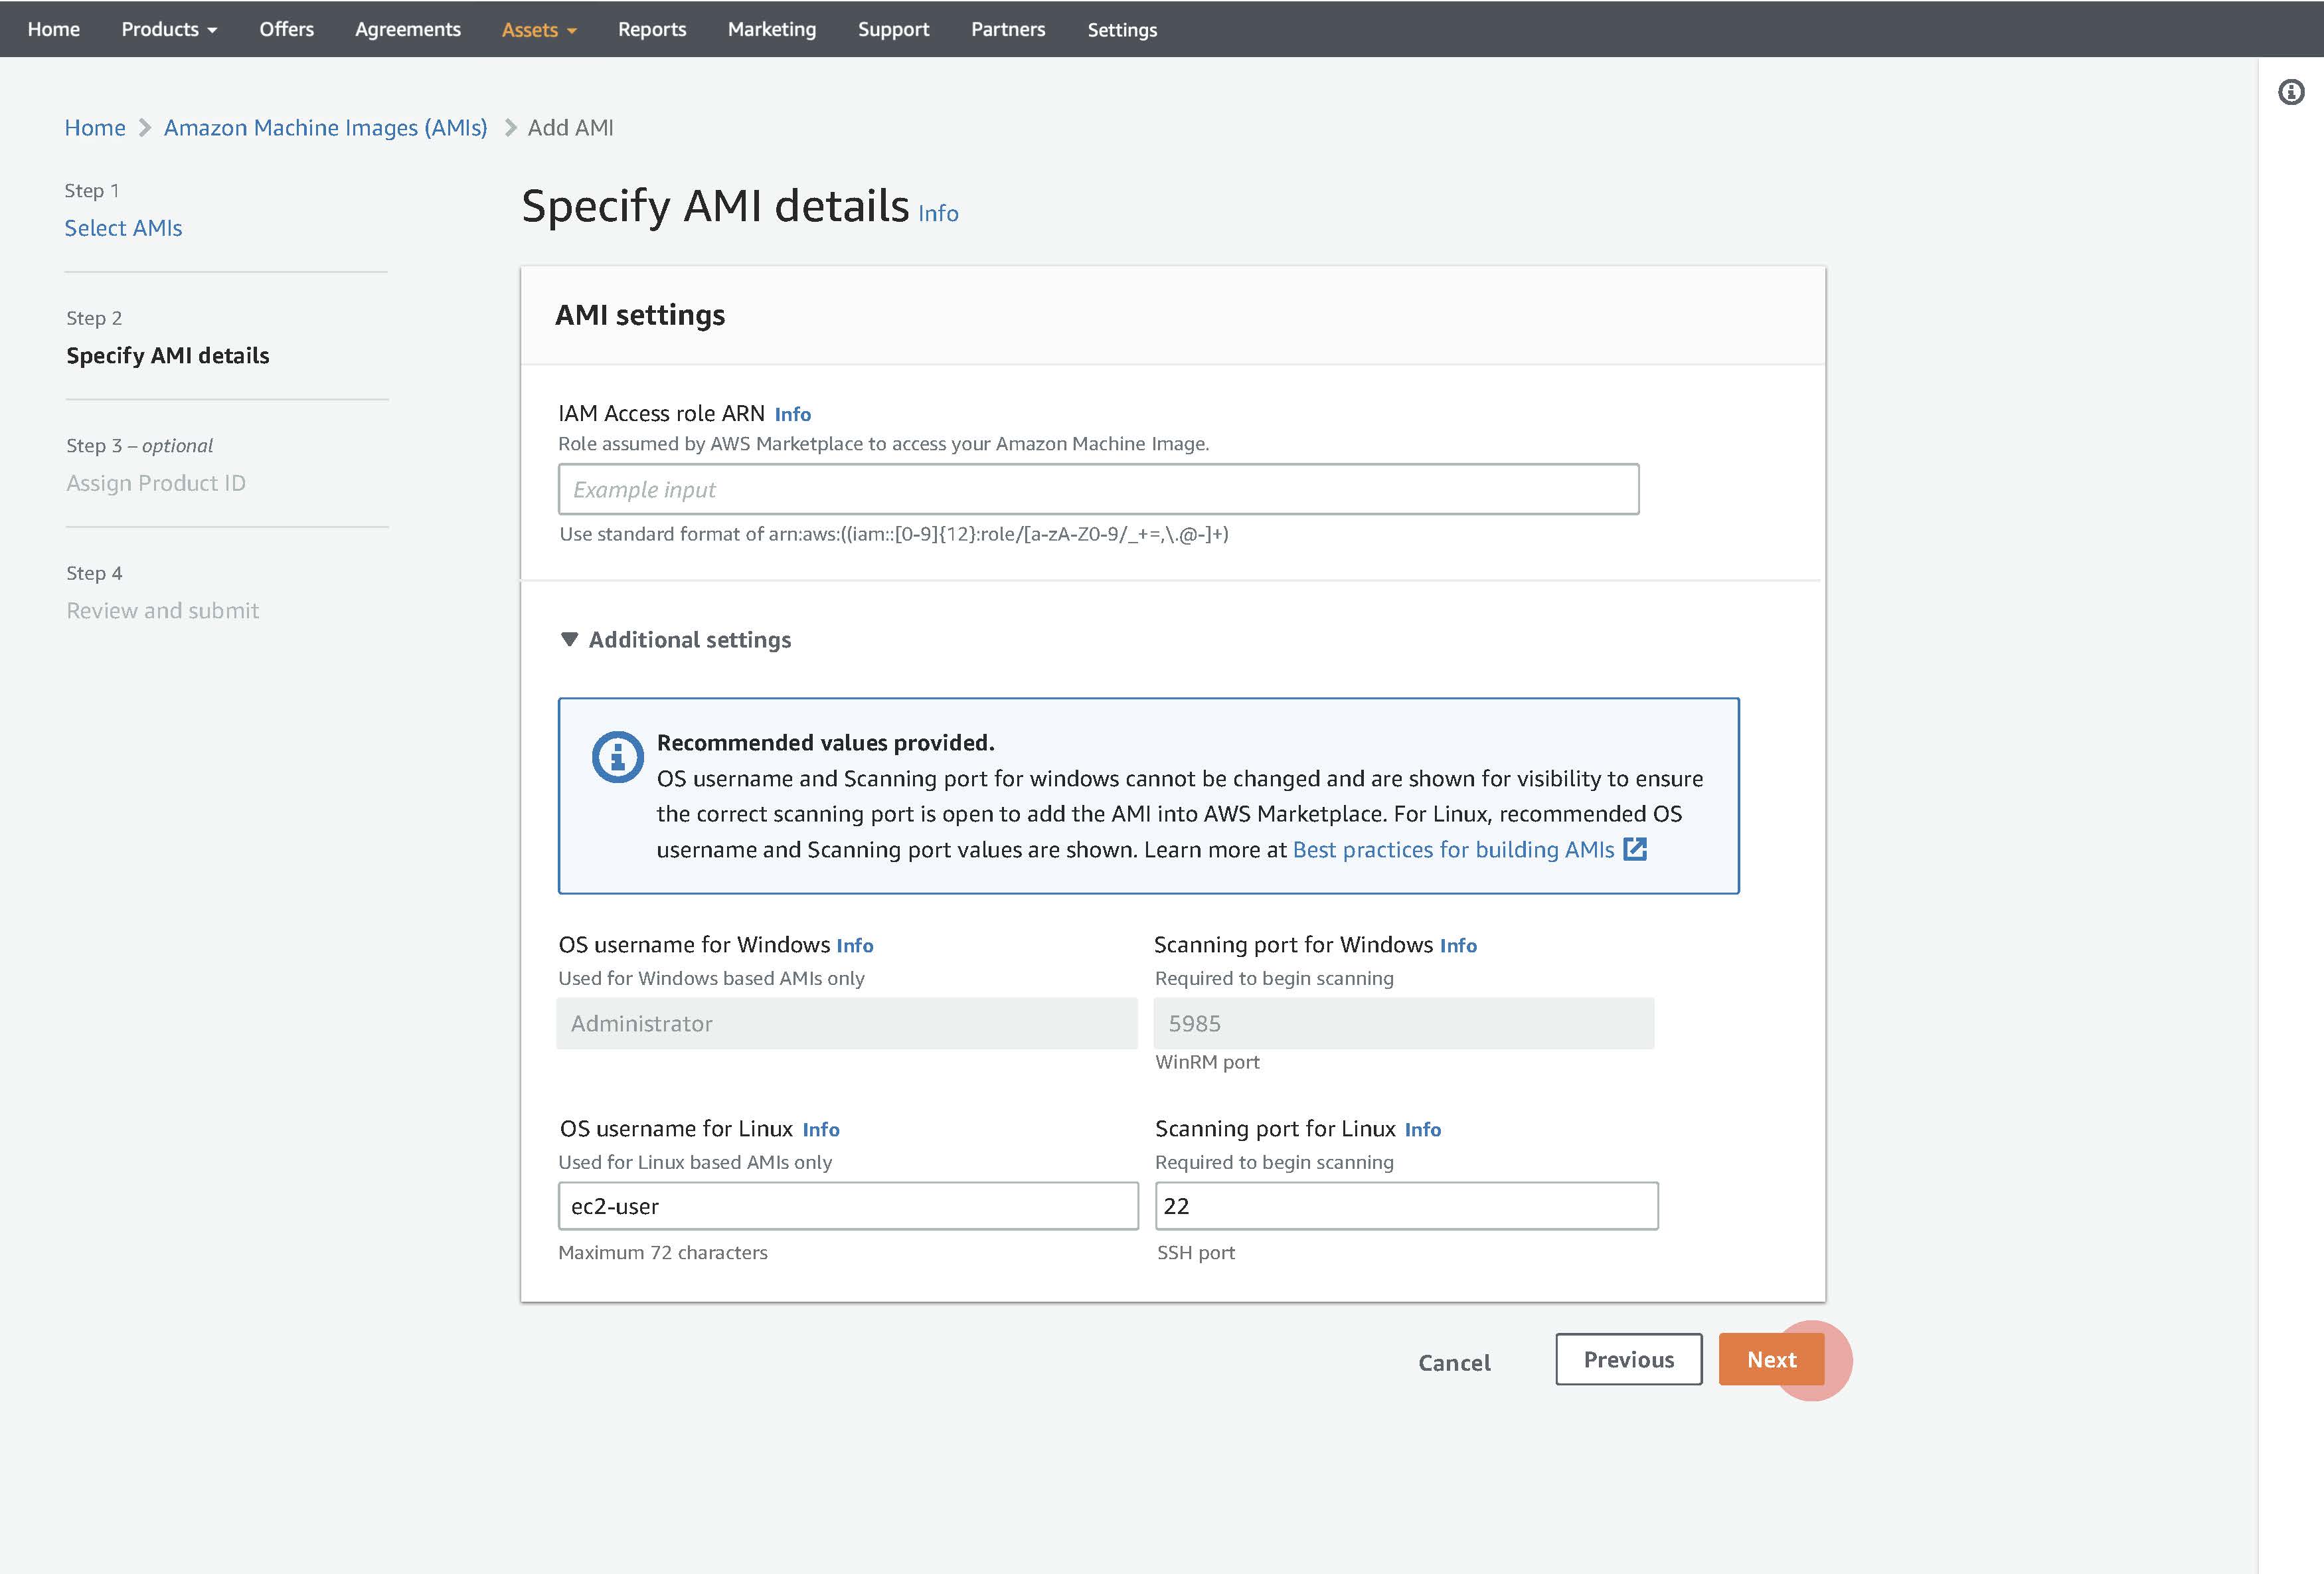
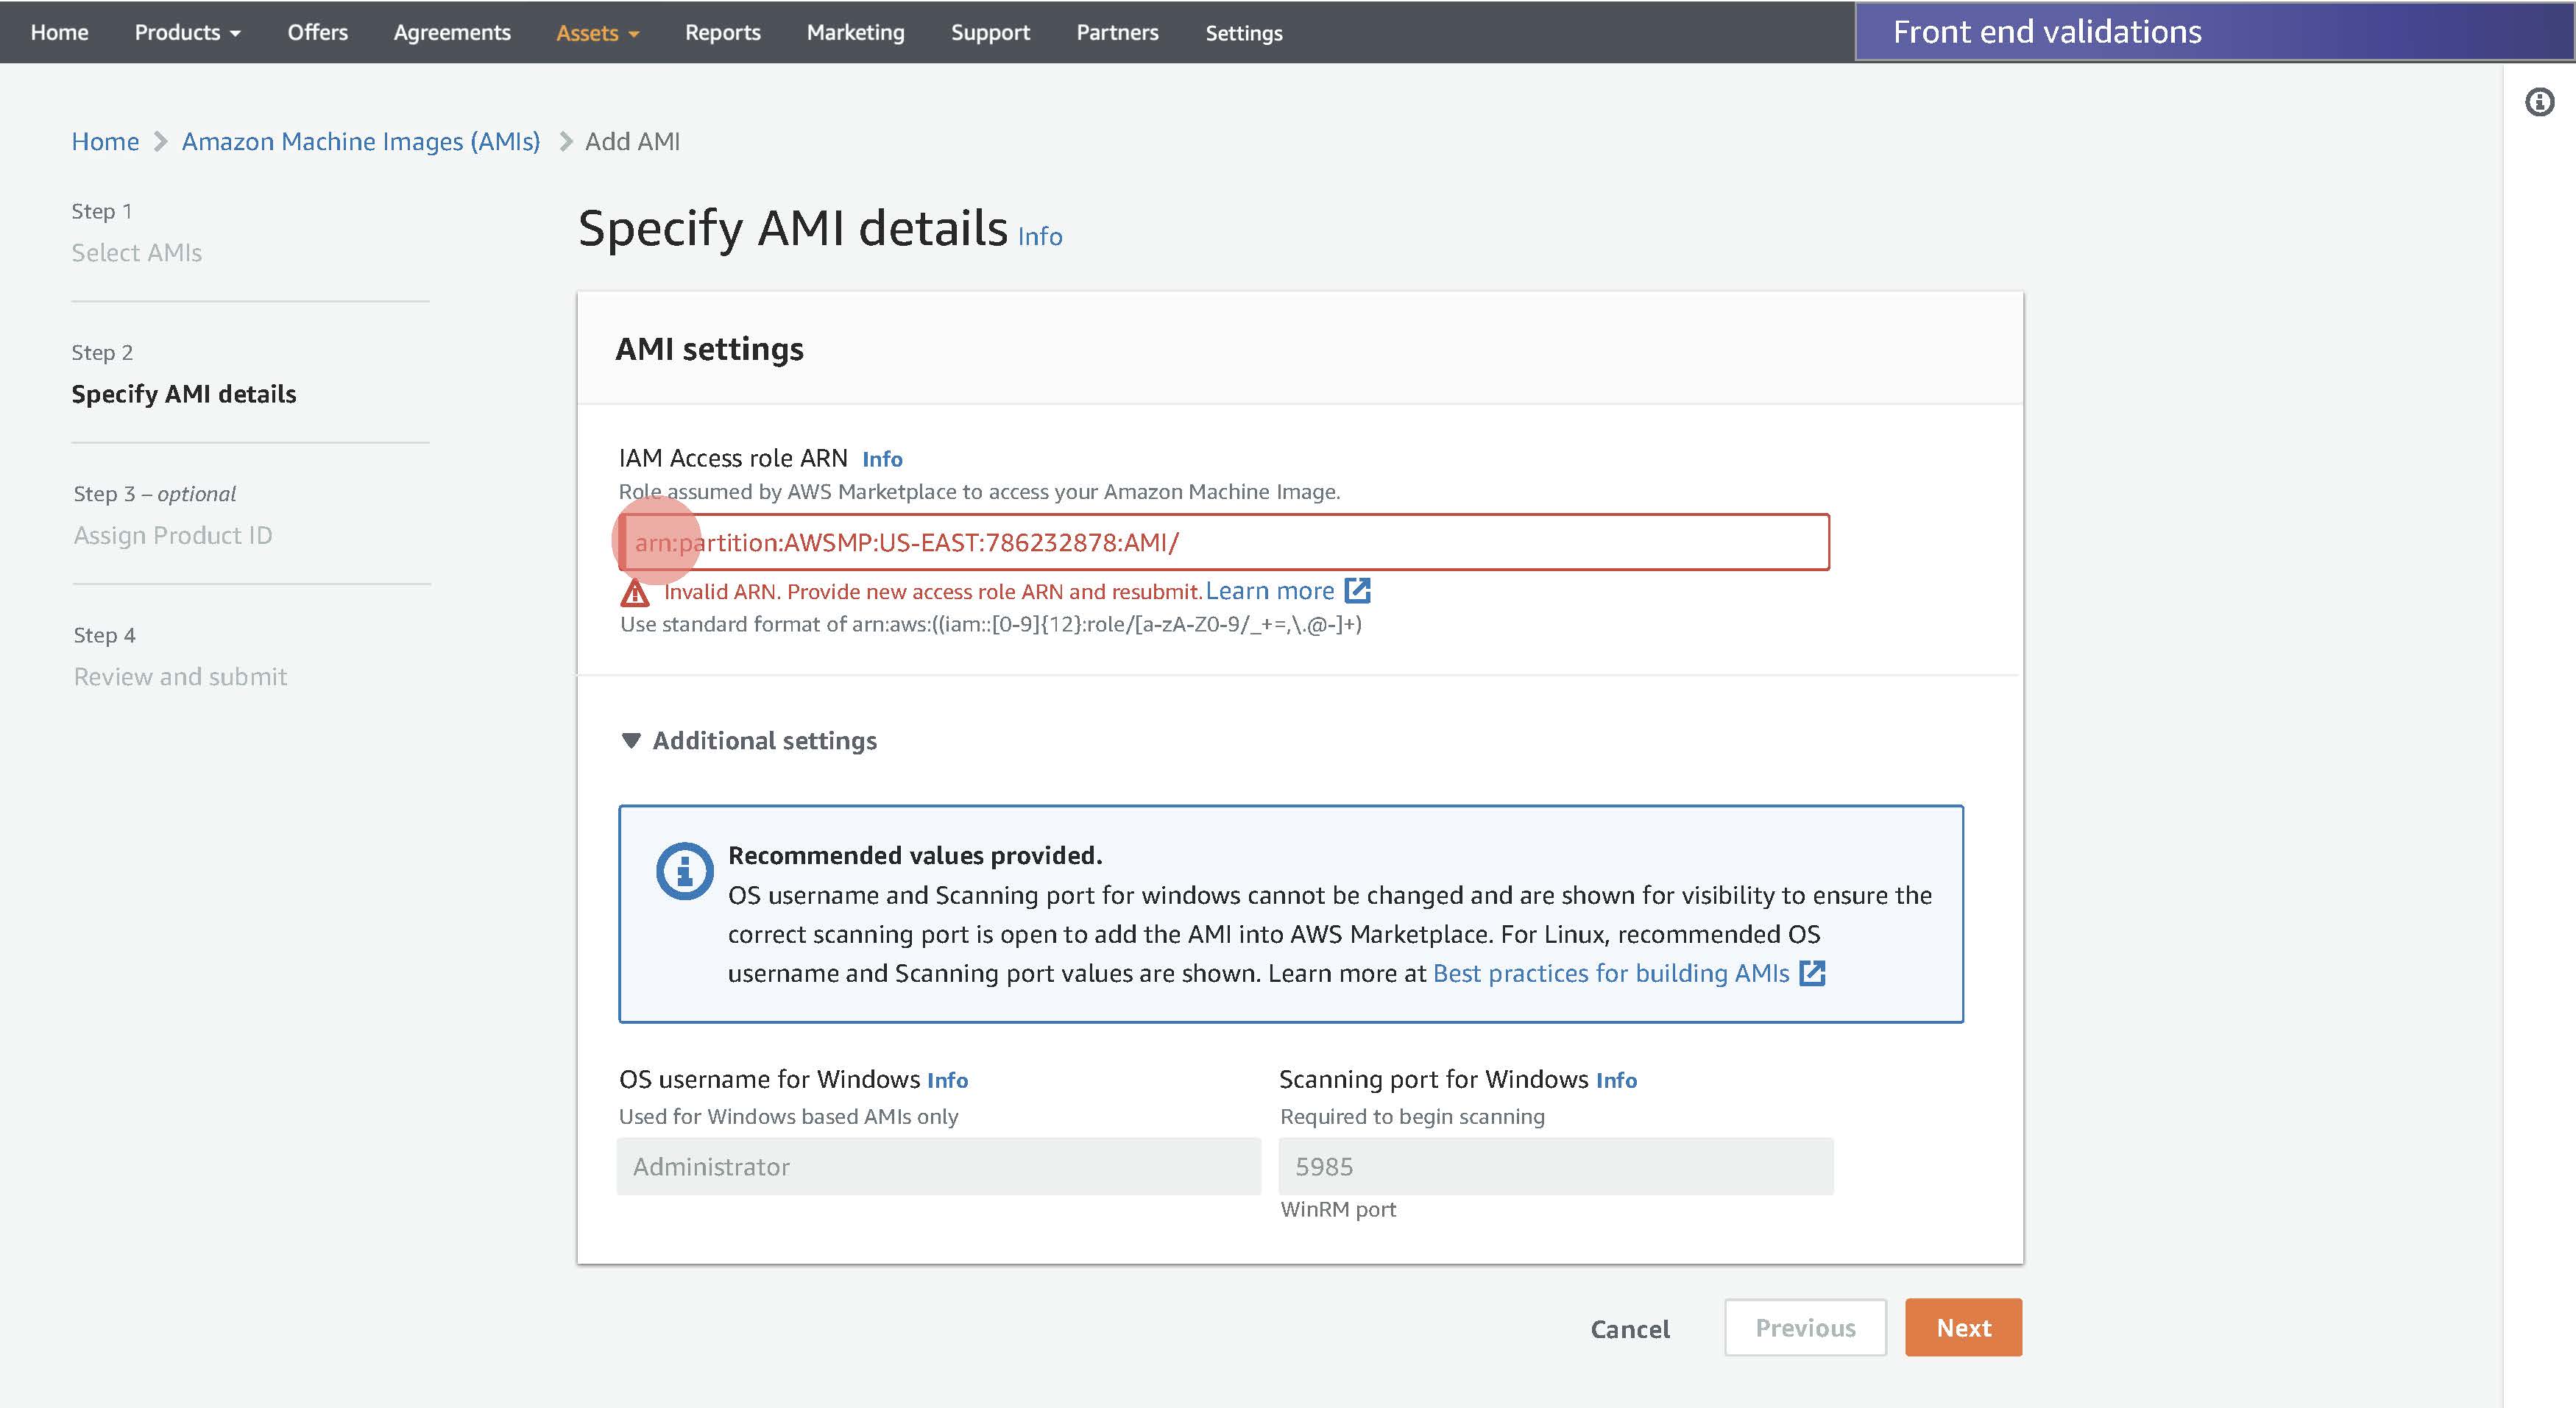
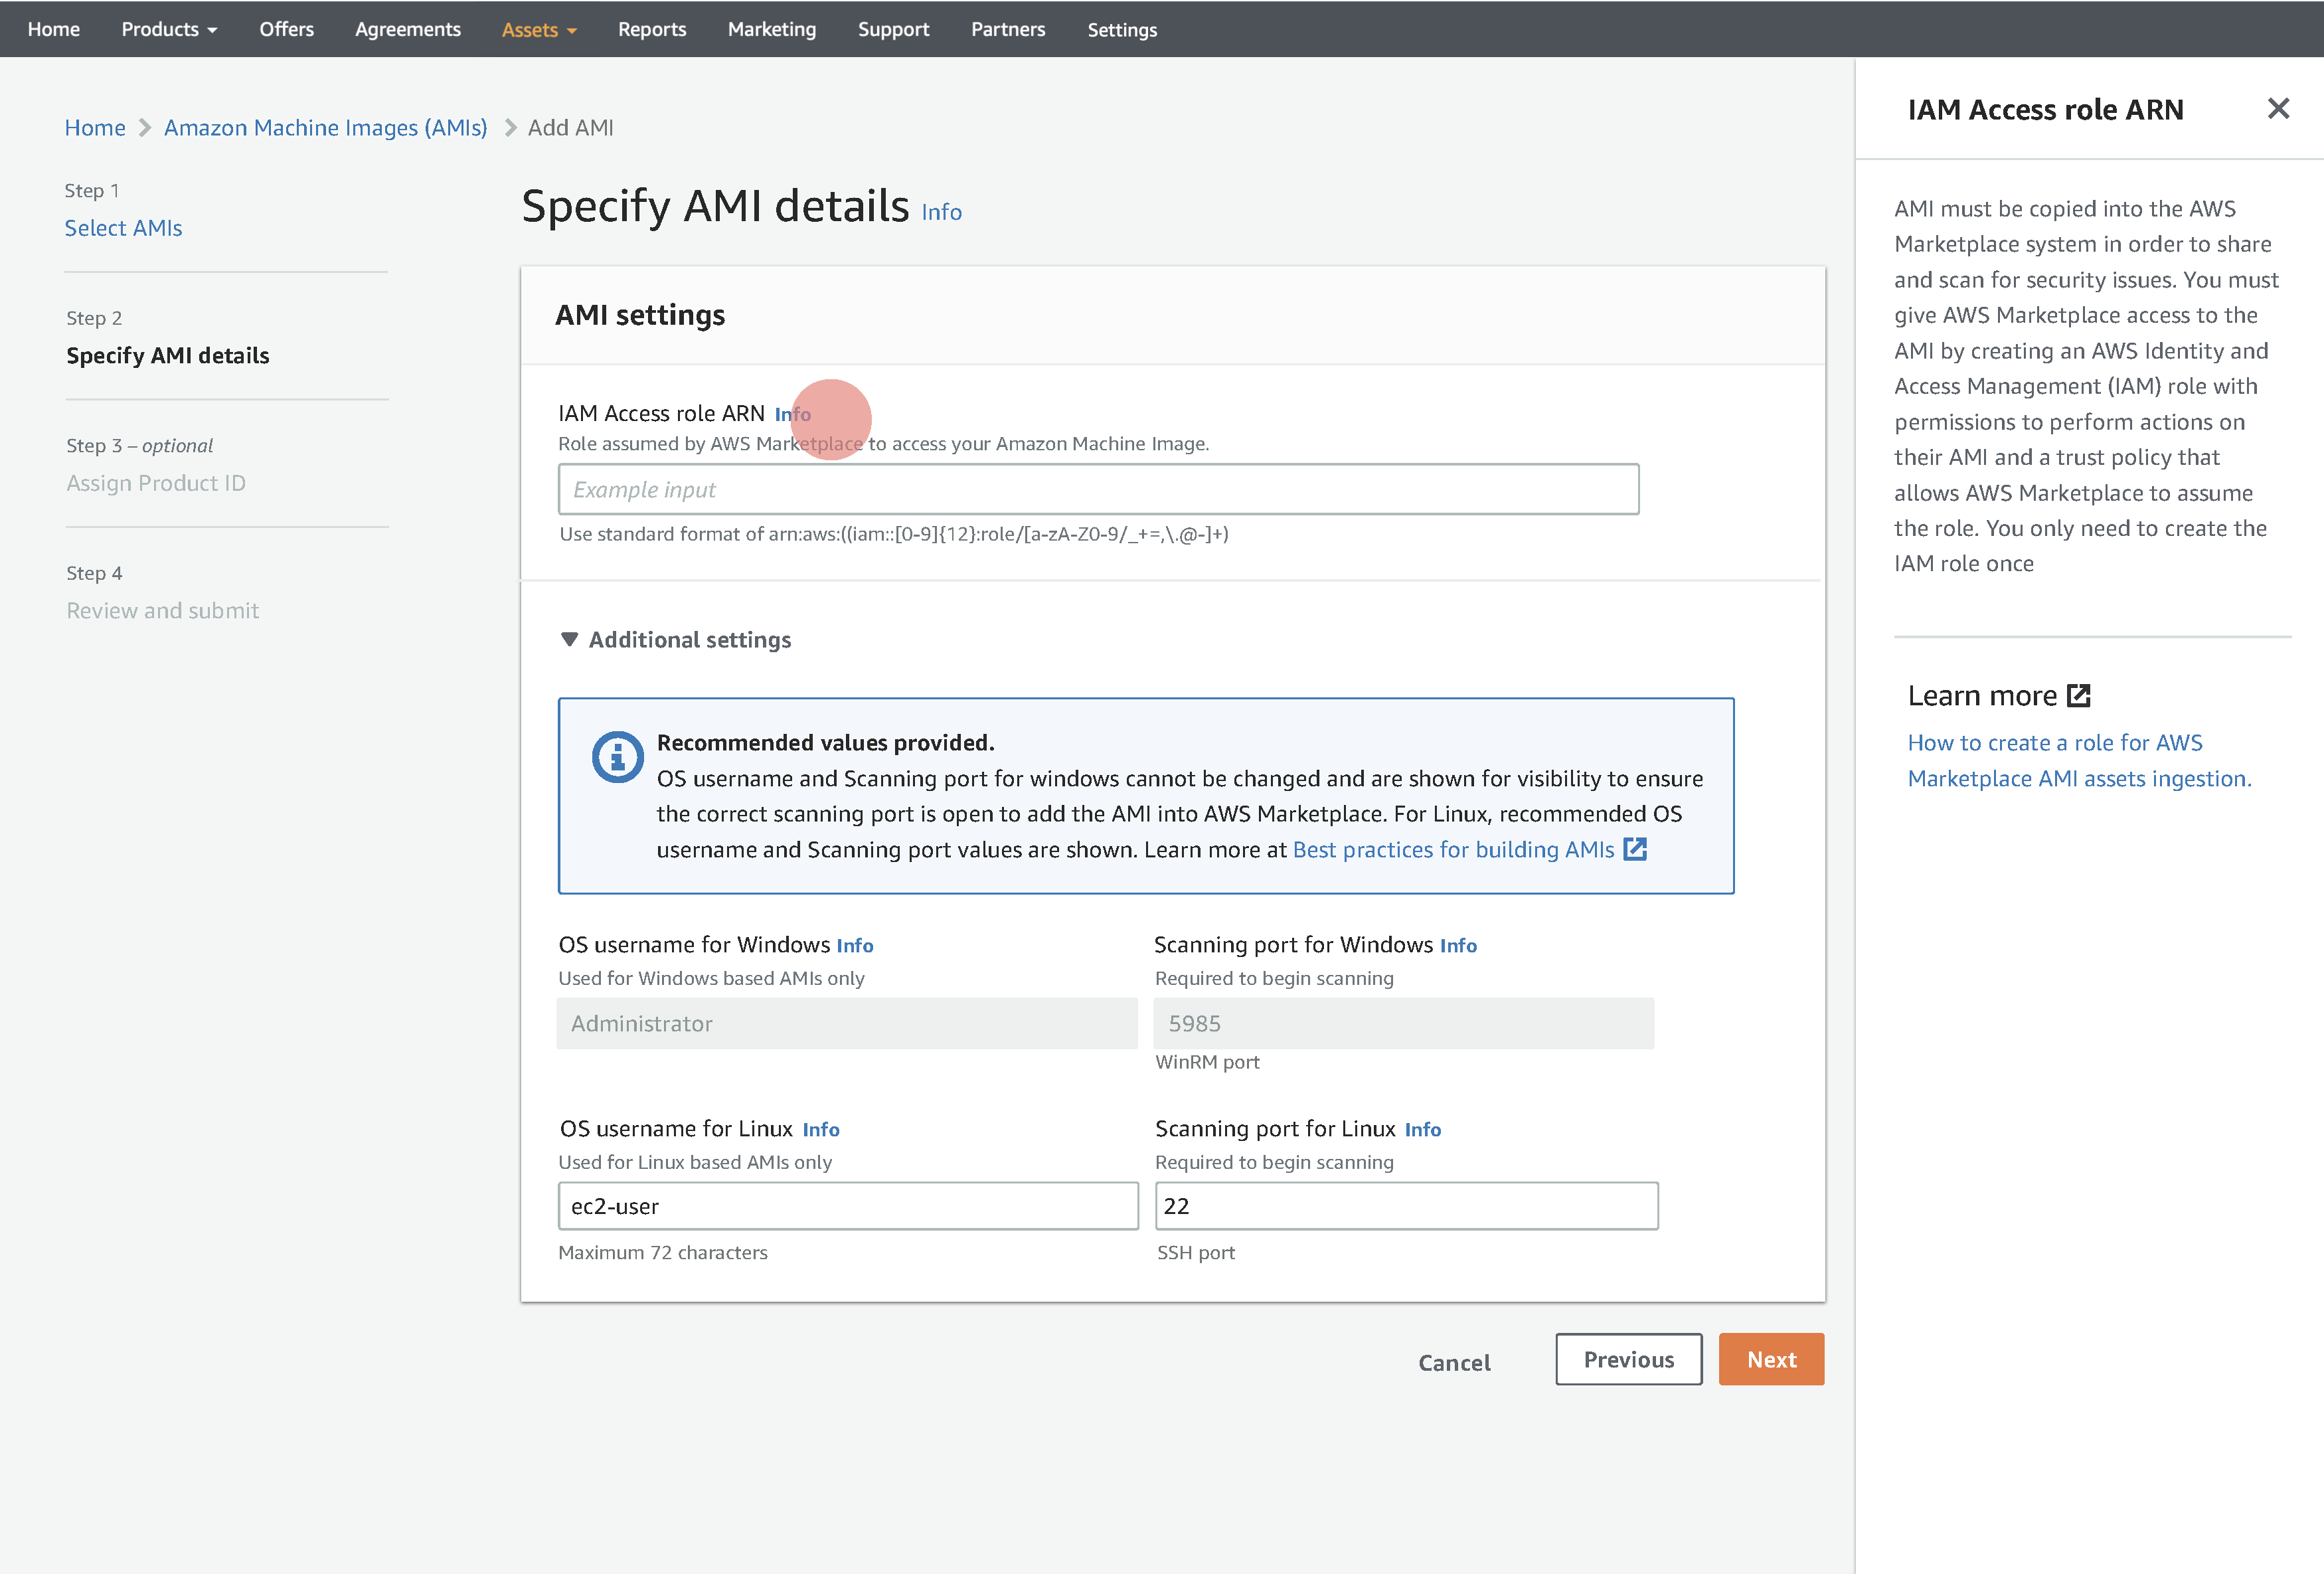
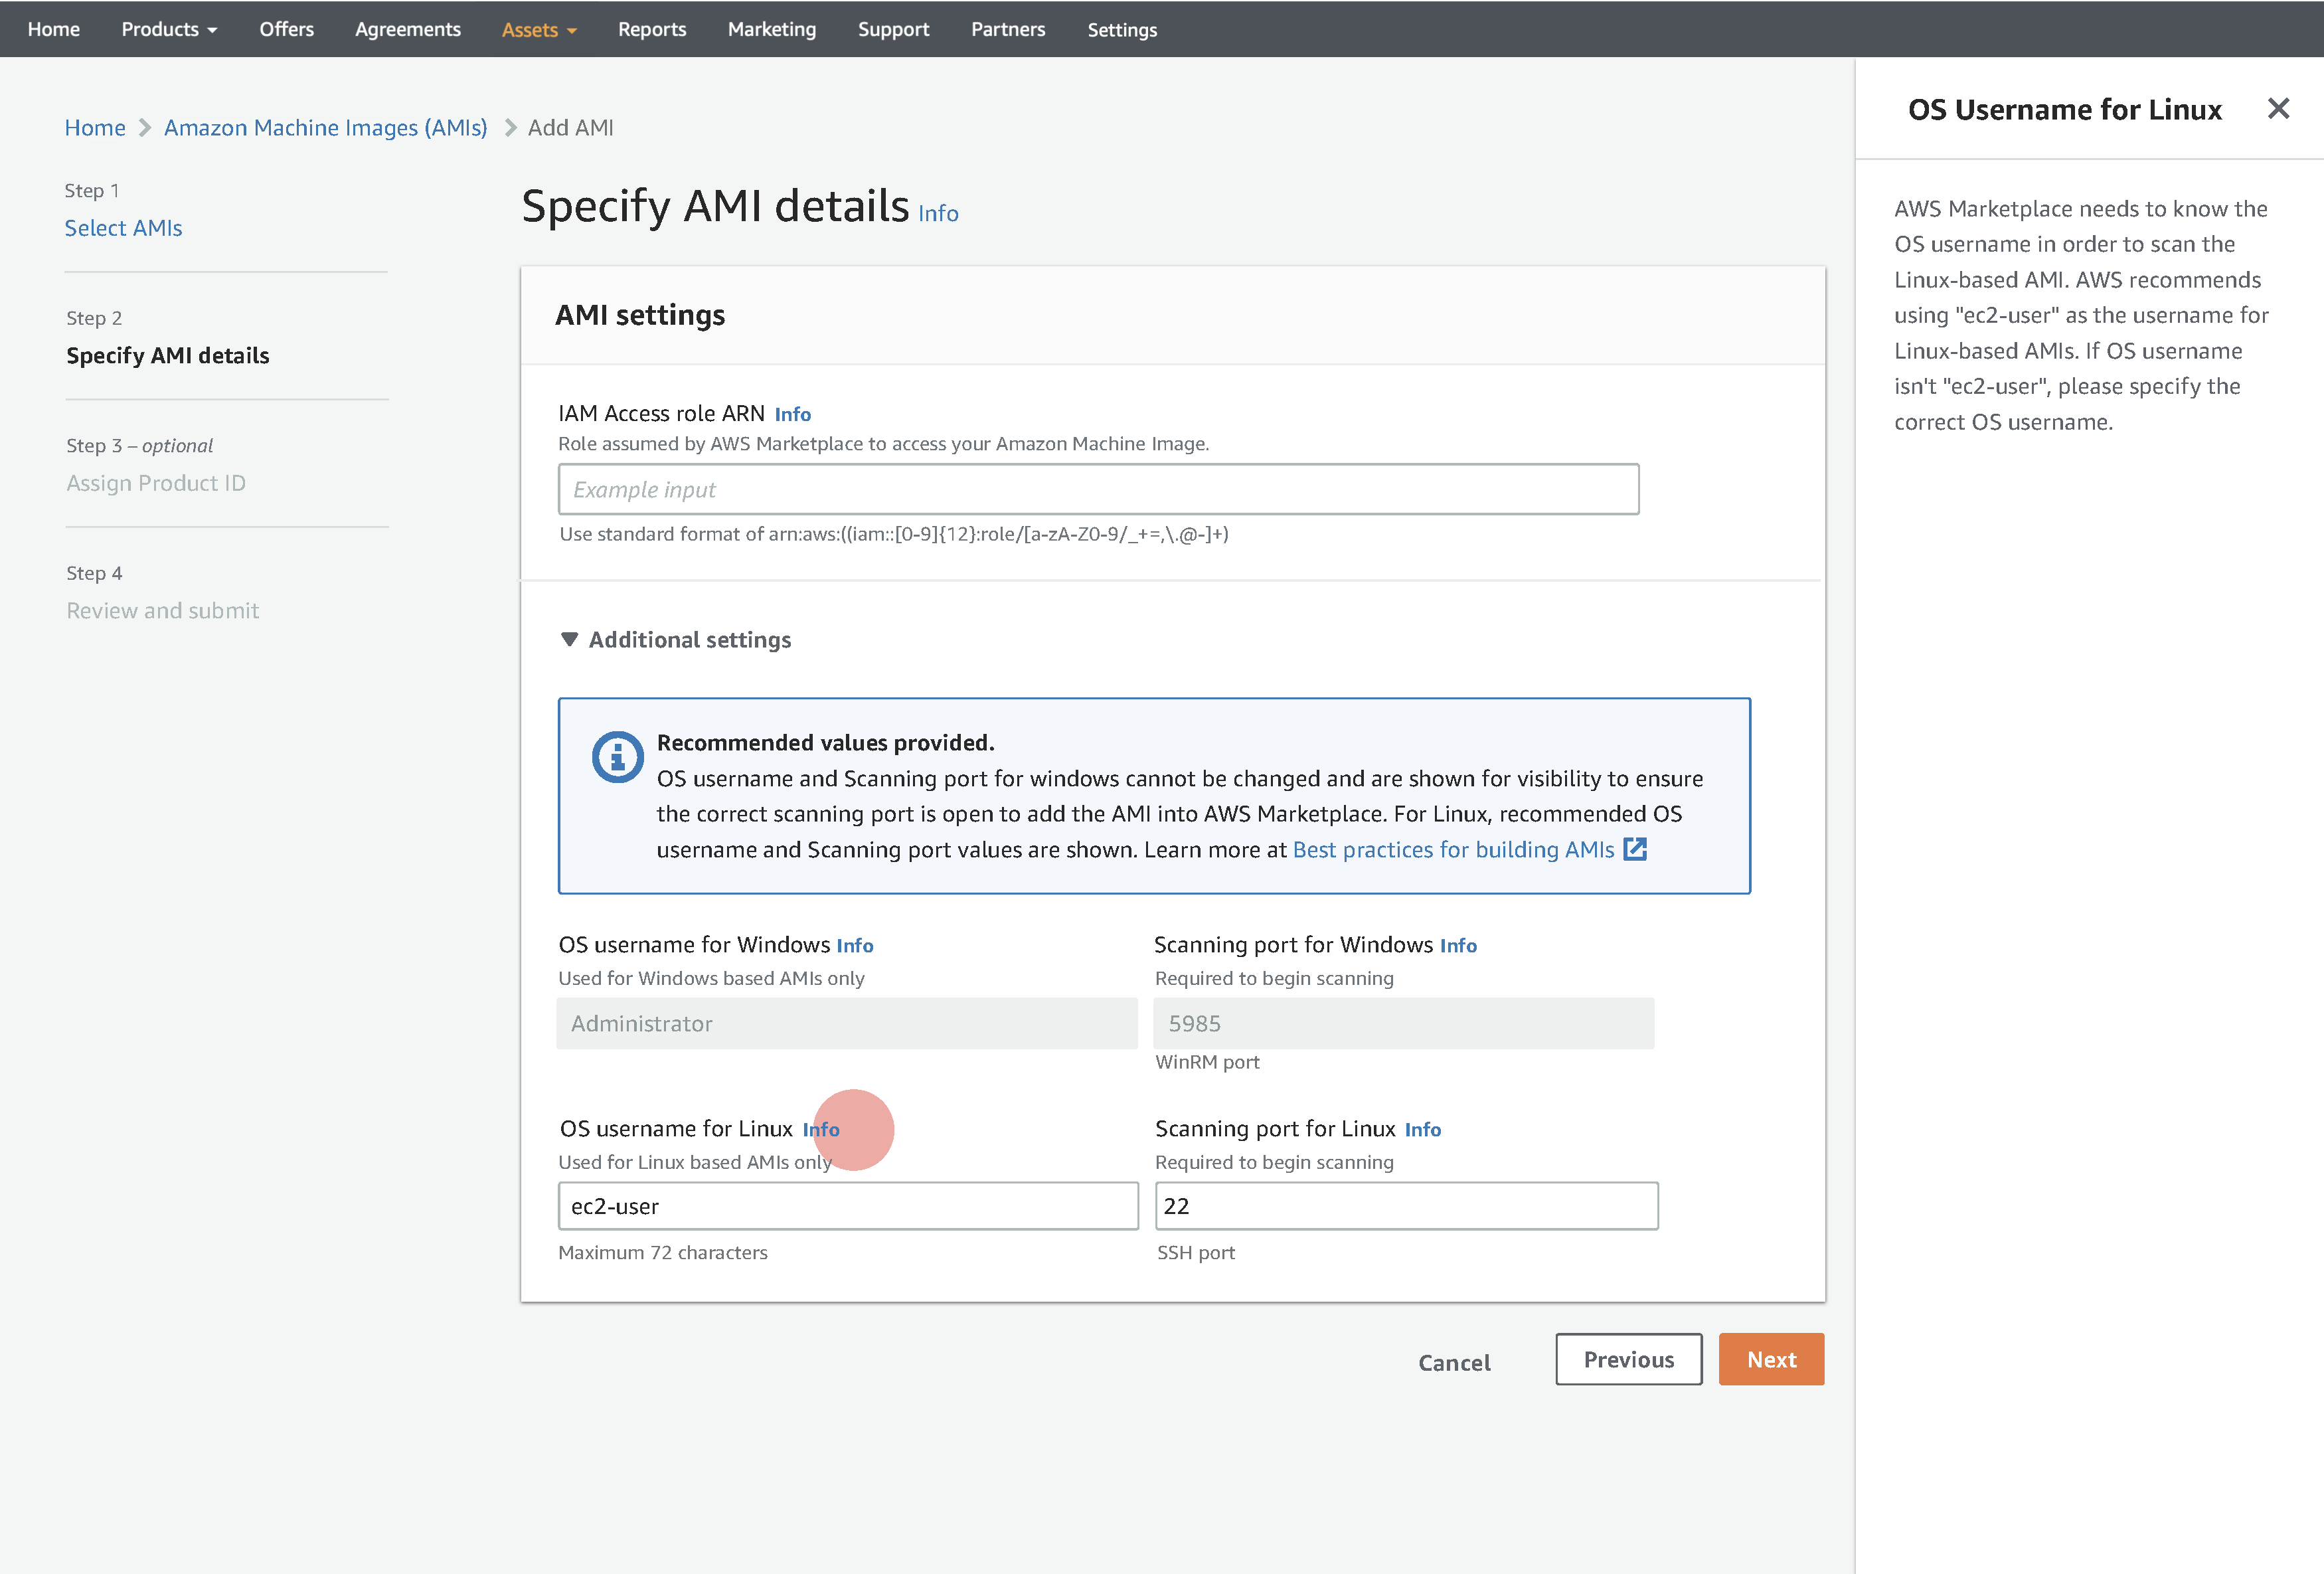
Step 2
Specify AMI details
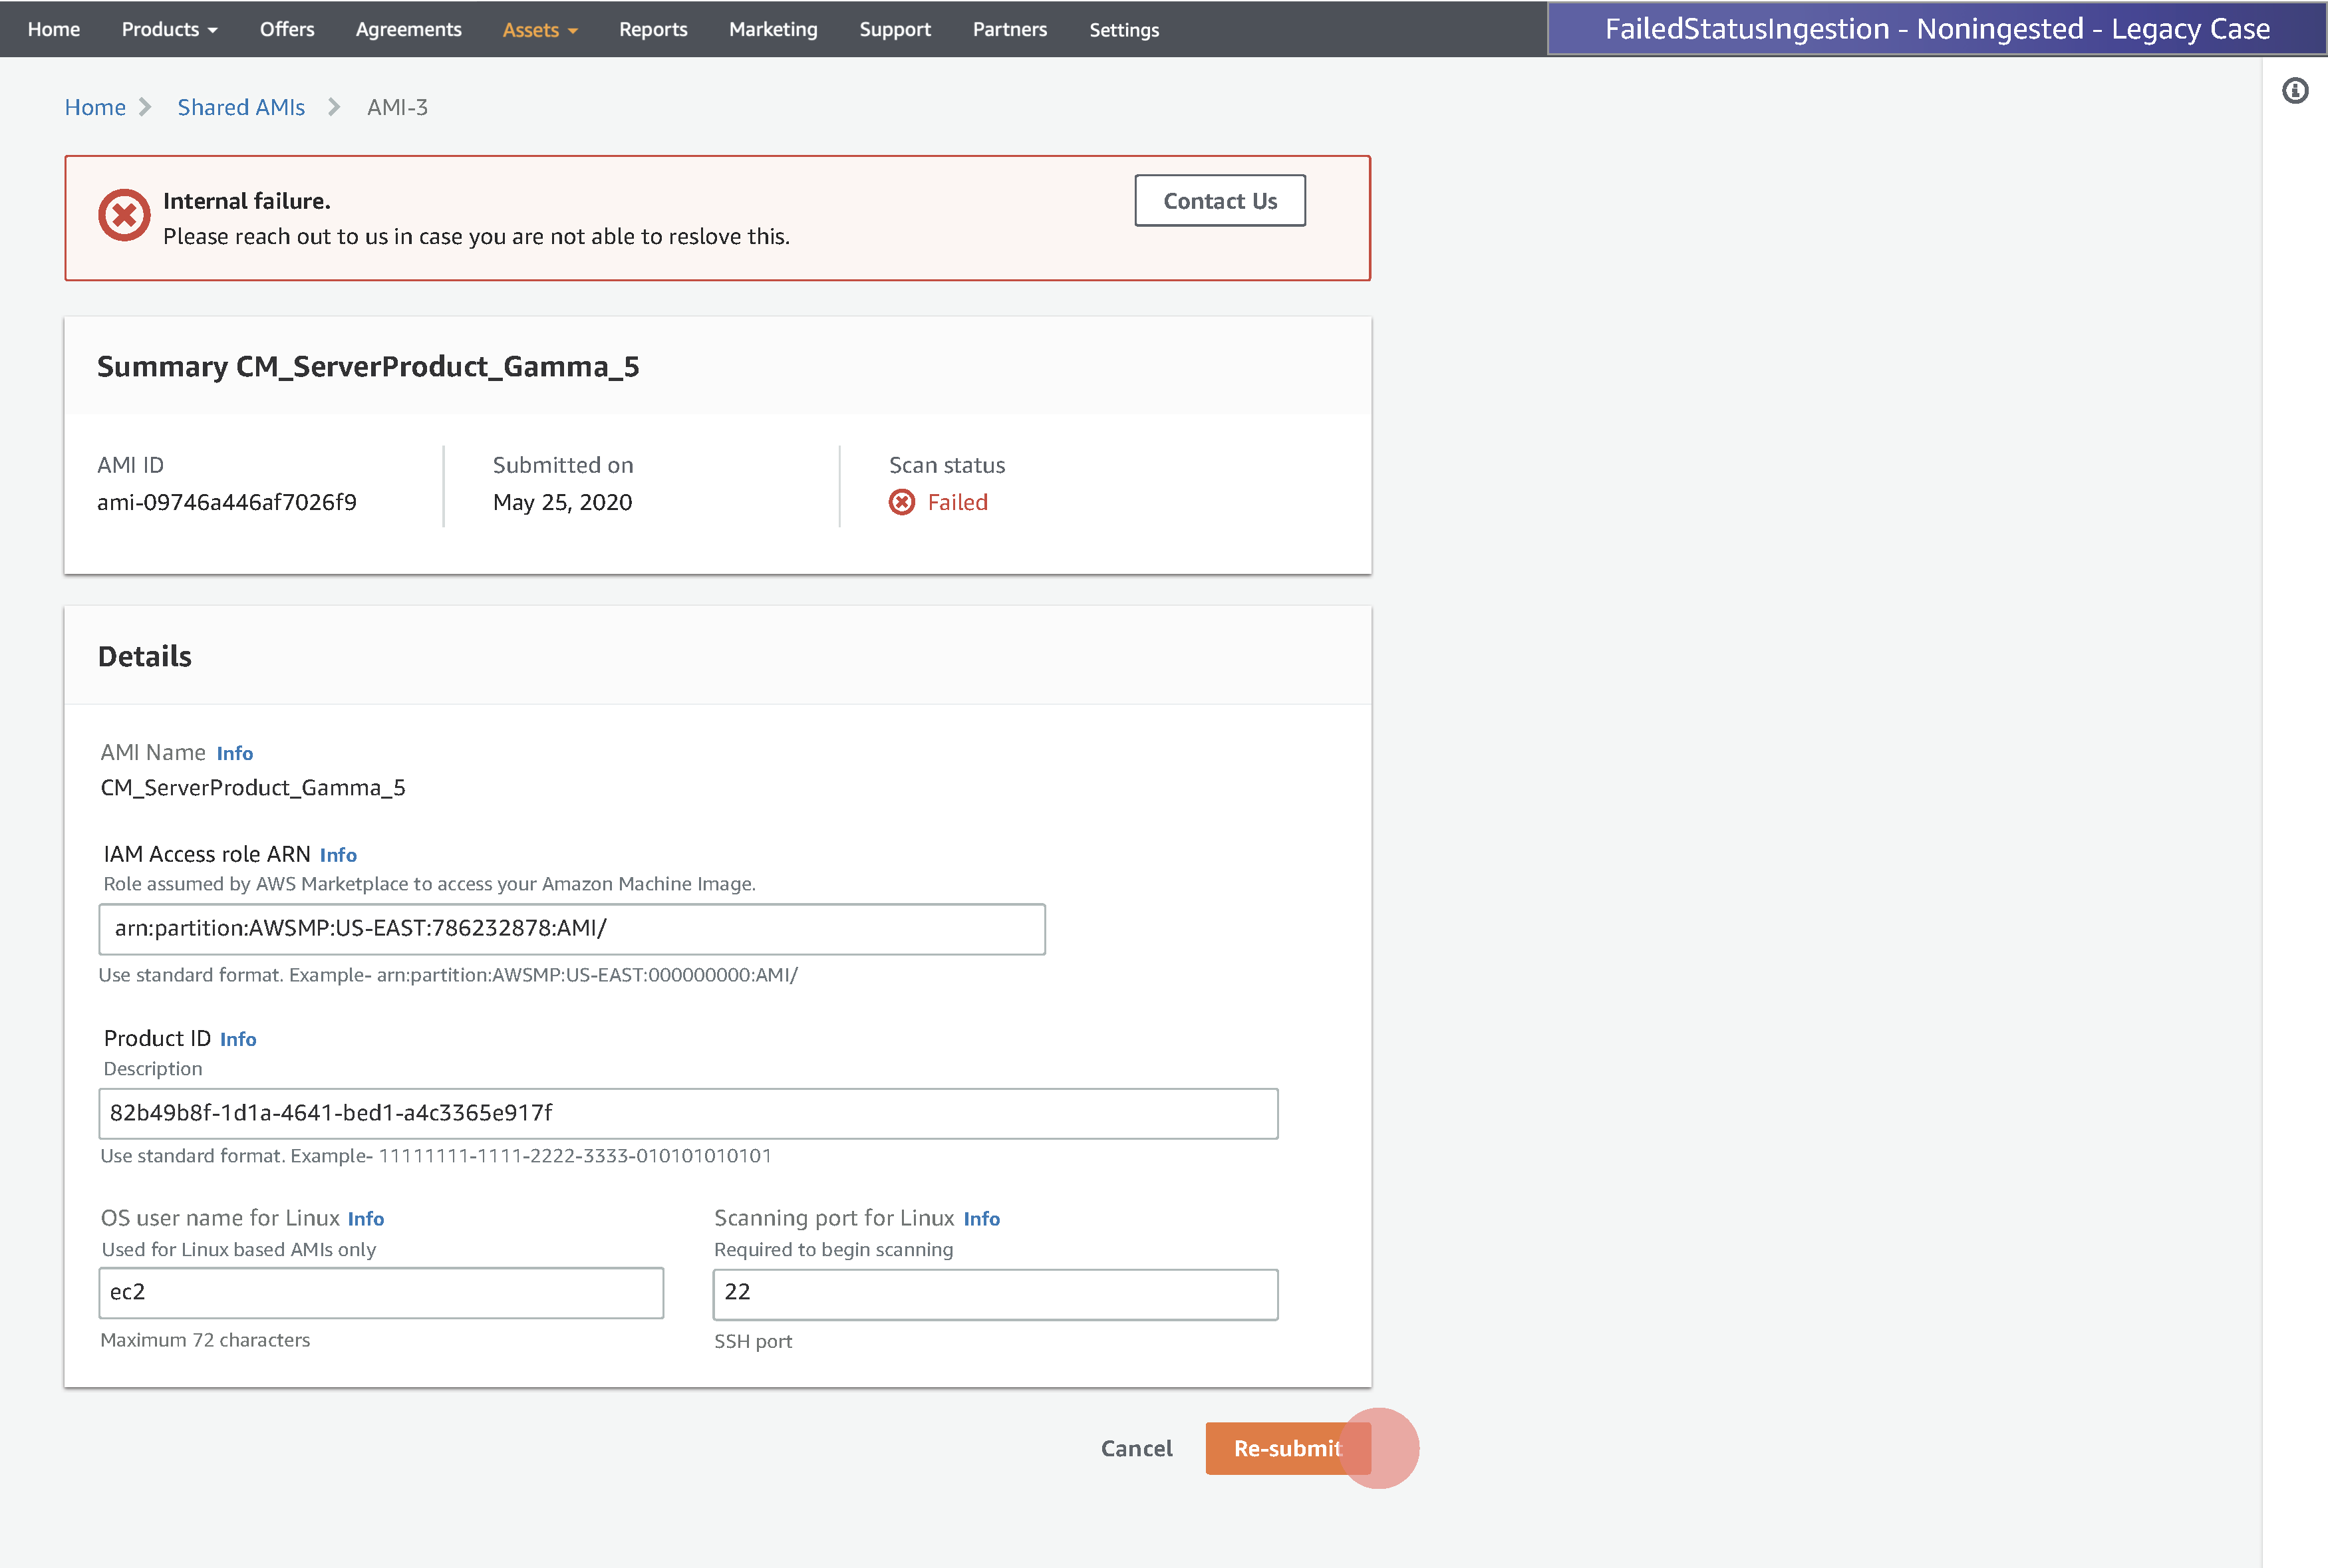
Seller must give Marketplace access to AMI by creating AWS Identity and Access Management (IAM) role with permissions to perform actions on their AMI. Sellers are asked to provie the IAM access role ARN values which assumes role by Marketplace to access AMI.
Additional settings
For linux base AMIs Marketplace need to know the scanning port as well as OS username in order to log in and scan AMI. It can take the default port number and OS username as mentioned.
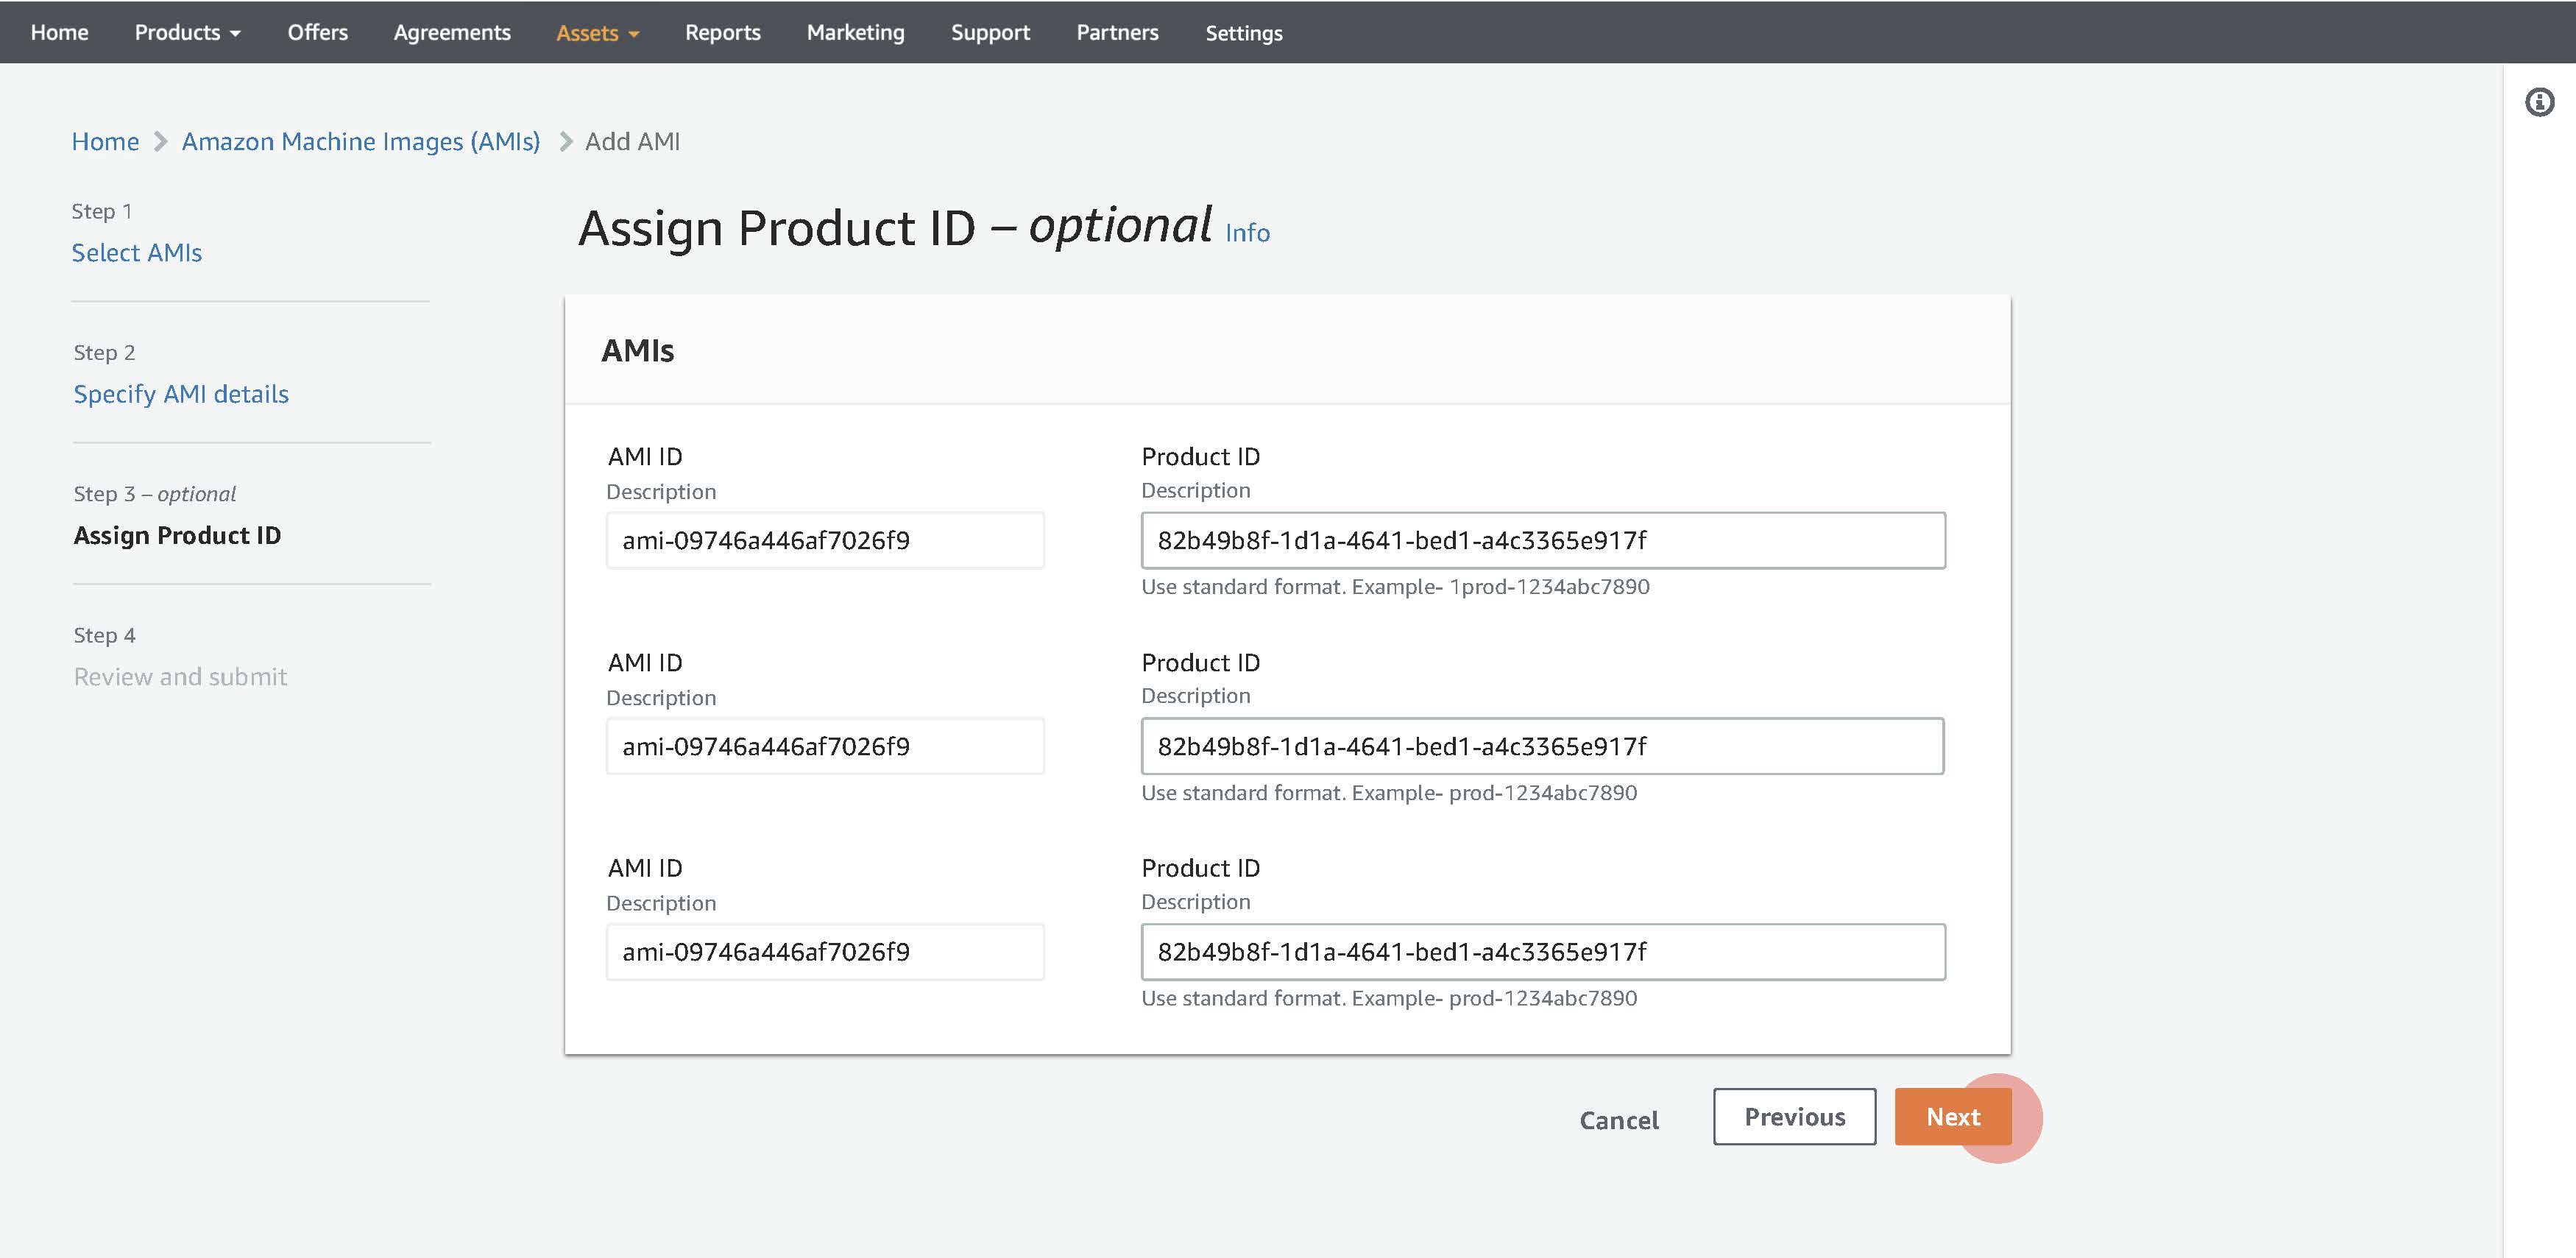
Step 3
Assign Product ID
If the seller product has been granted some exceptions for specific issue, then providing the ID filters them from the scanning result.
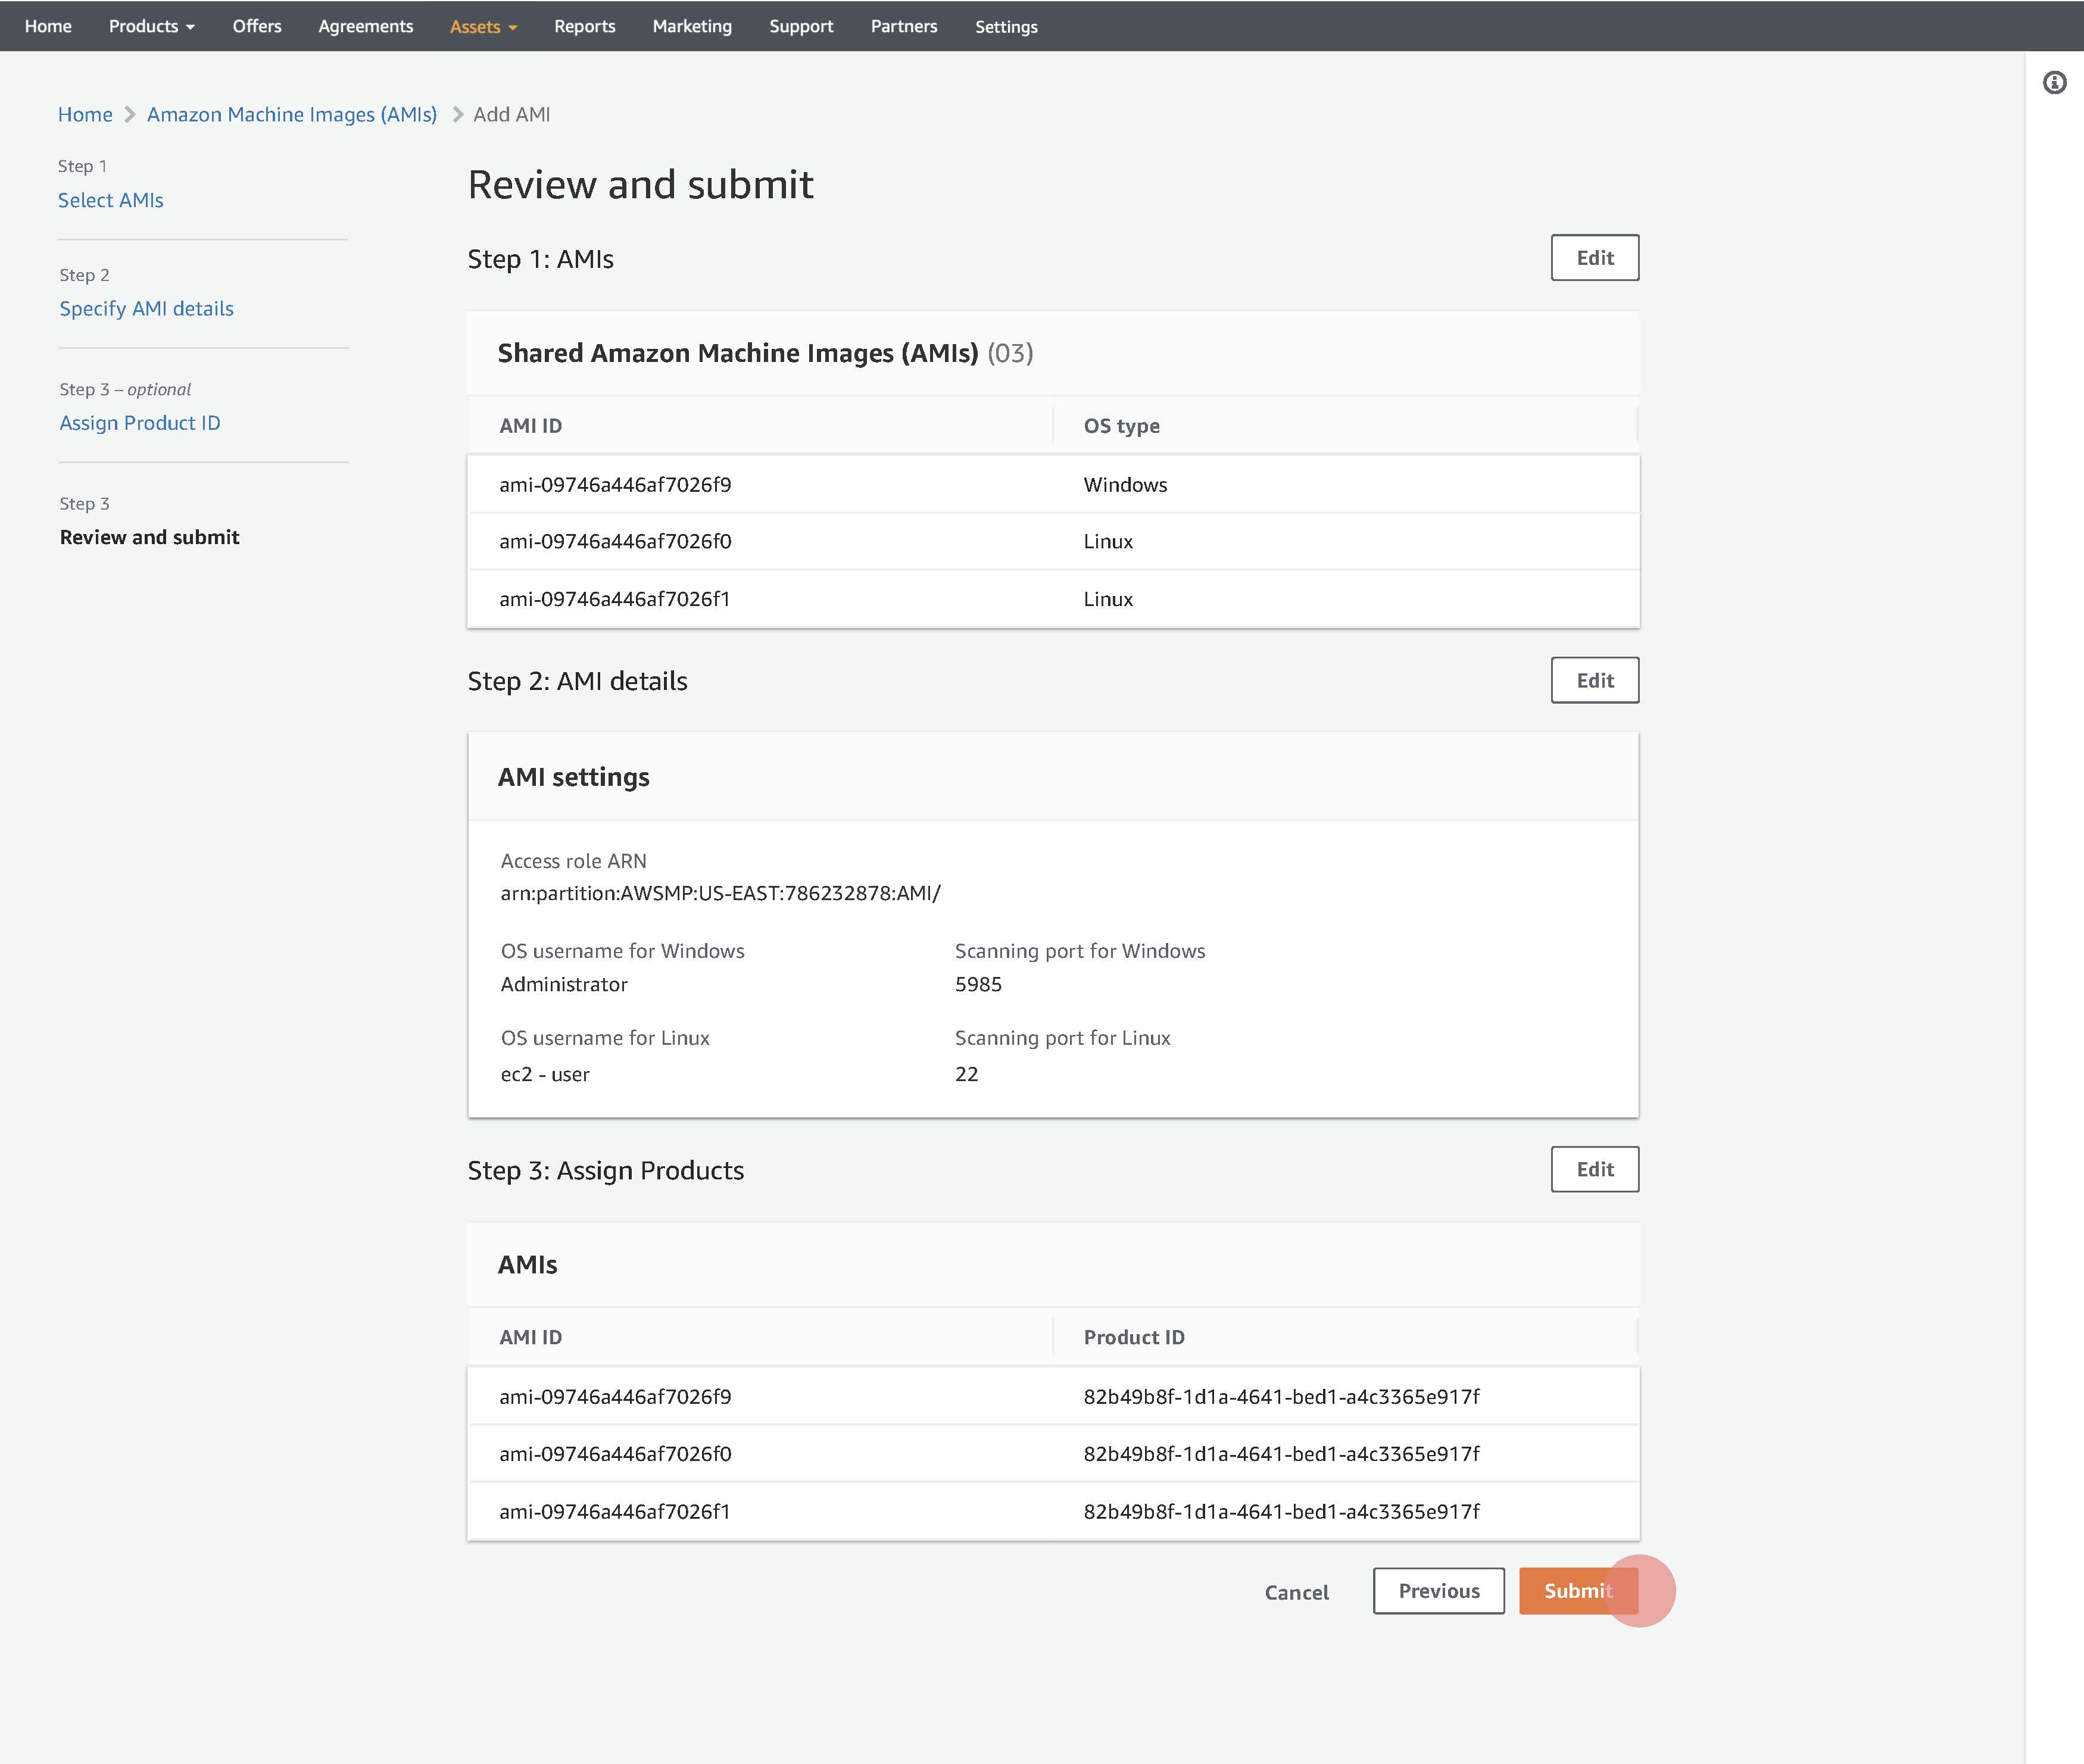
Step 4
Review and submit
Sellers can review the information provided and submit.
Submit success
Sellers can view the number of AMIs submitted and their statuses as scanning.